Halloween Cookie Platter Tutorial: Poison Apple & Ghost Cupcake Cookies
Create a spooky-sweet Halloween cookie platter featuring poisoned caramel apples, ghost cupcakes, and a “Trick or Treat” centerpiece.
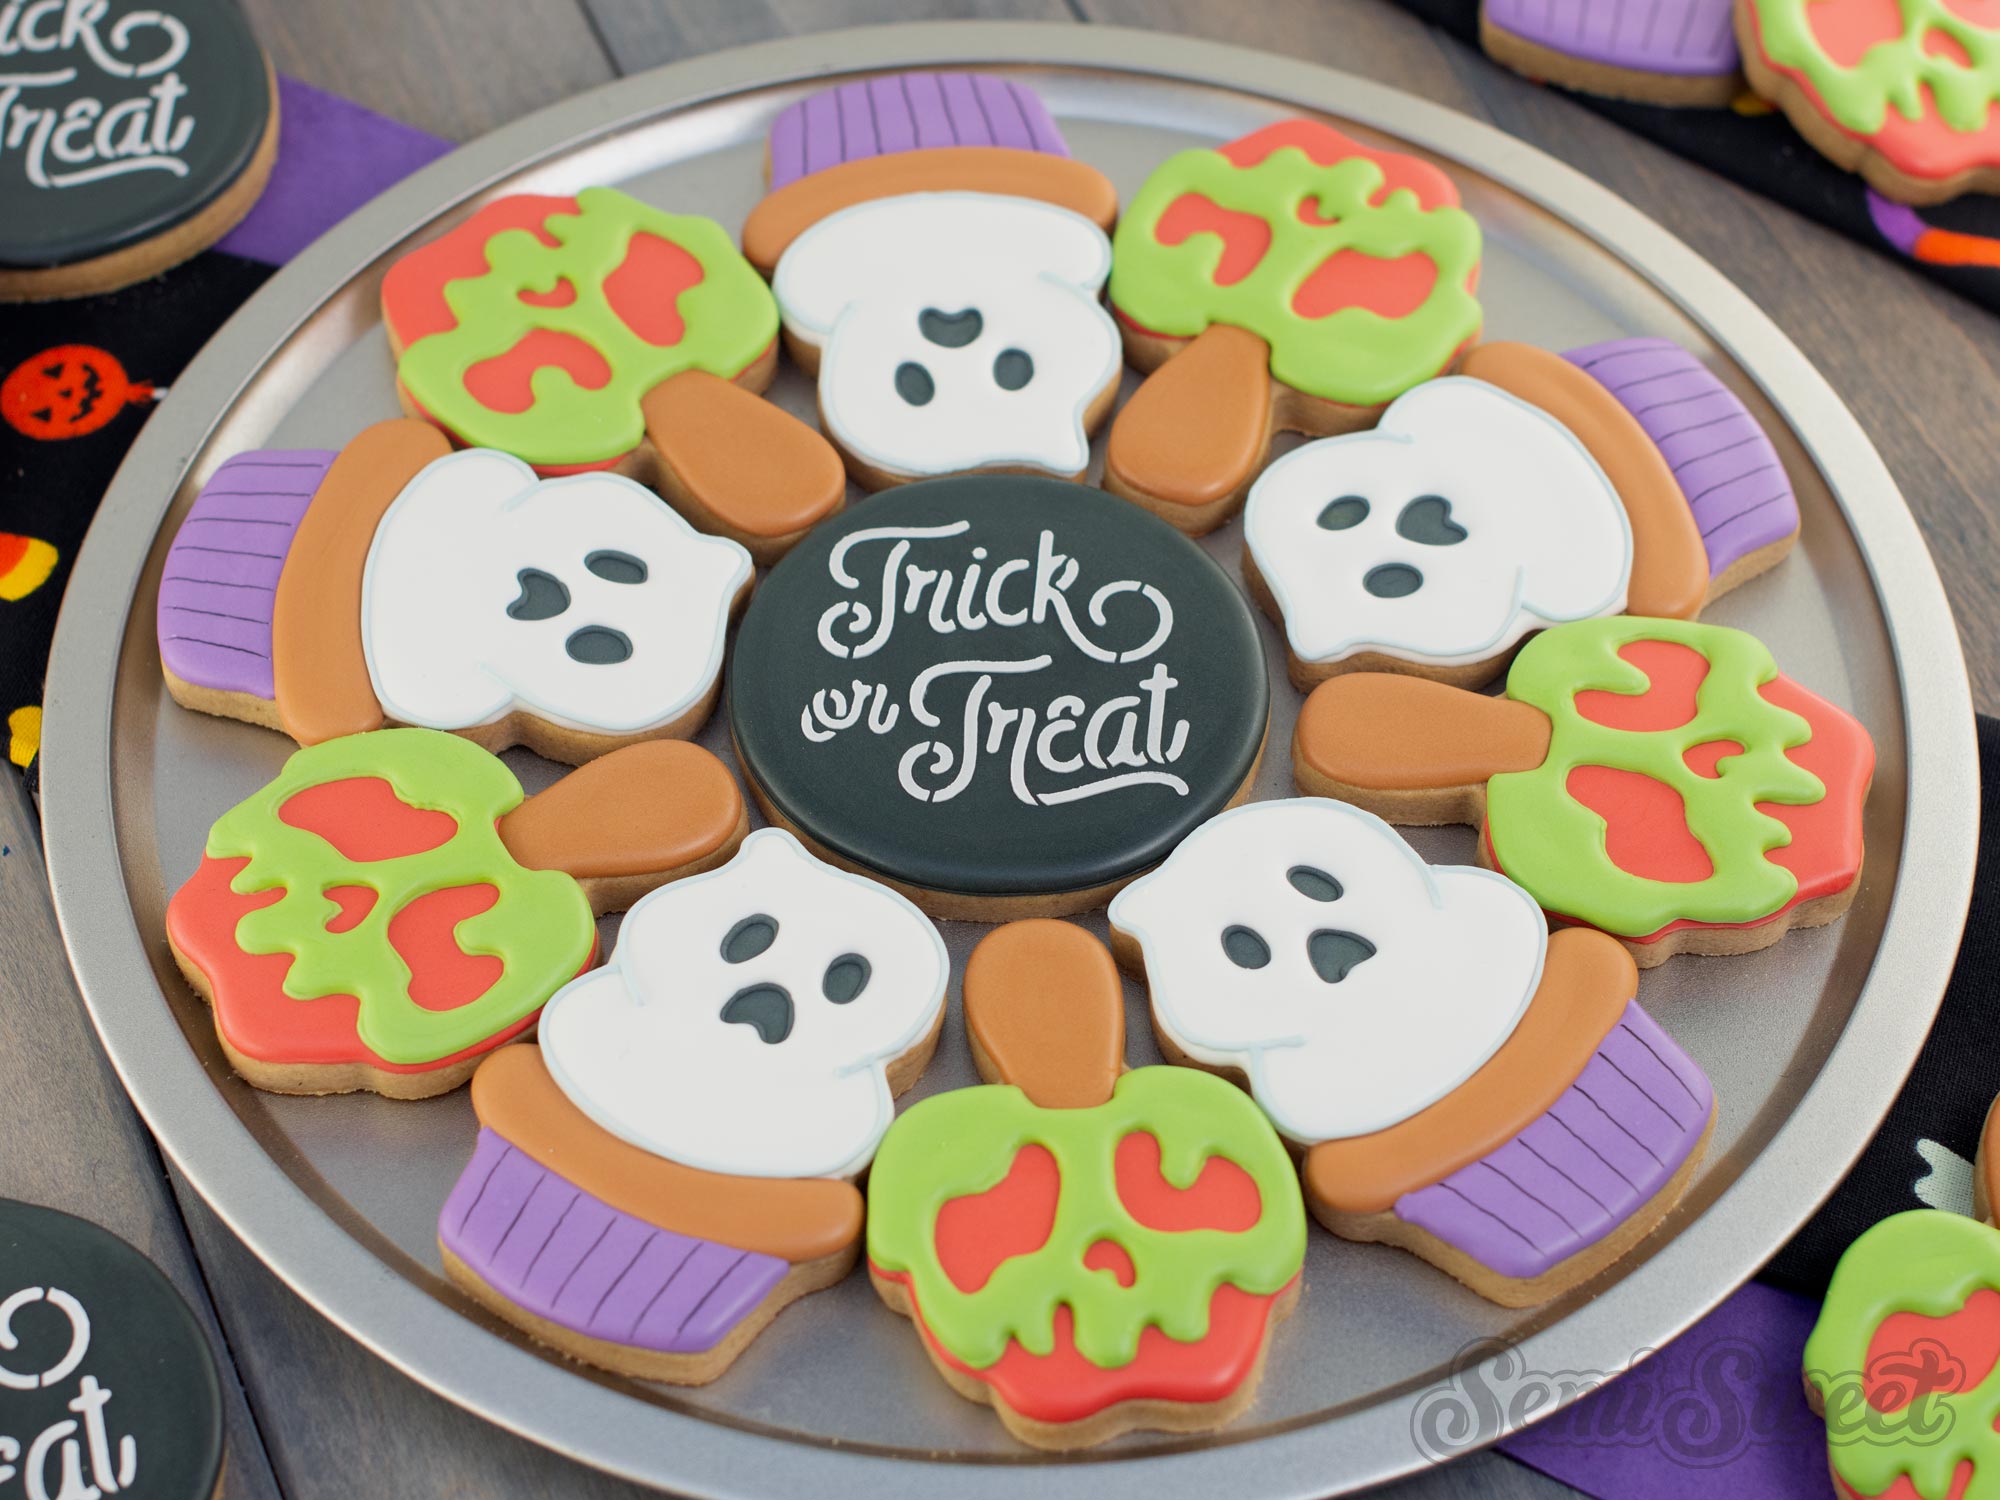
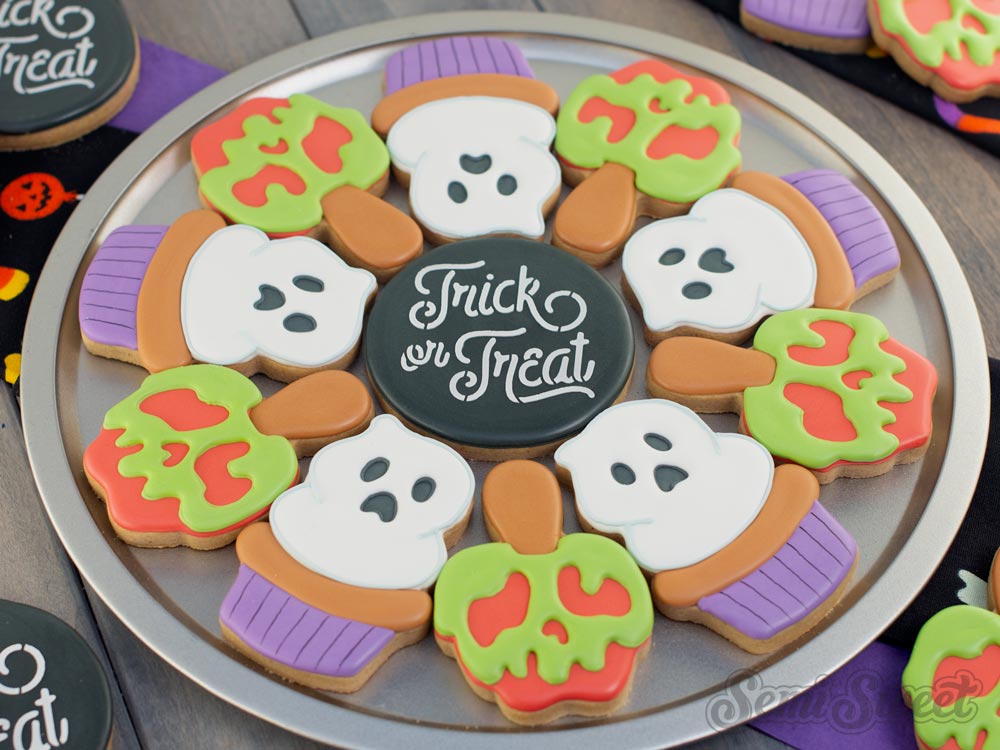
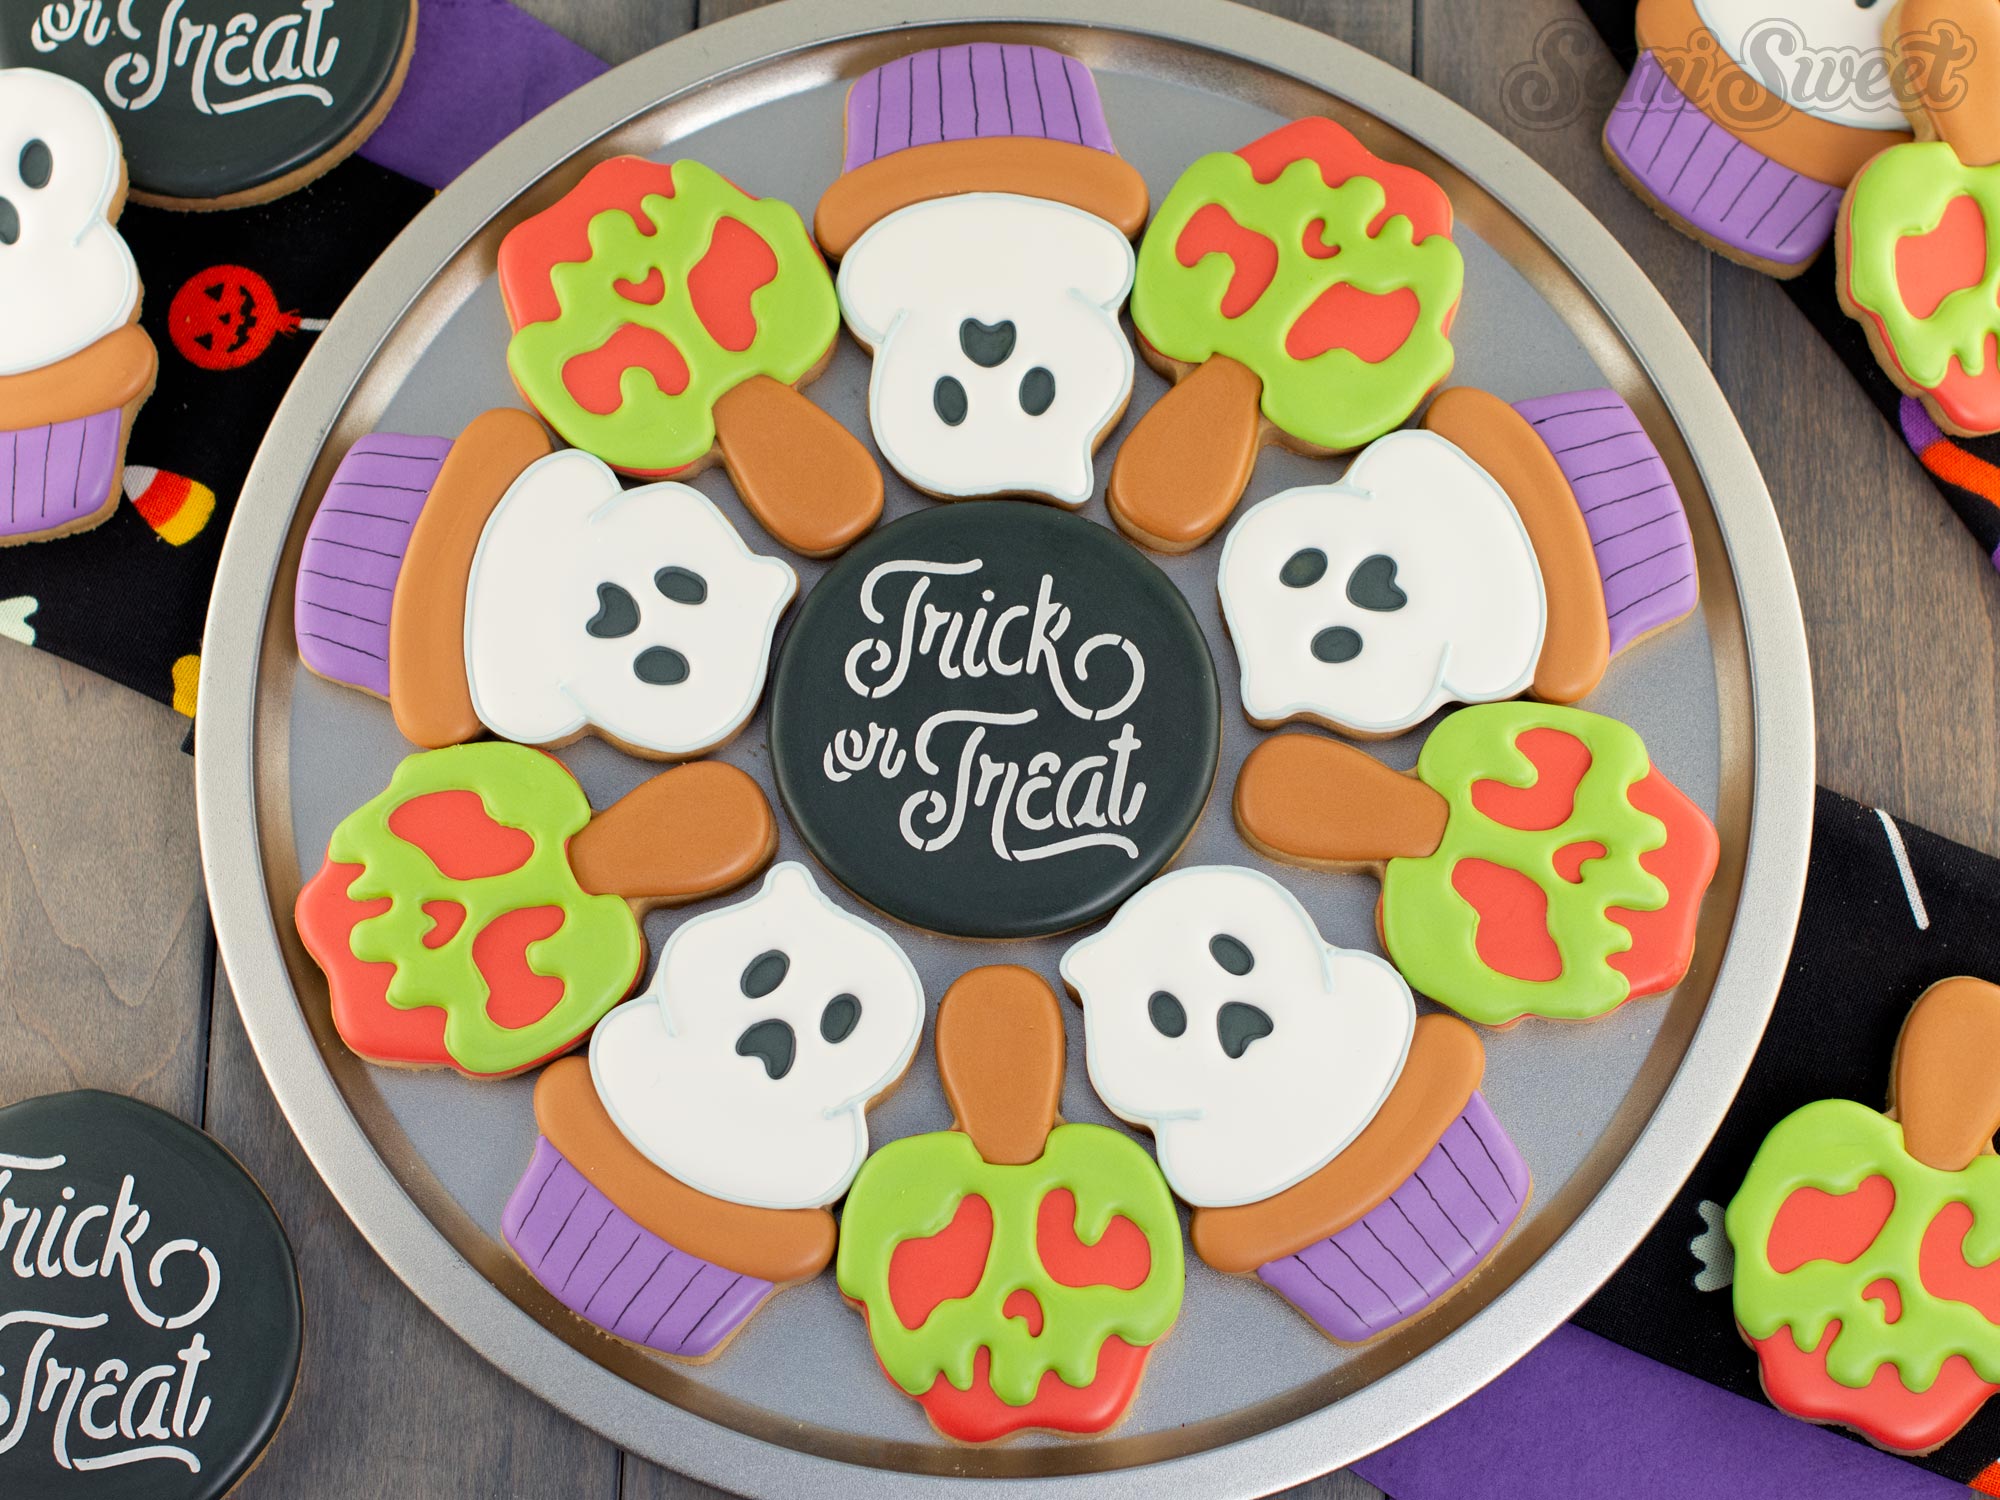
Looking for a fun Halloween cookie idea that makes a big impact? This Halloween cookie platter combines two spooky-sweet designs, a poisoned caramel apple and a ghost cupcake, arranged around a center “Trick or Treat” cookie. The repeating cookies make the finished platter look impressive and coordinated, while keeping the decorating process simple enough to recreate at home.
We have the coordinating cookie cutter set available in our shop, along with a “Trick or Treat” cookie stencil that makes adding the lettering to the center cookie quick and easy. Follow along below to see how to decorate each cookie with royal icing and assemble the complete Halloween platter.
My Essential Cookie Tools for Cookie Decorating


My Essential Cookie Tools for Baking Cookies


My Essential Baking Tools for Royal Icing


Essential Decorating Tools for Royal Icing

Halloween Treats Platter Cookie Cutter Set
This Halloween Treats Platter cookie cutter set includes a poisoned apple cookie cutter, a ghost cupcake cookie cutter, and a center circle cutter. You can purchase cookie cutters together as a 3-piece set, or as a 2-piece cutter set without the center circle.
(This is the same circle cutter used in all my platter sets, like this acorn and leaves cookie platter, overlapping pumpkin cookie platter, and this pumpkin pie cookie platter, etc.)
There are two sizes available. When arranged as a platter, as shown in the example picture, the platter measures:
LARGE- 12 inches in diameter.
SMALL- 9 inches in diameter.
For this tutorial, I'll be decorating the large size.
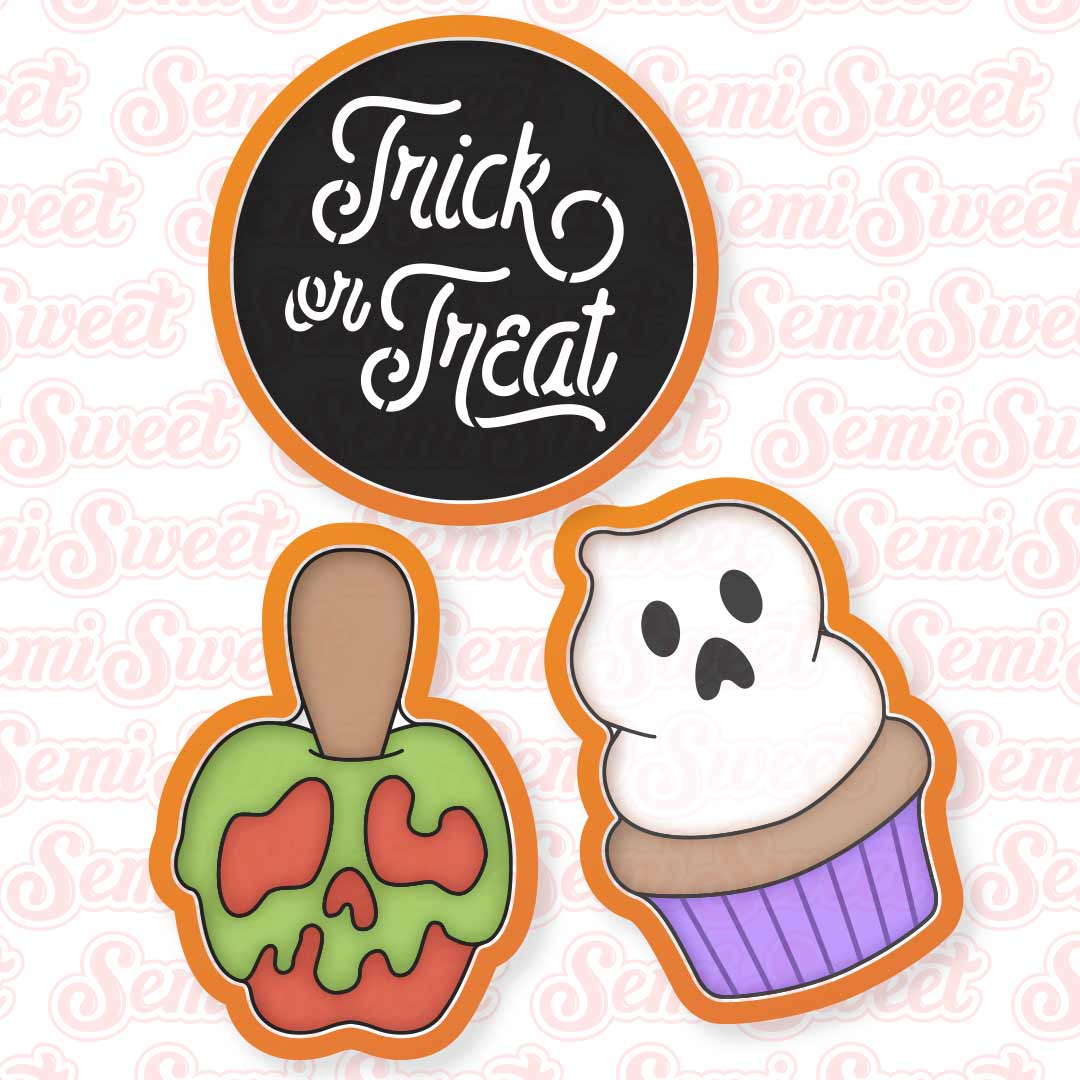
Template for the Halloween Treats Cookie Platter
To help with the decorating process, I made a PDF template of all the designs for this Halloween cookie platter.
Click the link below for the downloadable template PDF file.
This file is rather large in data size. Just a warning, it might take a moment before the file opens in your browser.
If you have a Kopykake or Pico projector, just print it out (or pull it up on your mobile device) and you are good to go. For those without a projector, follow the suggested steps below by tracing the design onto the cookie with an edible food marker.
The Cookie Decorating Process
Decorating cookies always starts with a good royal icing recipe. This is my favorite royal icing recipe that I use to decorate sugar cookies.
Royal Icing Colors
For my Halloween cookie platter, I used the following suggested royal icing colors:
- White icing (I used Americolor Bright White.)
- Black icing (I used Americolor Super Black.)
- Purple icing (I used Americolor Regal Purple.)
- Red icing (I used Americolor Super Red.)
- Green icing (I mixed Americolor Mint Green with Egg Yellow.)
- Tan icing (I mixed Americolor Warm Brown and Americolor Electric Green.)
How to Decorate the Poisoned Caramel Apple Cookie
Step 1
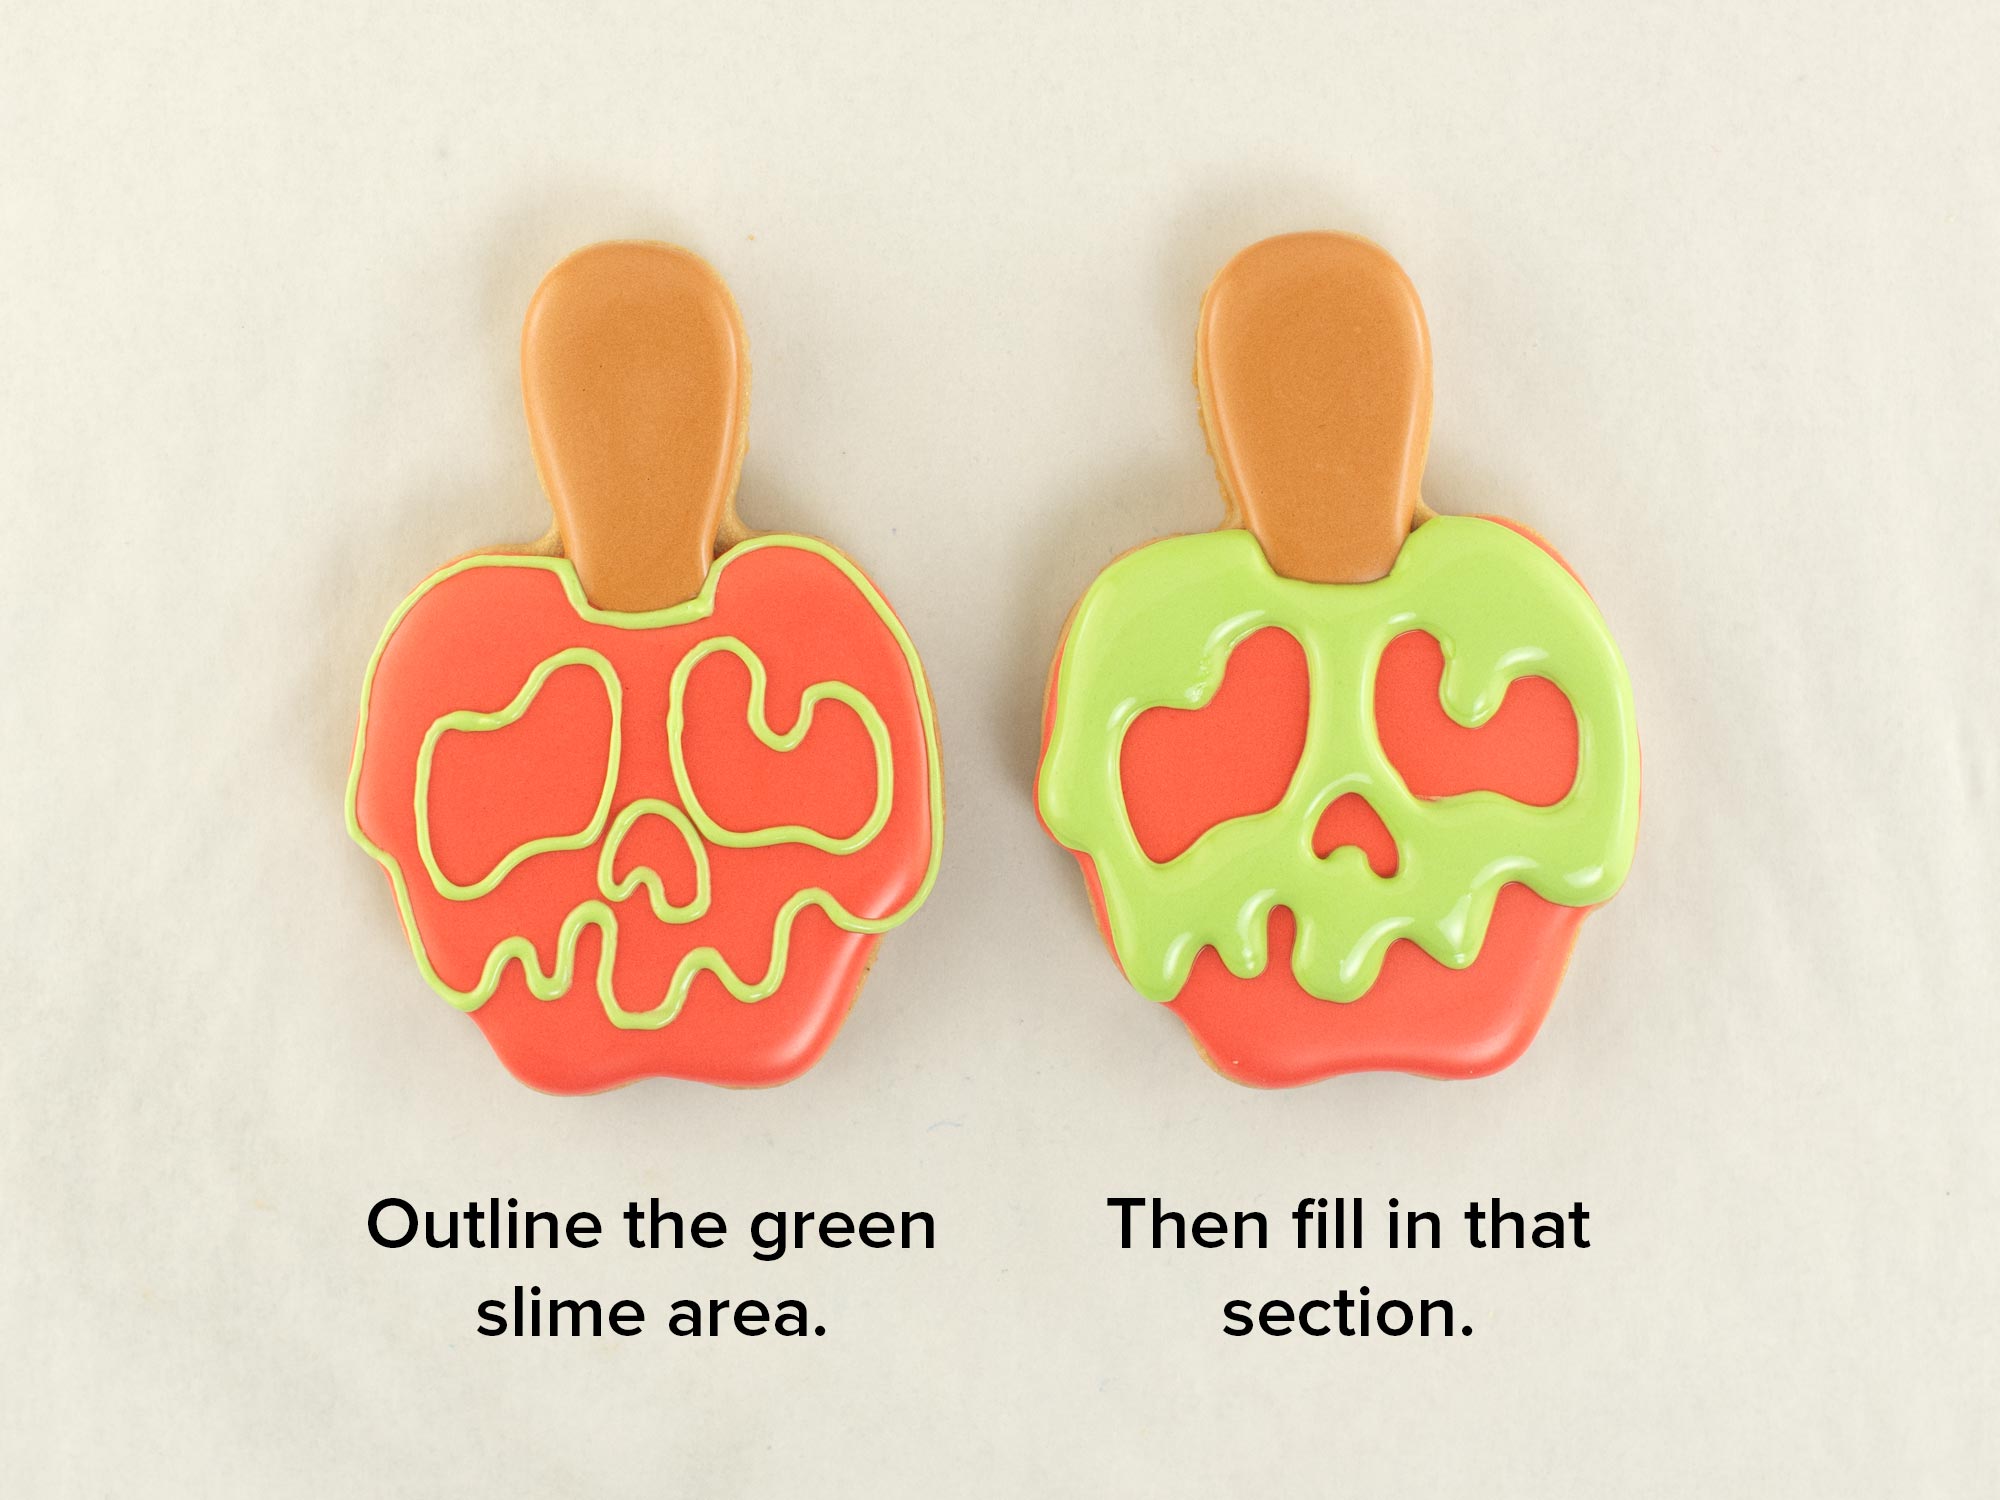
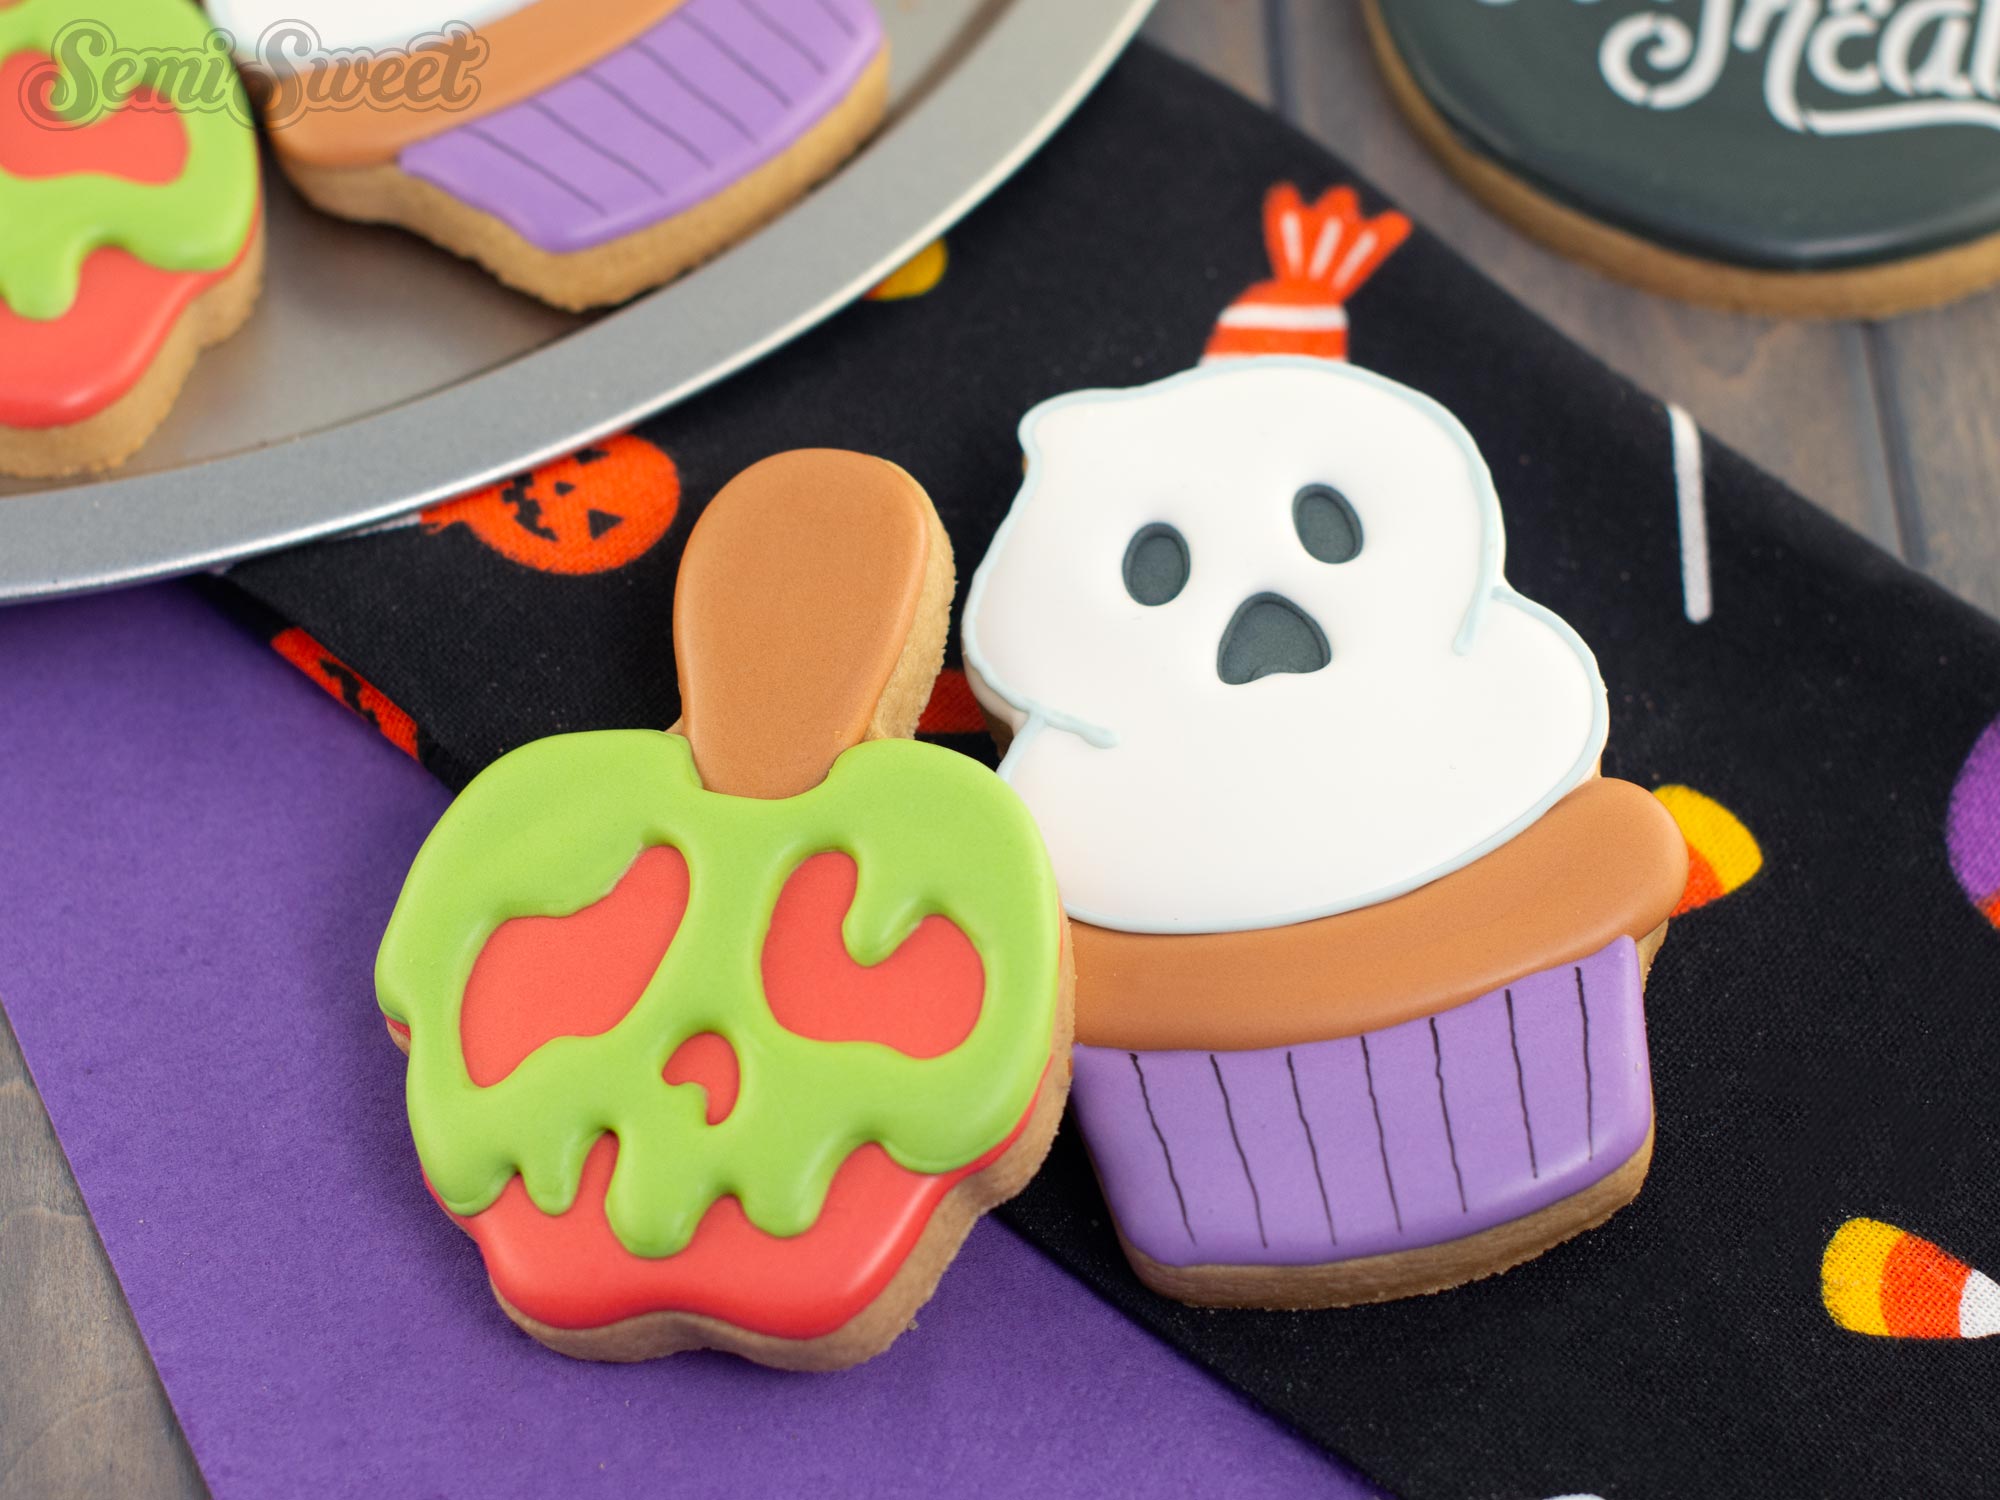
The poisoned caramel apple gives a classic fall treat a spooky Halloween twist.
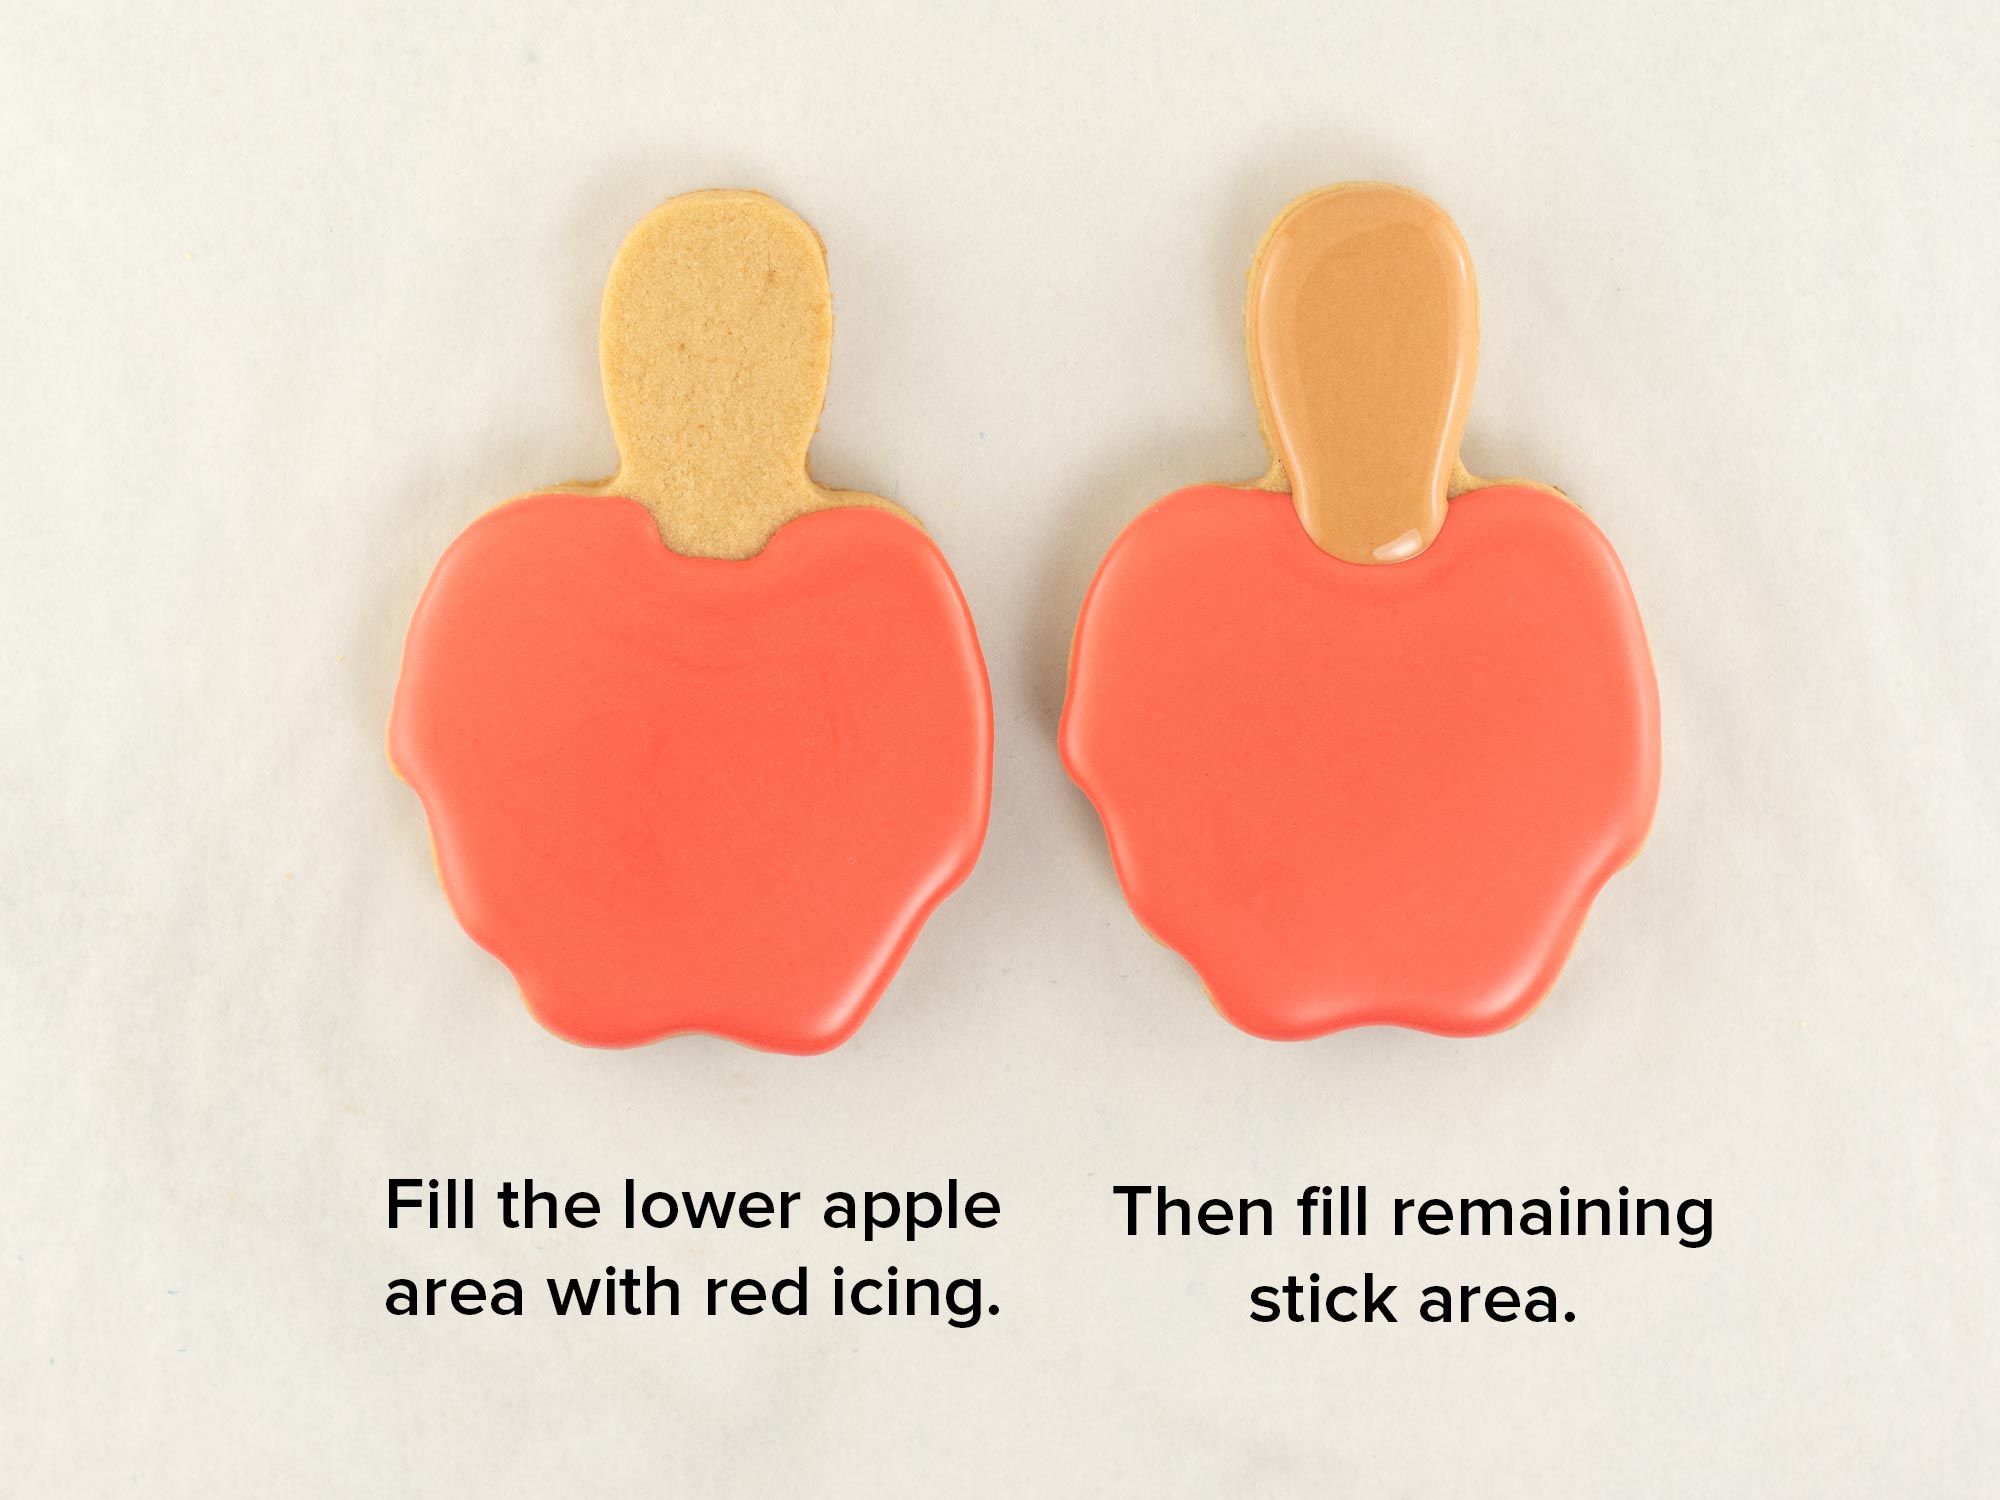
Begin by outlining and flooding the main apple section with red royal icing. Let that icing set for about 15 minutes.
Then fill the top stick area with tan icing.
Step 2
Once that icing has had a chance to set, add the dripping poison details. The drips are what really transform an ordinary caramel apple into something that feels perfect for Halloween.
Start by outlining the drips then fill in the section with green icing.
How to Decorate the Ghost Cupcake Cookie
Step 1
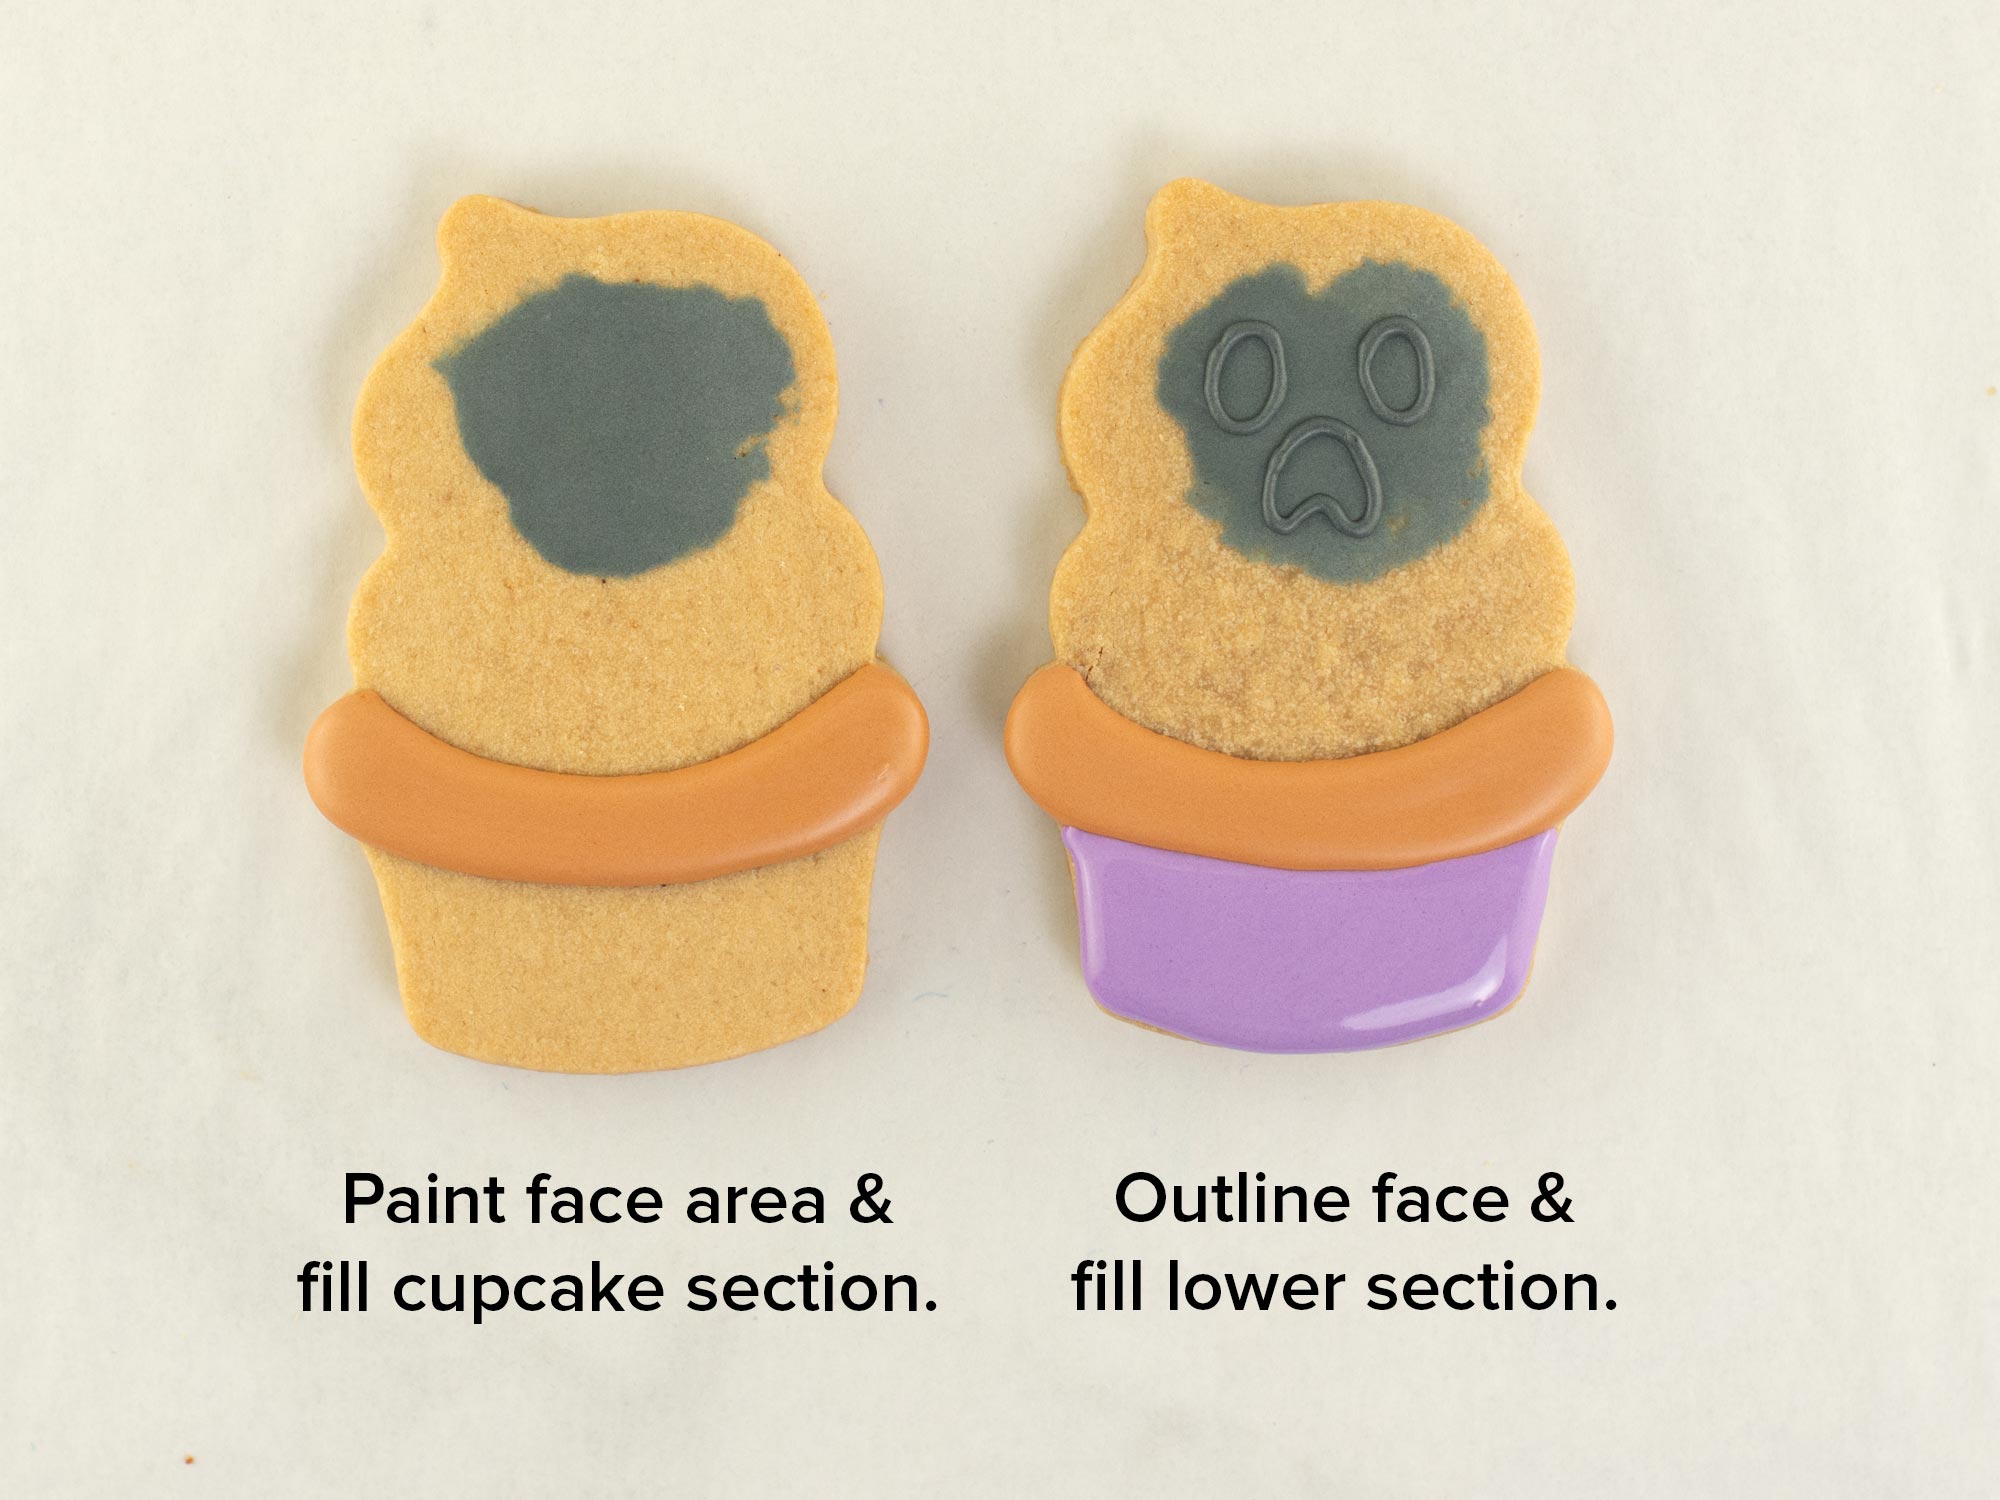
Next up is the ghost cupcake, a cute design that balances out the spooky poisoned apple.
Begin by painting on a thin layer of black icing where the facial features are, as shown. Also, fill in the middle cupcake section with tan icing.
Then outline the facial details over the painted section in black icing. Fill in the bottom wrapper section with purple icing.
Step 2
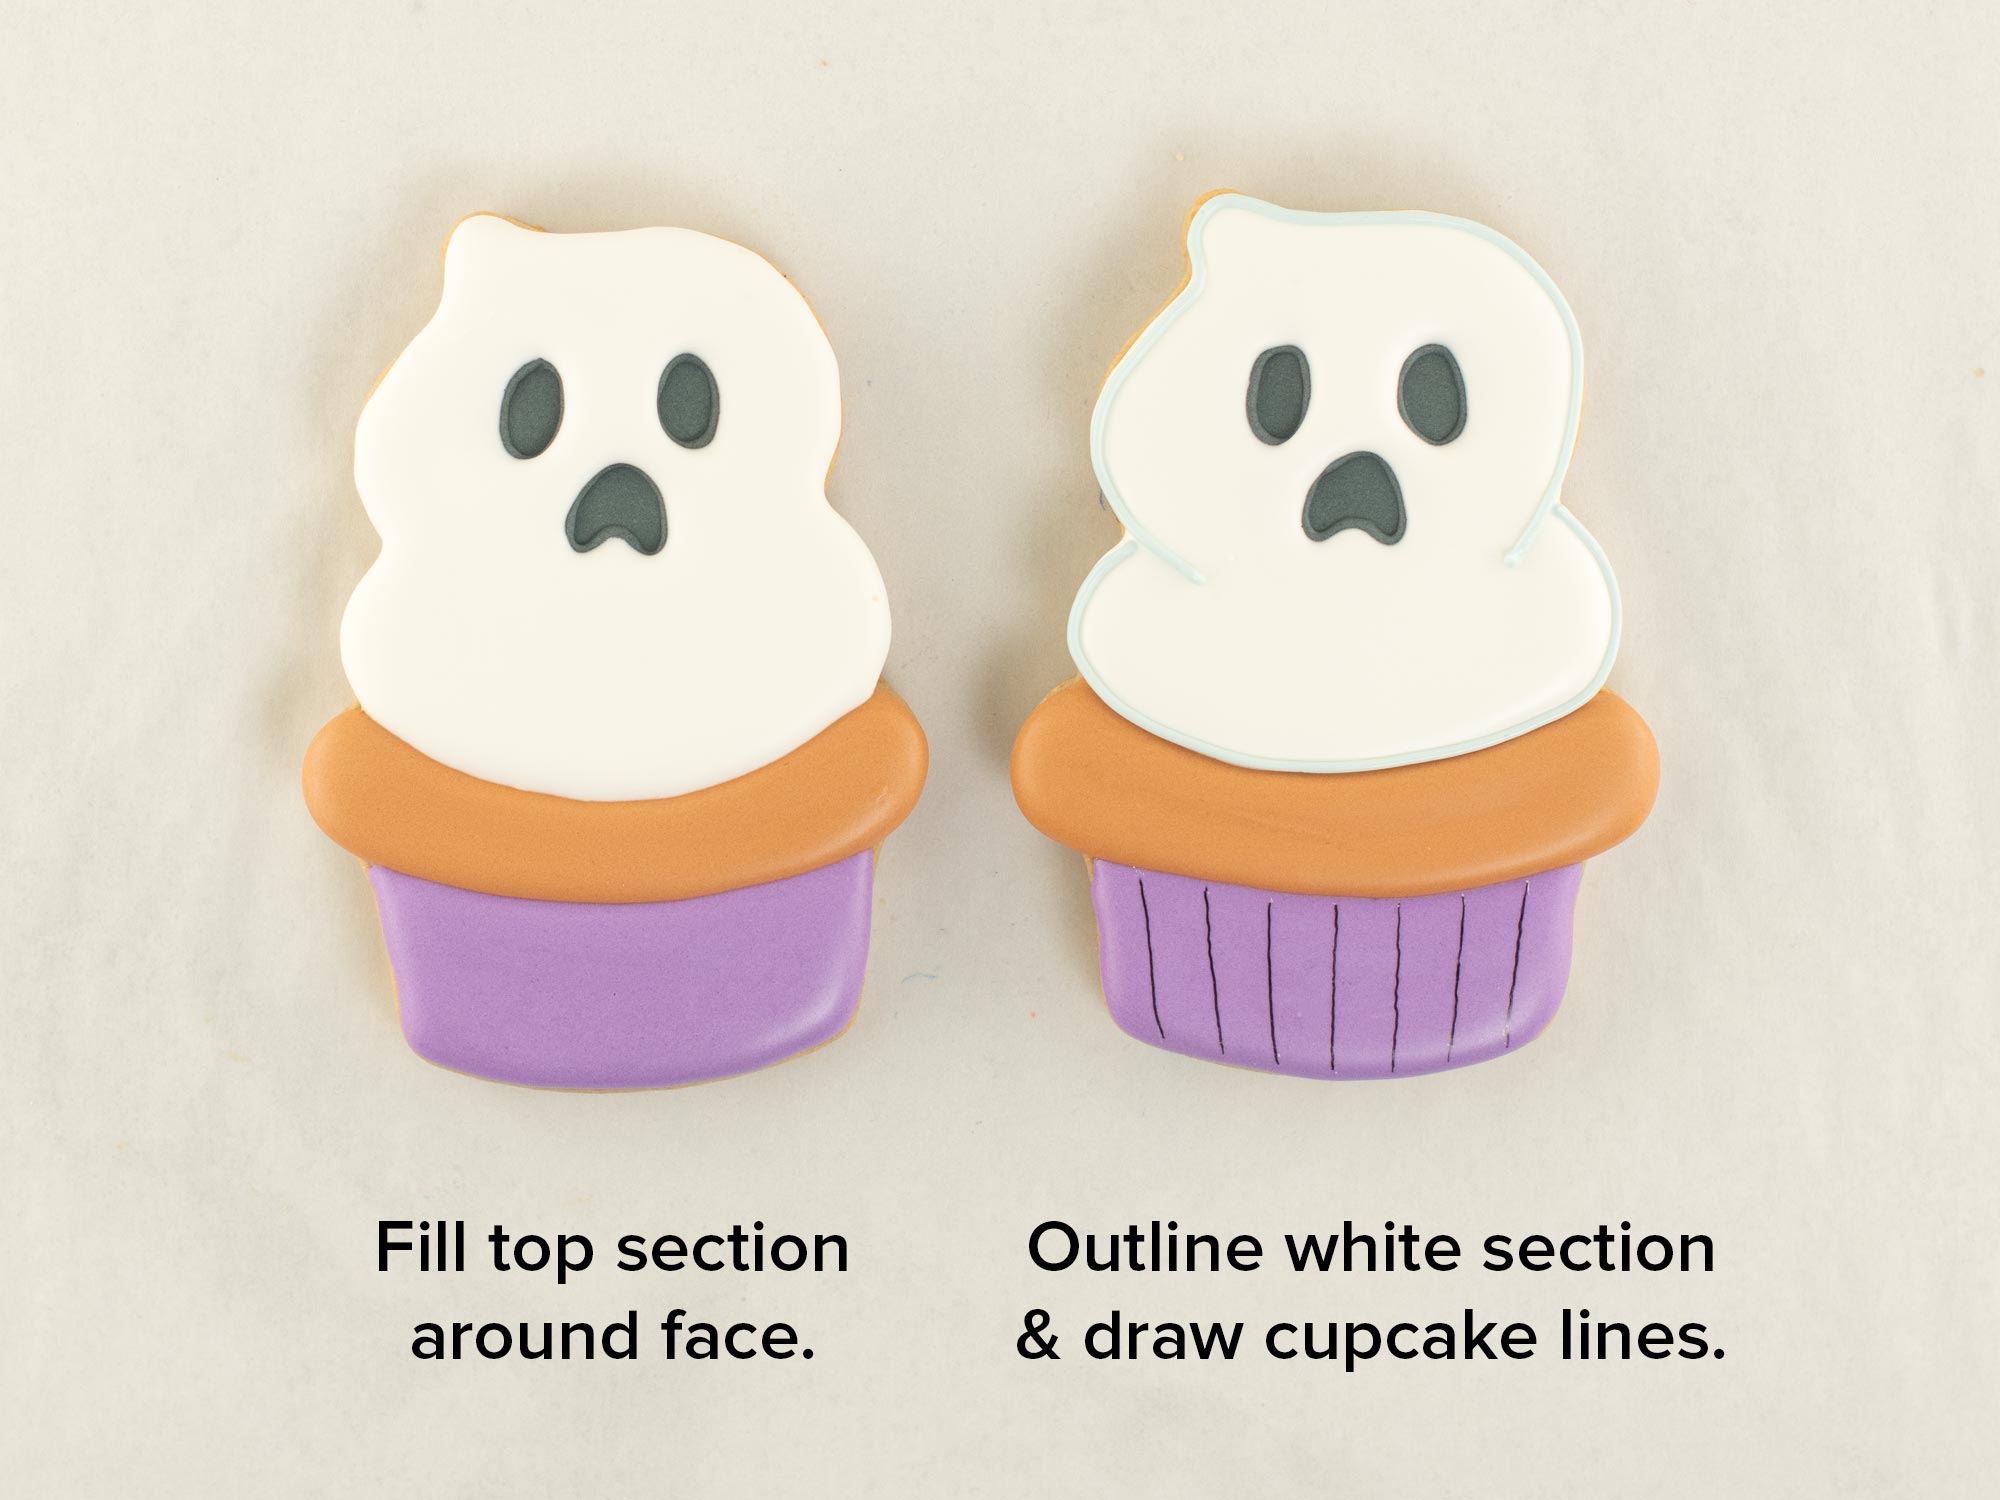
Next, fill in the top ghost section in white icing around the facial holes, as shown.
Once that icing dries, outline the ghost in light blue icing. Also, draw on the wrapper lines with a black food pen.
Creating the “Trick or Treat” Center Cookie
The center cookie brings the entire platter together with a festive “Trick or Treat” message.
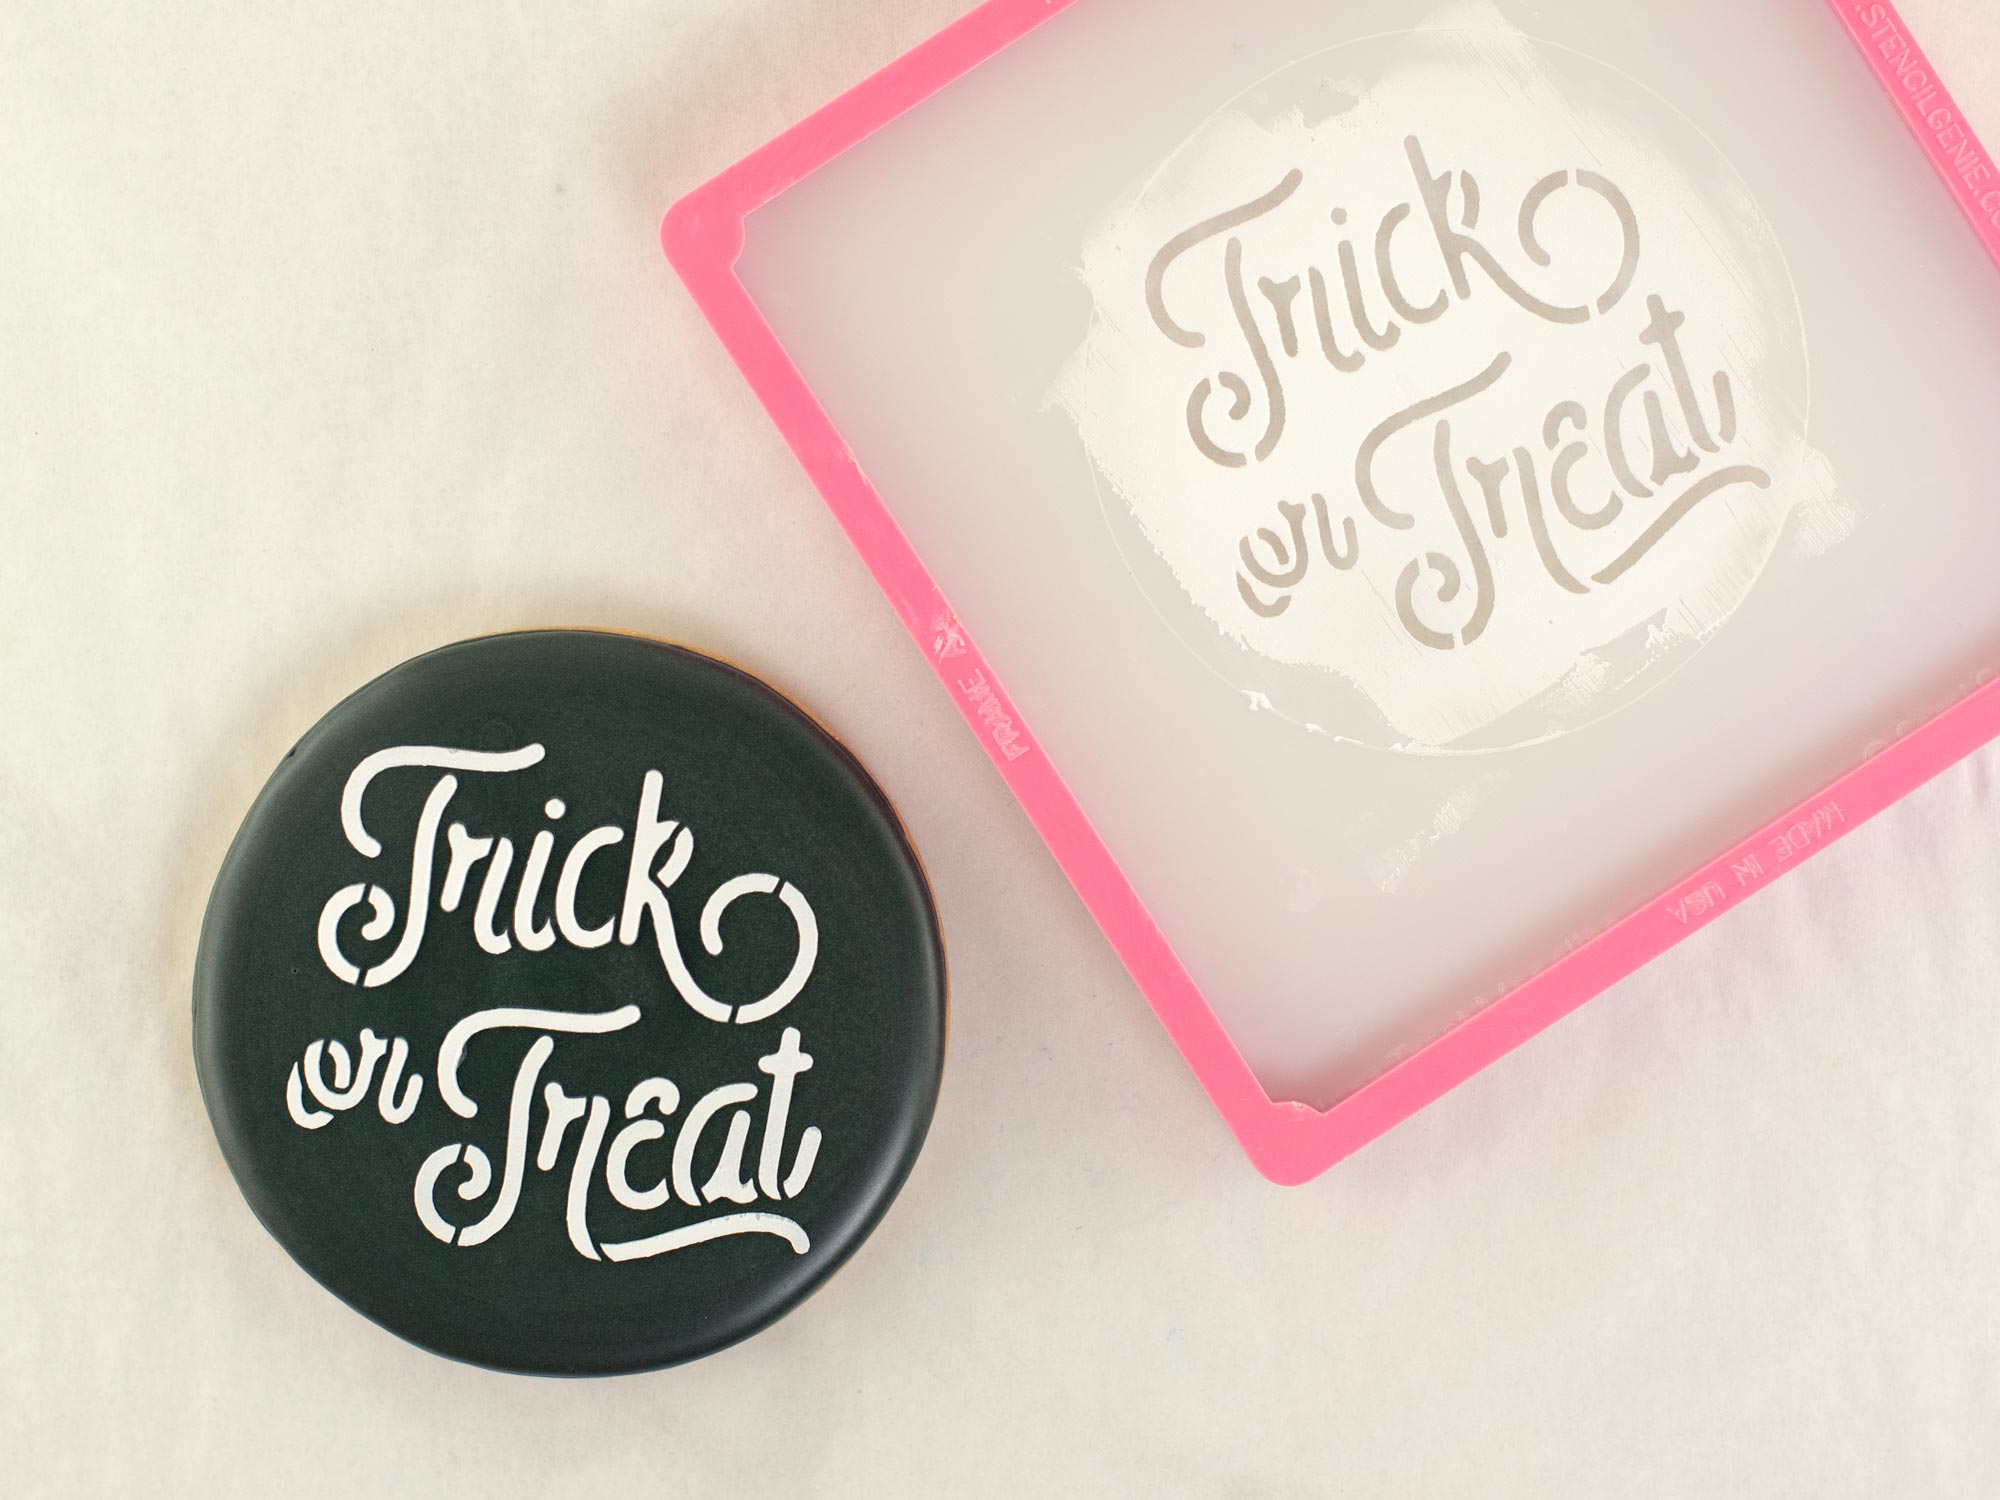
After flooding the cookie with your desired background color, allow the royal icing to dry completely before adding the lettering.
Instead of piping the words by hand, you can use our coordinating “Trick or Treat” cookie stencil. Position the stencil over the dried cookie and apply the design using your preferred stenciling method.
A stencil is especially helpful for a platter like this because the lettering becomes the focal point in the middle. It gives you crisp, consistent lettering while making this step much less intimidating.
Tip for Clean Cookie Stenciling
For crisp lettering, use royal icing that's relatively stiff rather than flood consistency. You want it to spread smoothly across the stencil without being runny enough to seep underneath the openings.
Also, try not to make the icing layer too thick. A thin, even pass usually produces the cleanest results.
Halloween Cookie Platter Video Tutorial
The steps above are summarized in this time-lapsed video I put together below.
Assemble the Halloween Cookie Platter
Once all of your cookies are completely dry, it’s time for the fun part... putting everything together.
Place the “Trick or Treat” cookie in the center. Then arrange the poisoned caramel apples and ghost cupcakes around it, alternating between the two designs.
Repeating the same two cookies creates a cohesive pattern around the center and makes the platter feel full without requiring you to decorate a large number of different designs.
It’s a great option for Halloween parties, dessert tables, classroom celebrations, or even a spooky movie night. You can also package the completed platter as a Halloween gift.
Make Your Own Halloween Cookie Platter
One of my favorite things about cookie platters is how a handful of relatively simple cookies can come together to create one impressive finished design. The poisoned caramel apples add a spooky touch, while the ghost cupcakes keep the platter cute and playful. Add the “Trick or Treat” center cookie, and everything comes together into a festive Halloween centerpiece.
If you’d like to recreate this platter, you can find the coordinating cookie cutter set in our shop, along with the matching “Trick or Treat” cookie stencil to make decorating the center cookie even easier.
Be sure to check out our other Halloween cookie cutters and decorating supplies for even more spooky cookie ideas. Happy decorating!
Add Vibrant Colors with Americolor Food Coloring

To make your decorated cookies pop, use Americolor Food Coloring for bold, consistent colors. It’s my go-to brand for achieving vibrant shades without altering the consistency of the royal icing.
Buy NowTags:
You may also like...


Mike Tamplin
Hi, I’m Mike, the cookie decorator behind Semi Sweet Designs! Since 2011, I’ve been sharing recipes, tips, and tutorials to help beginners gain confidence and give experts fresh inspiration. Along with my brother, Billy, we design and offer hundreds of cookie cutters, stencils, and apparel—all made with decorators in mind.
Whether you're just starting or a seasoned pro, we’re here to make cookie decorating easier and more fun!
Read more