How to Decorate a Back-to-School Cookie Platter with Royal Icing (Easy Tutorial for Beginners)
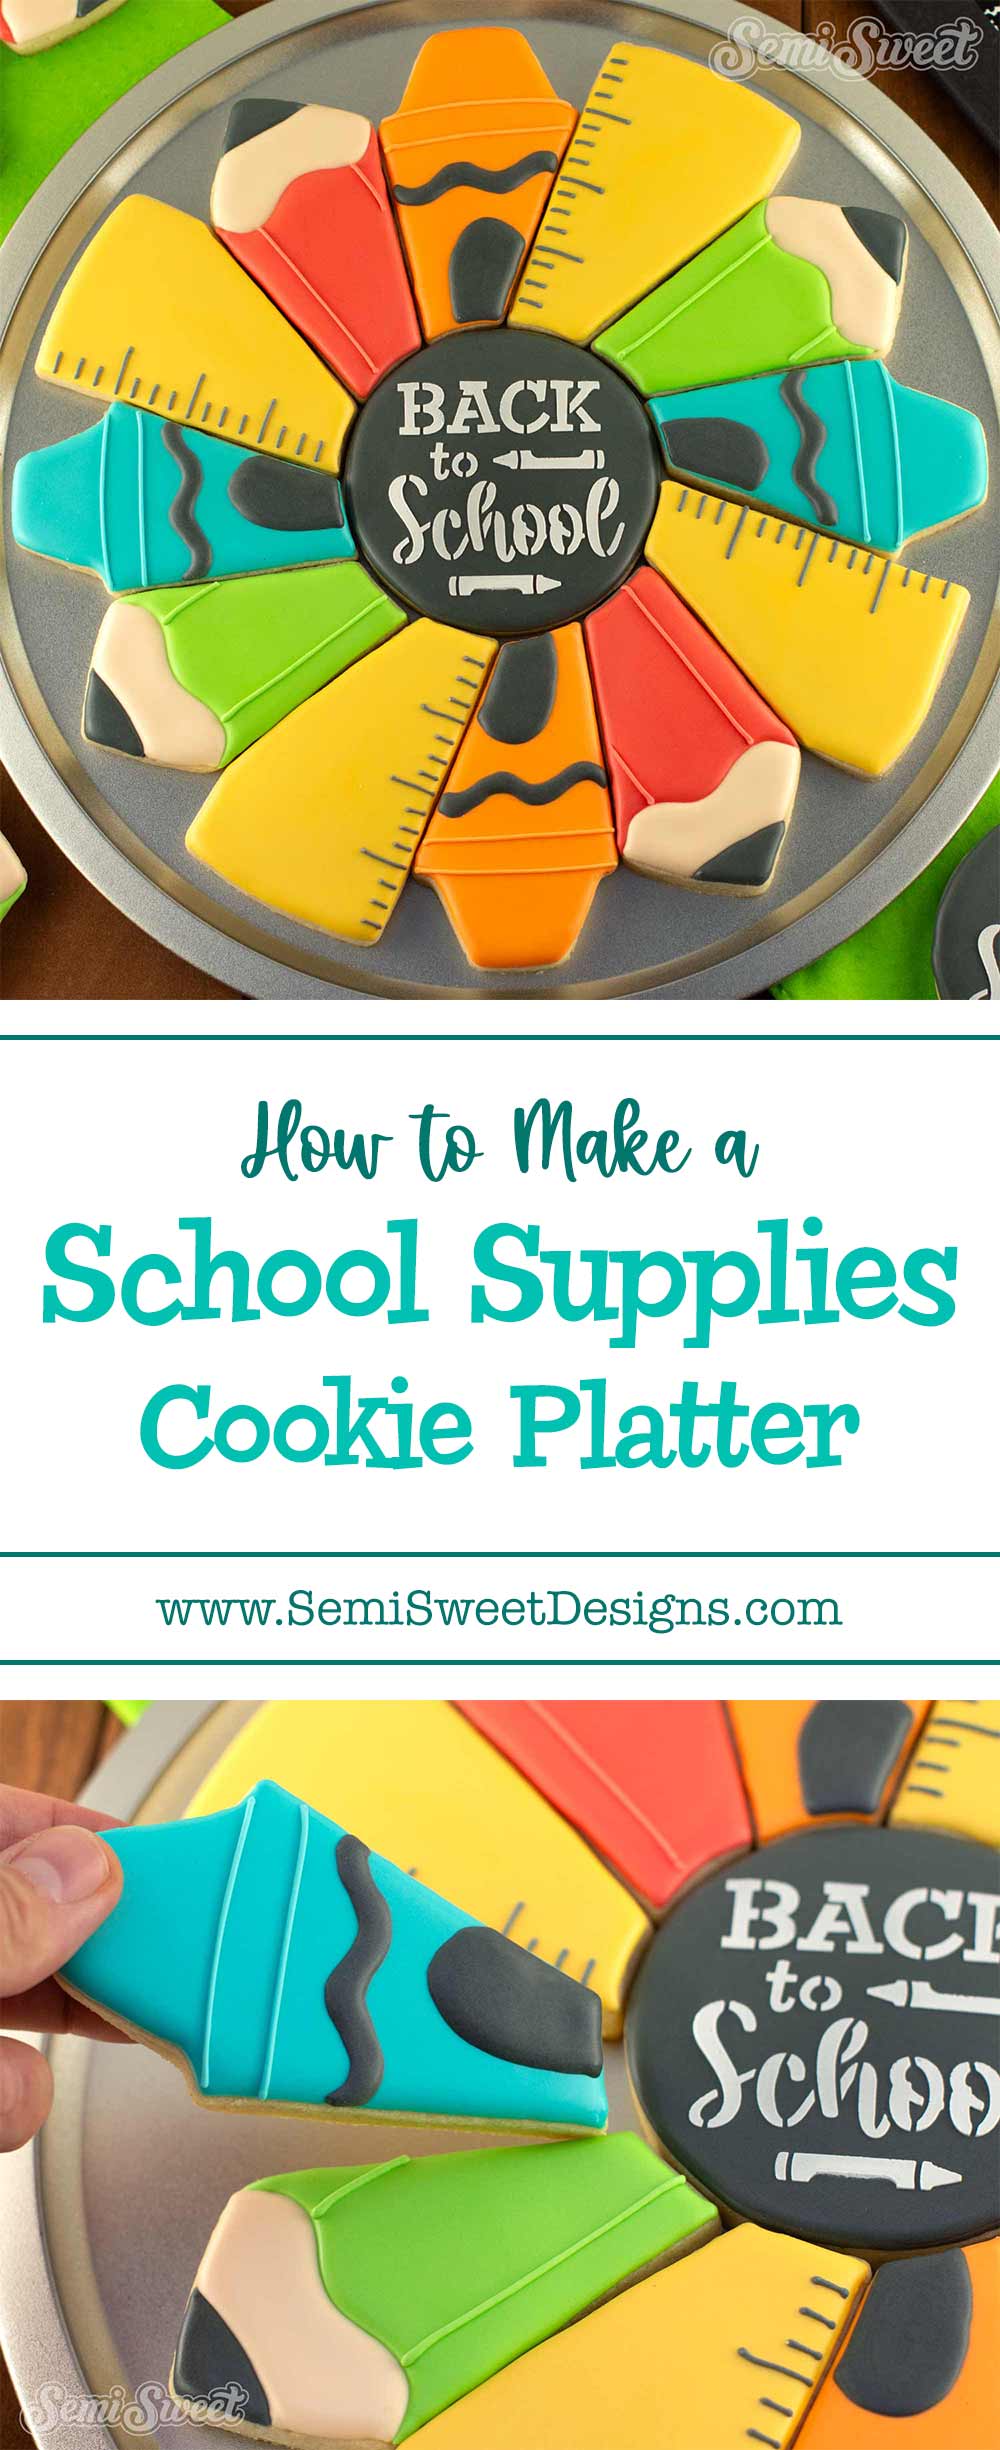
I’ll walk you through how to decorate a fun and colorful back-to-school cookie platter using royal icing, featuring pencils, crayons, and ruler cookies.

It’s that time of year again! Backpacks are packed, lunchboxes are labeled, and cookie decorators everywhere are gearing up for the new school season! In this tutorial, I’ll walk you through how to decorate a fun and colorful back-to-school cookie platter using royal icing. This beginner-friendly set features pencils, crayons, and ruler cookies arranged around a center cookie that reads “Back to School.” Whether you're creating treats for a teacher gift, a school event, or just celebrating the season, this platter is sure to impress. You can find the coordinating cookie cutter set and matching stencil in my shop to make this project even easier!
My Essential Baking Tools for Royal Icing
Essential Decorating Tools for Royal Icing
School Supplies Platter Cookie Cutter Set
New to the shop is this school supplies platter cookie cutter set. This set includes 4 cookie cutters: an overlap crayon, an overlapping pencil, an overlapping ruler, and a center circle. You can purchase all cookie cutters together, or as single pieces without the circle cutter.
(This is the same circle cutter used in all my platter sets, like this Pine Wreath Platter, Ghost Candy Corn Platter, and Apple Pencil Platter, etc.)
There are two sizes available. When arranged as a platter, as shown in the example picture, the platter measures:
LARGE- 12 inches in diameter.
SMALL- 9 inches in diameter.
For this tutorial, I'll be decorating the LARGE size.
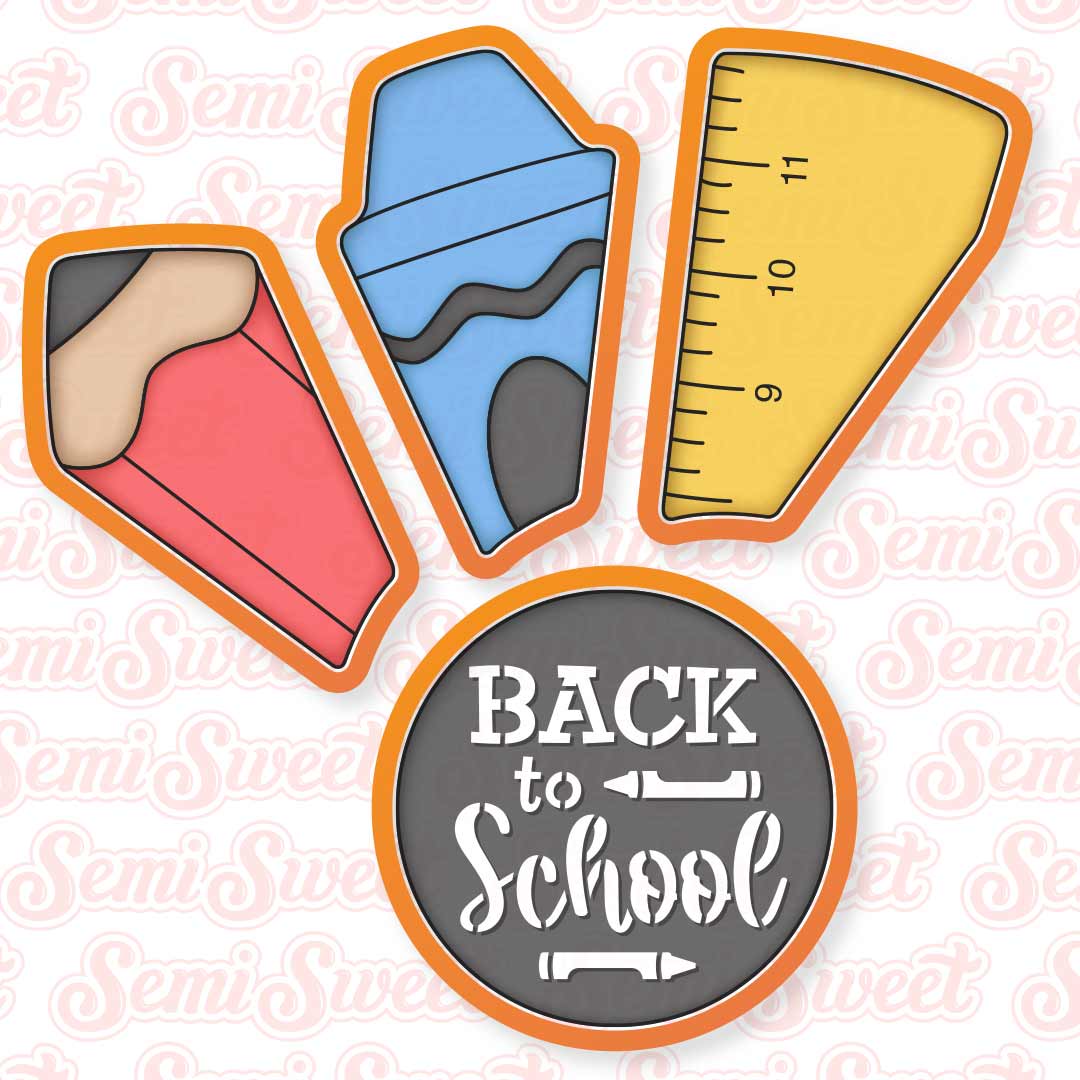
Cookie Templates for the School Supplies Cookie Platter Set
To help with the decorating process, I made a PDF template available for all the new back-to-school cookie cutter designs, including this school supplies platter set.
You can download these cookie templates HERE.
If you have a Kopykake or Pico projector, just print it out (or pull it up on your mobile device) and you are good to go. For those without a projector, follow the suggested steps below by tracing the design onto the cookie with an edible food marker.
The Cookie Decorating Process
To decorate these cookies, my icing of choice is royal icing. Here's how to make royal icing for cookie decorating.
For the colors used for these school supplies cookies, you will need the following suggested colors:
- Red icing (I used Americolor Super Red.)
- Yellow icing (I mixed Americolor Egg Yellow with Americolor Gold.)
- White icing. (I used Americolor Bright White.)
- Black icing (I used Americolor Super Black.)
- Green icing (I mixed Americolor Egg Yellow with Mint Green and a touch of Americolor Electric Green.)
- Teal icing (I mixed equal parts Americolor Teal and Americolor Sky Blue.)
- Tan icing (I used Americolor Ivory.)
- Orange icing (I used Americolor Orange.)
Step 1
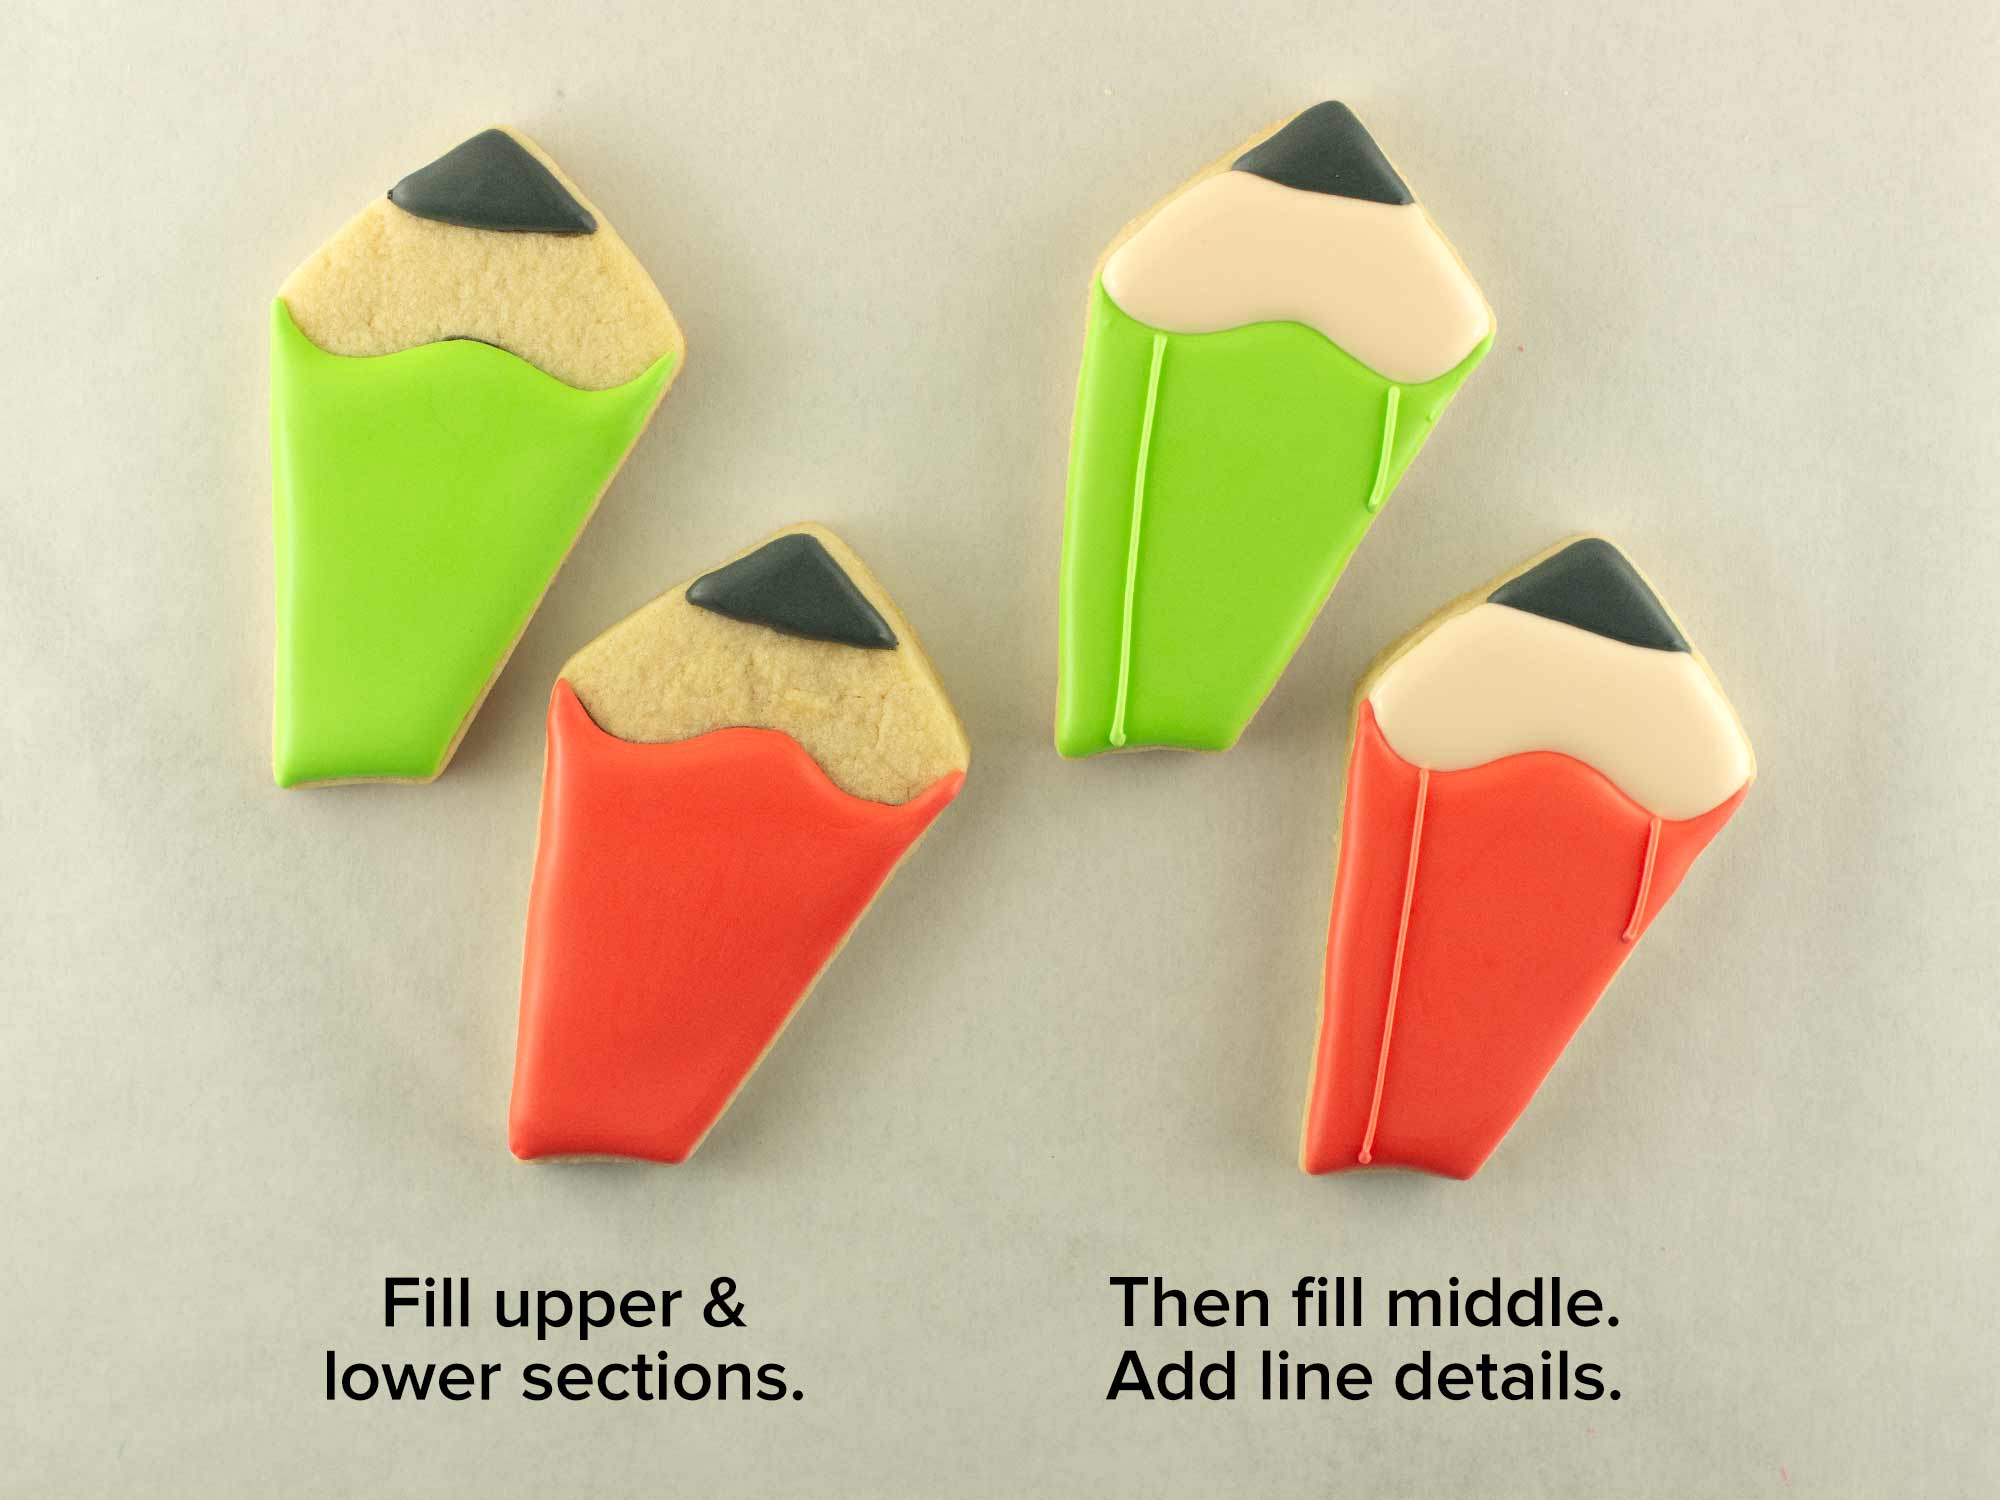
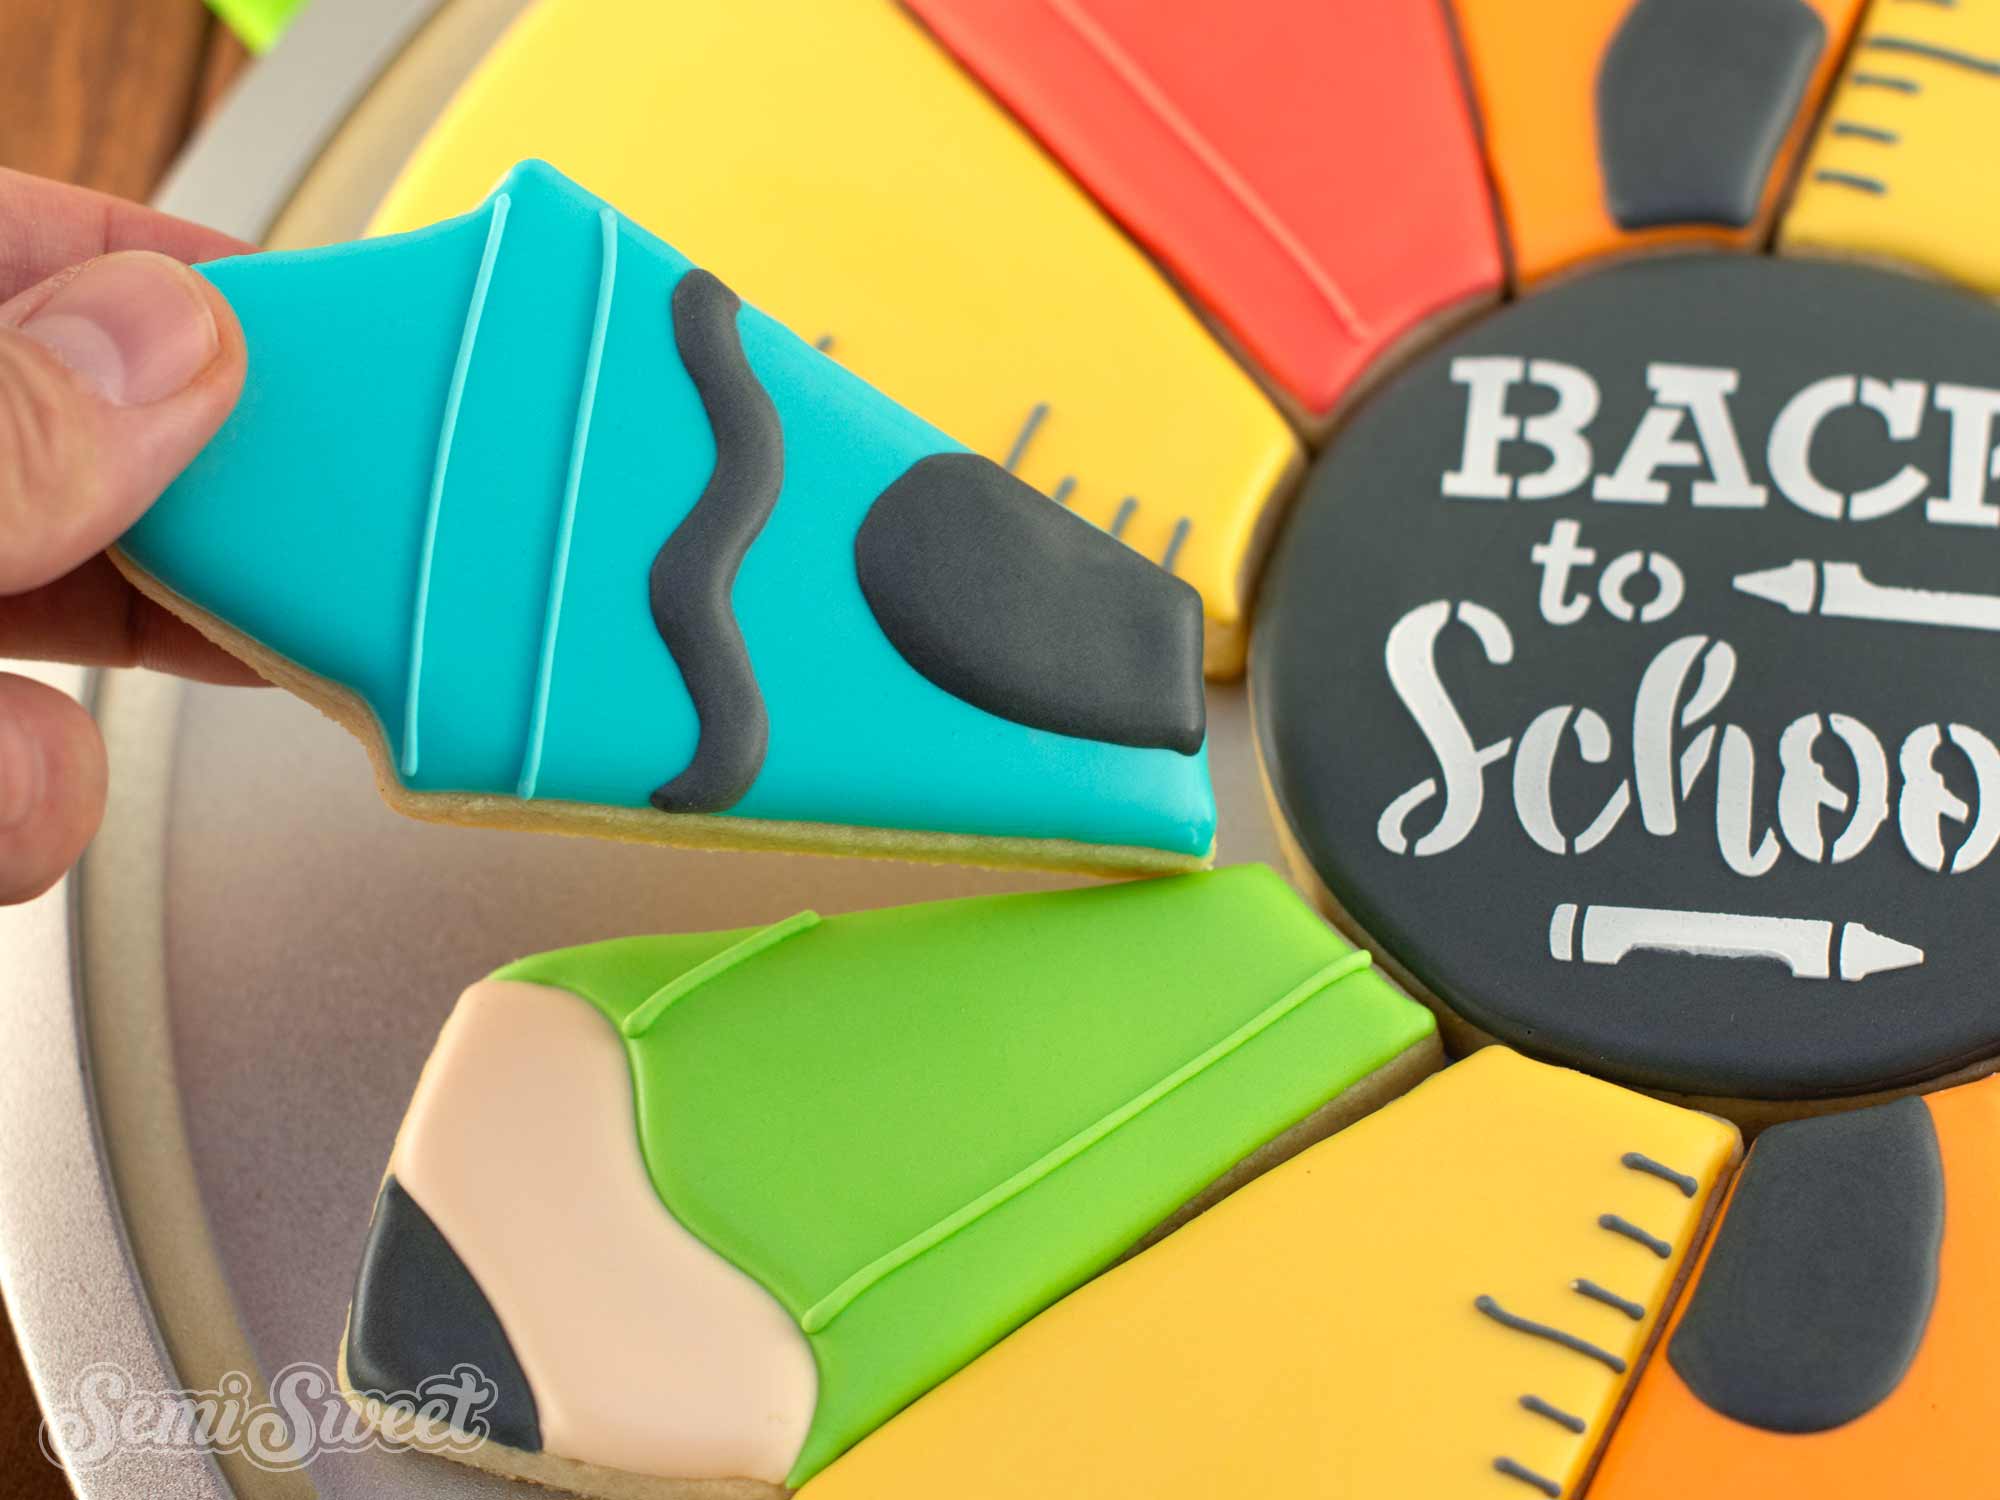
For the pencil cookies, begin by filling in the top and bottom sections. I colored these pencils with green and red icing. Let this icing set for about 20 minutes.
Then fill in the remaining middle section with tan icing. Add the two line details on the colored sections, as shown.
Step 2
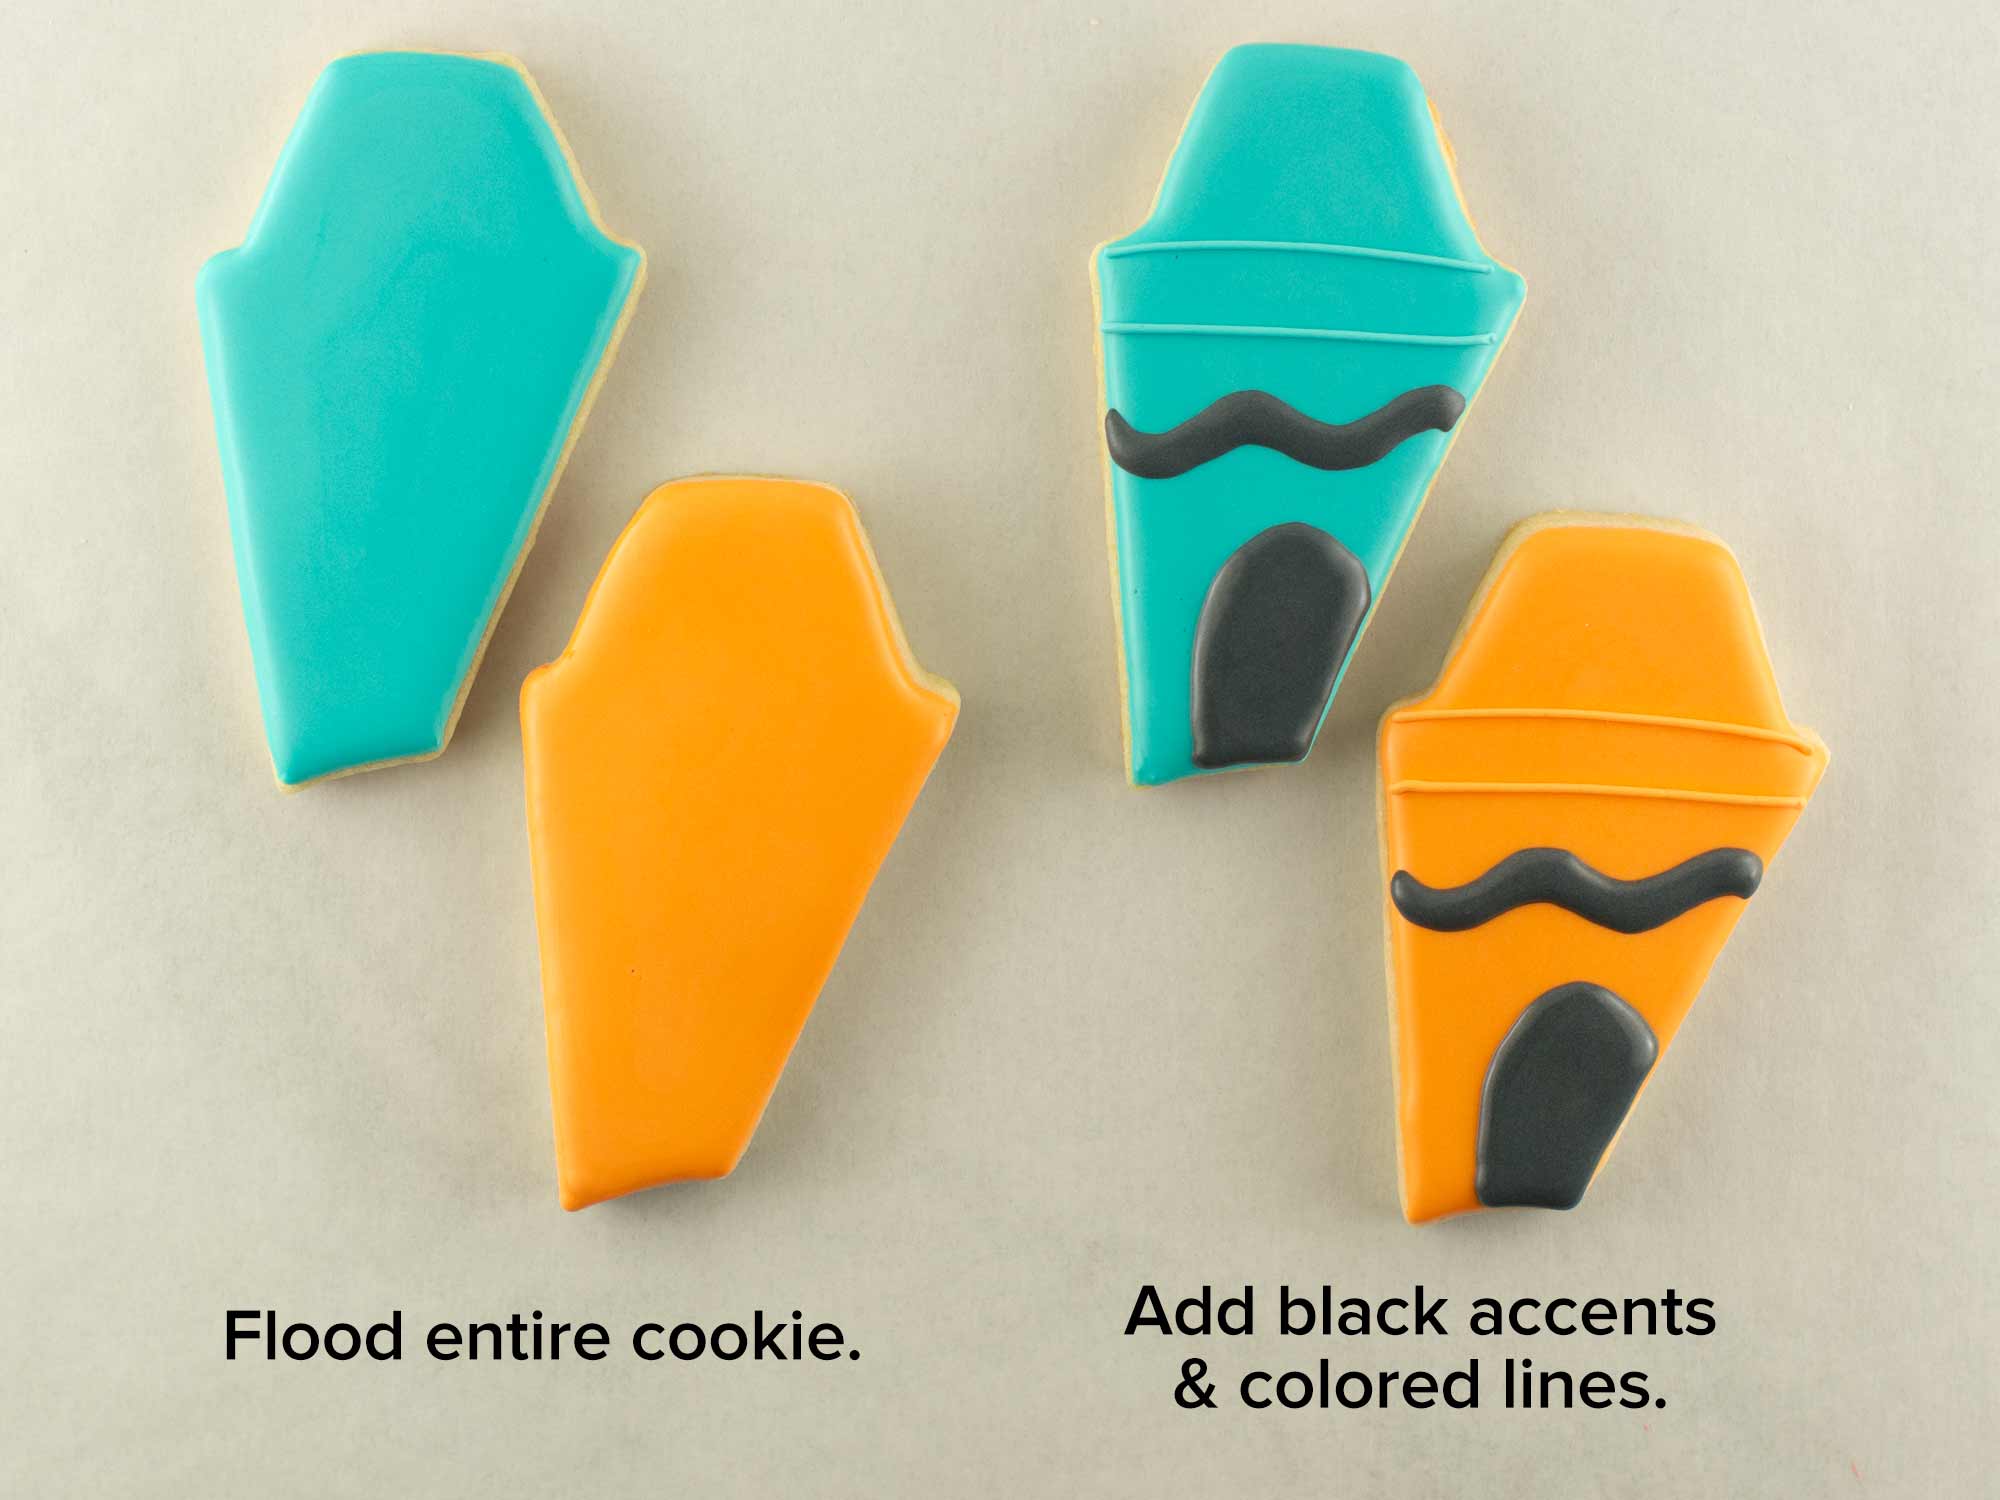
For the crayon cookies, begin by flooding the entire cookie in your colors of choice. I used teal blue and orange. Let this icing set for about 20 minutes.
Then add the black details, as shown. Add the two horizontal colored lines at the top.
Step 3
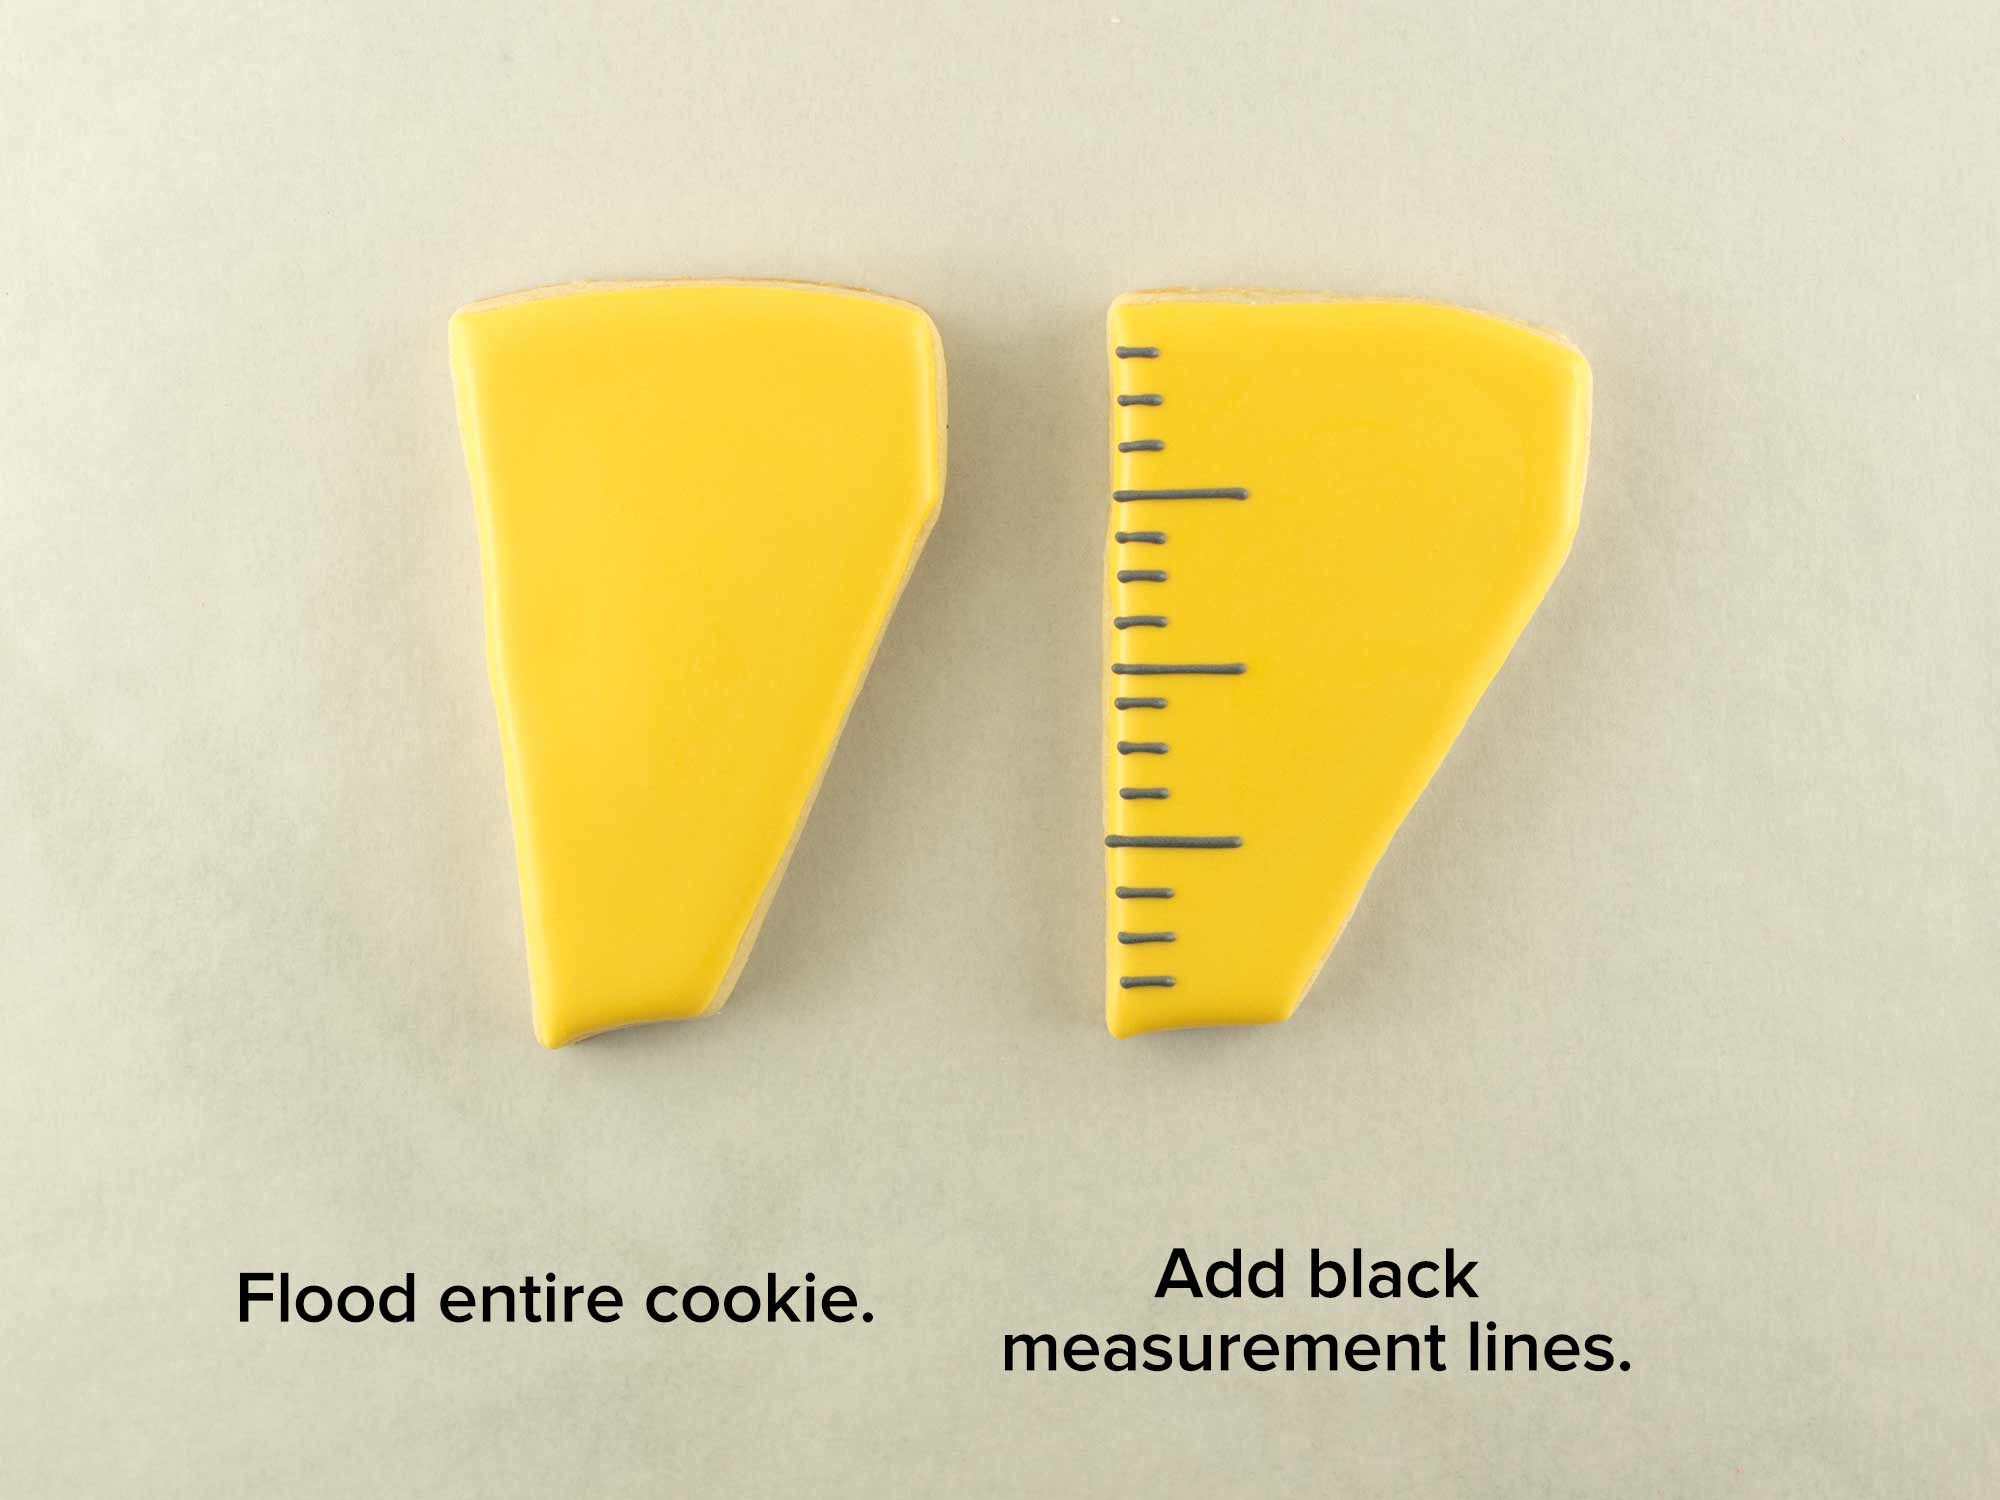
For the ruler cookies, begin by flooding the entire cookie with yellow icing. Let this icing set for about 20 minutes.
Then add the measuring lines with black icing.
Step 4
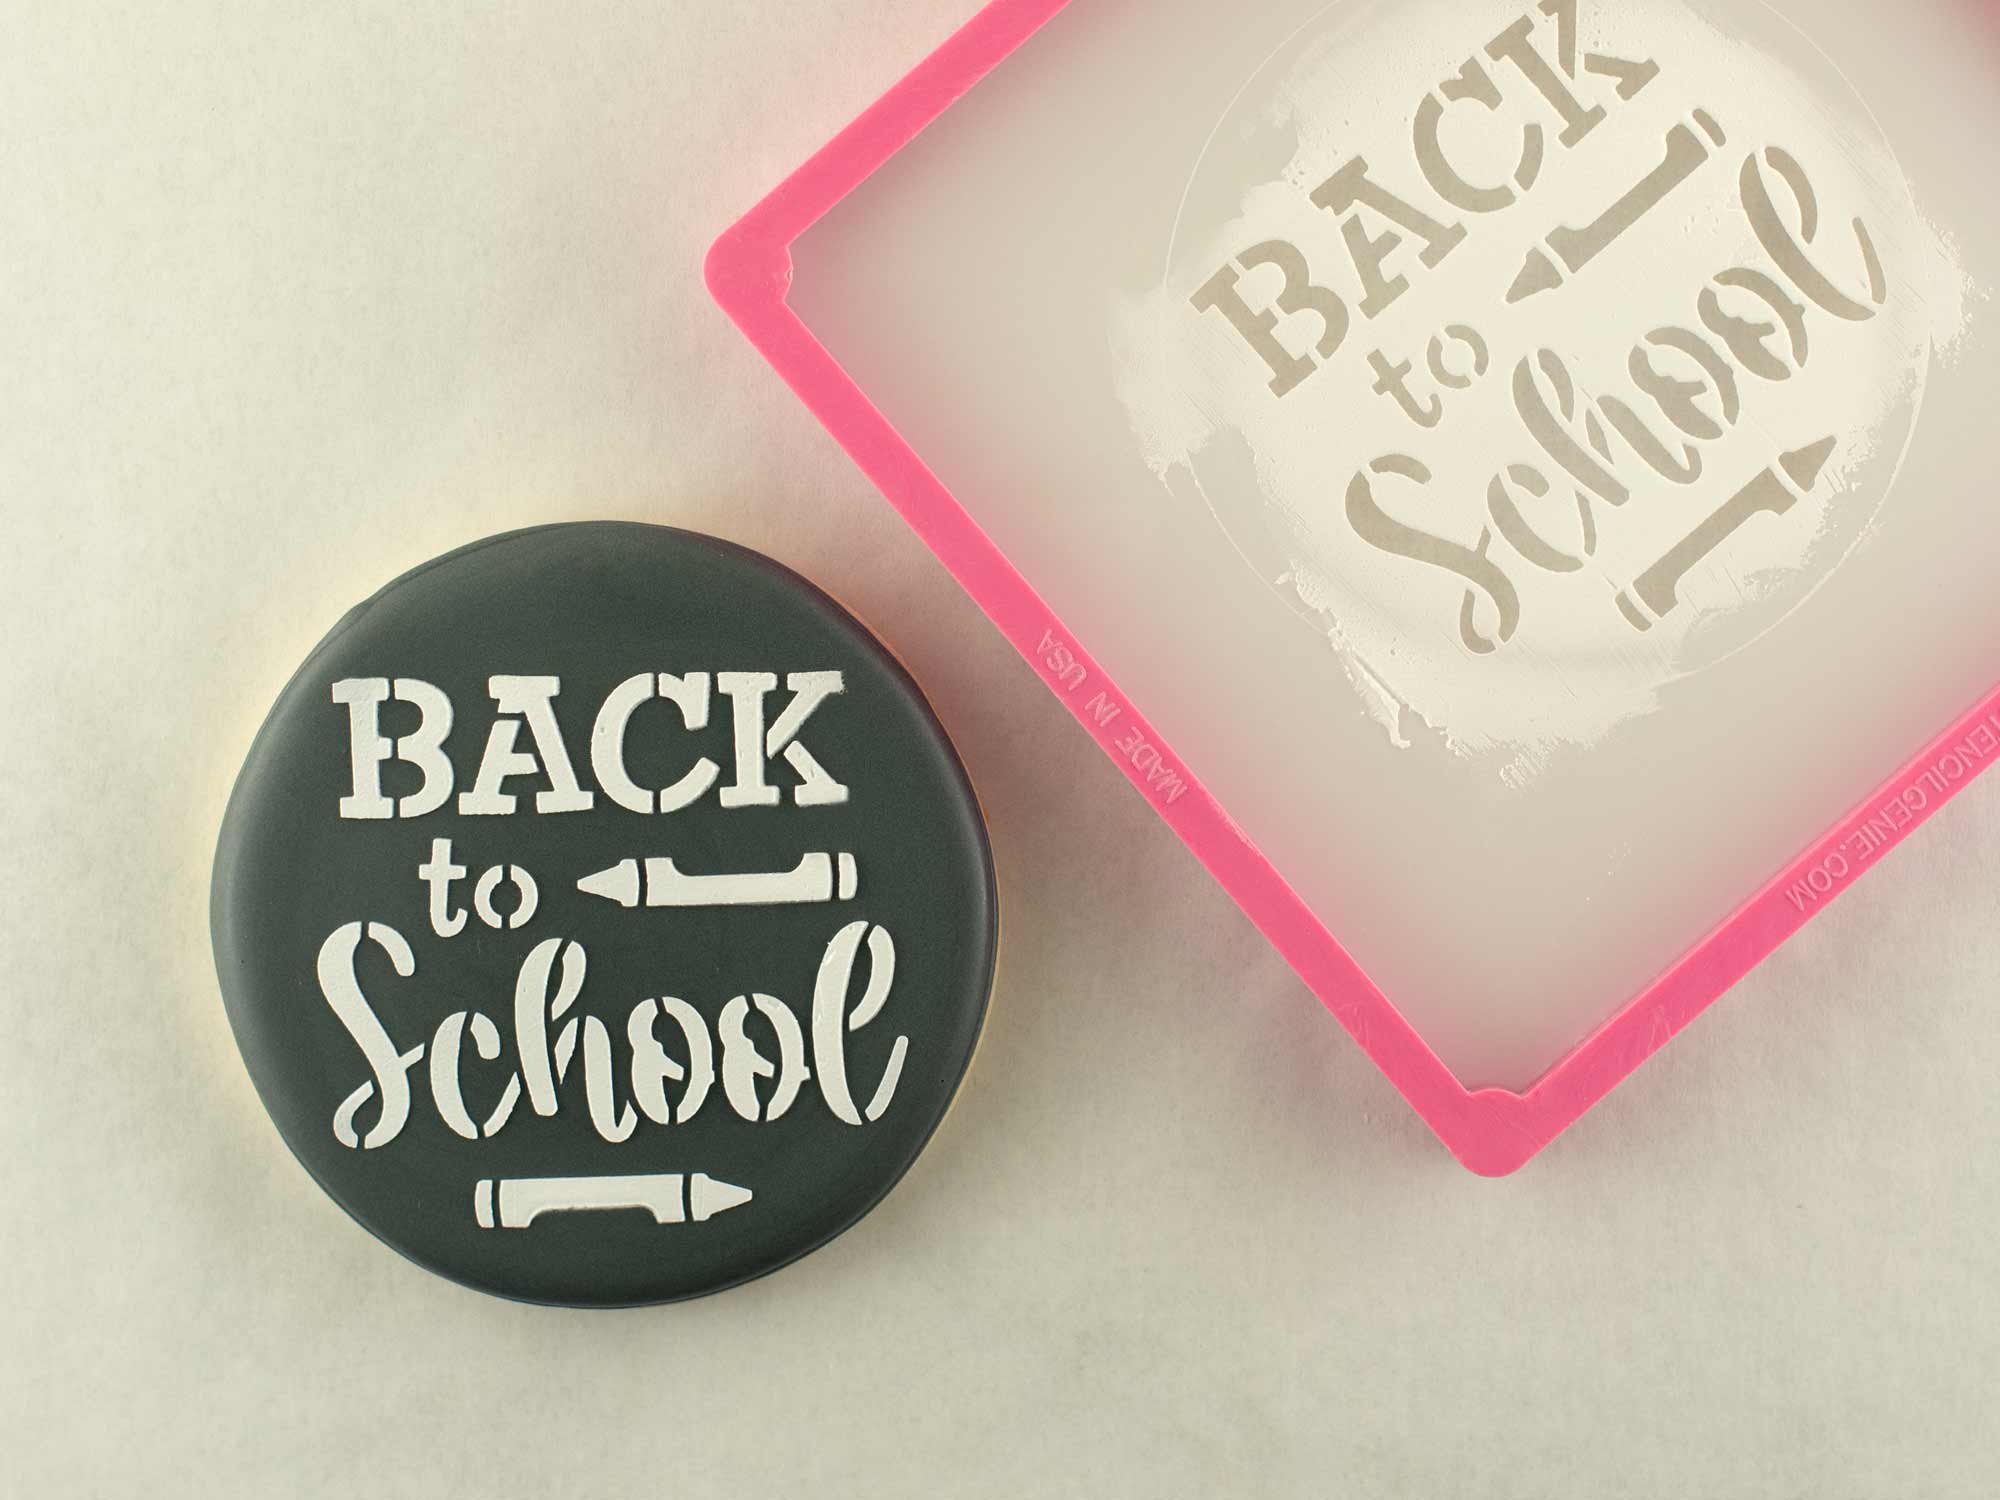
For the final, center message cookie, I let the base layer of icing dry completely.
In the shop is a new back-to-school cookie stencil you can use for the center message. Just swipe thick white royal icing over it to apply it to the cookie. The video below better illustrates how I did this.
School Supplies Cookie Platter Video Tutorial
The steps above are summarized in this time-lapsed video I put together below.
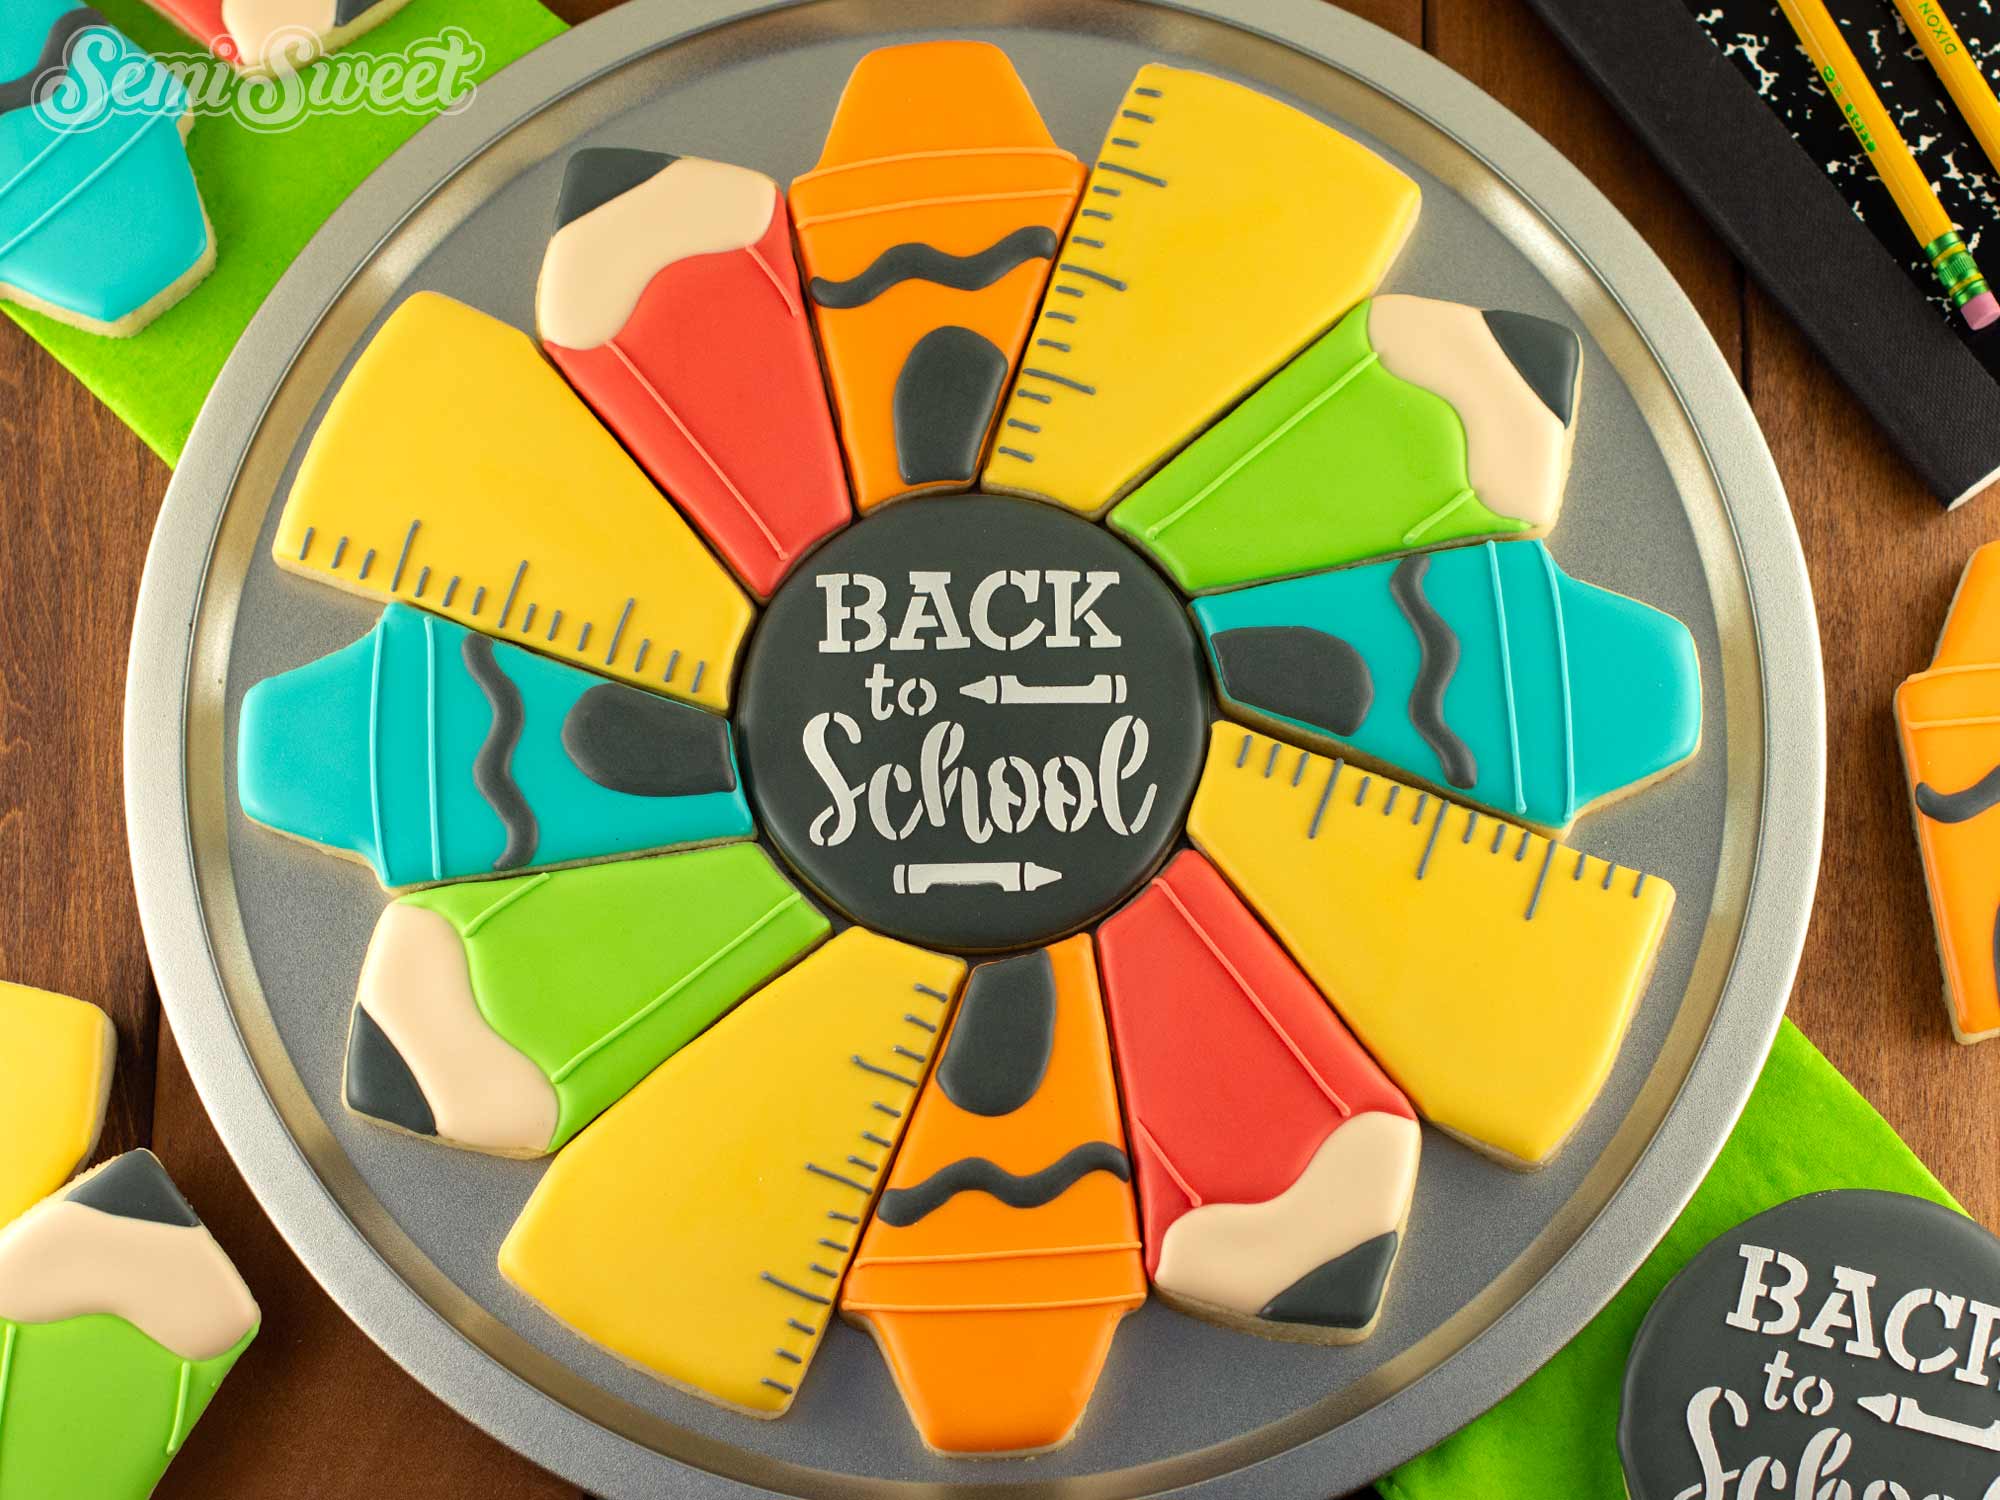
Here's the final school supplies cookie platter all assembled. To create this entire platter required 13 cookies--4 crayon pieces, 4 ruler pieces, 4 pencil pieces, pand 1 center circle cookie.
This is the large, 12" version. For the tray it's on, I like to use the 12" pizza pans from Dollar Tree. They are cheap and sturdy for transporting around.
I hope this tutorial helped you feel inspired and confident to create your own back-to-school cookie platter! Whether you're a seasoned decorator or just getting started, this colorful set is a fun way to celebrate the new school year with something sweet. If you’re looking for more school-themed cookie designs, be sure to check out my shop—I have a full collection of back-to-school cookie cutters and stencils to help make your cookie decorating even easier and more fun!
Add Vibrant Colors with Americolor Food Coloring

To make your decorated cookies pop, use Americolor Food Coloring for bold, consistent colors. It’s my go-to brand for achieving vibrant shades without altering the consistency of the royal icing.
Buy Now
