How to Make a Tulip Cookie Platter


My Essential Cookie Tools for Cookie Decorating


My Essential Cookie Tools for Baking Cookies


My Essential Baking Tools for Royal Icing


Essential Decorating Tools for Royal Icing

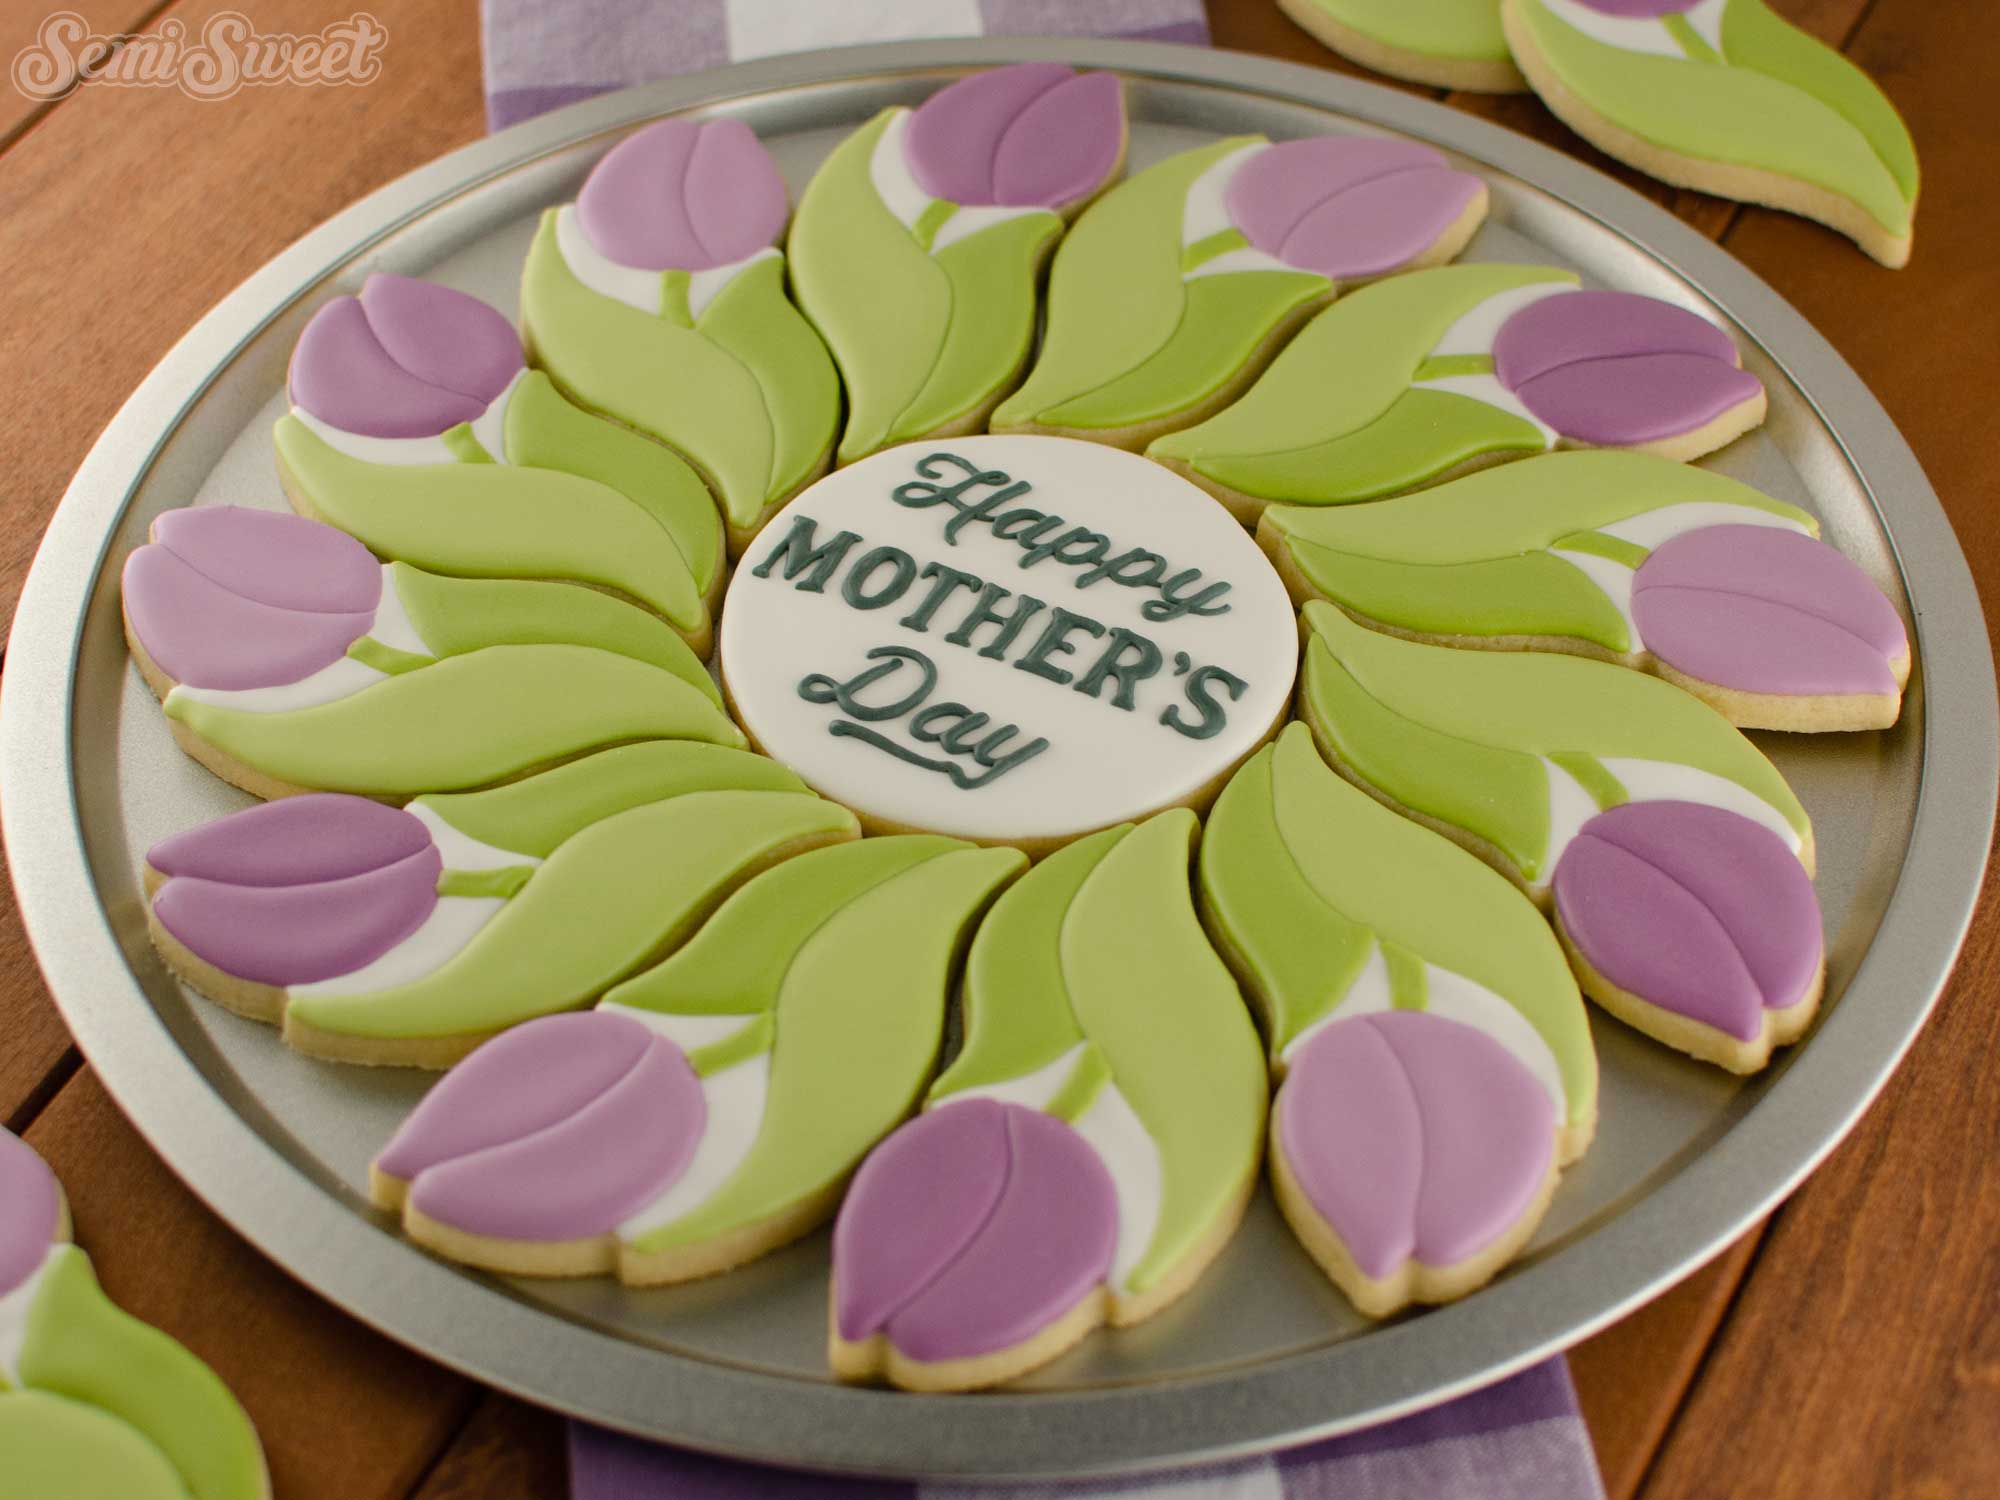
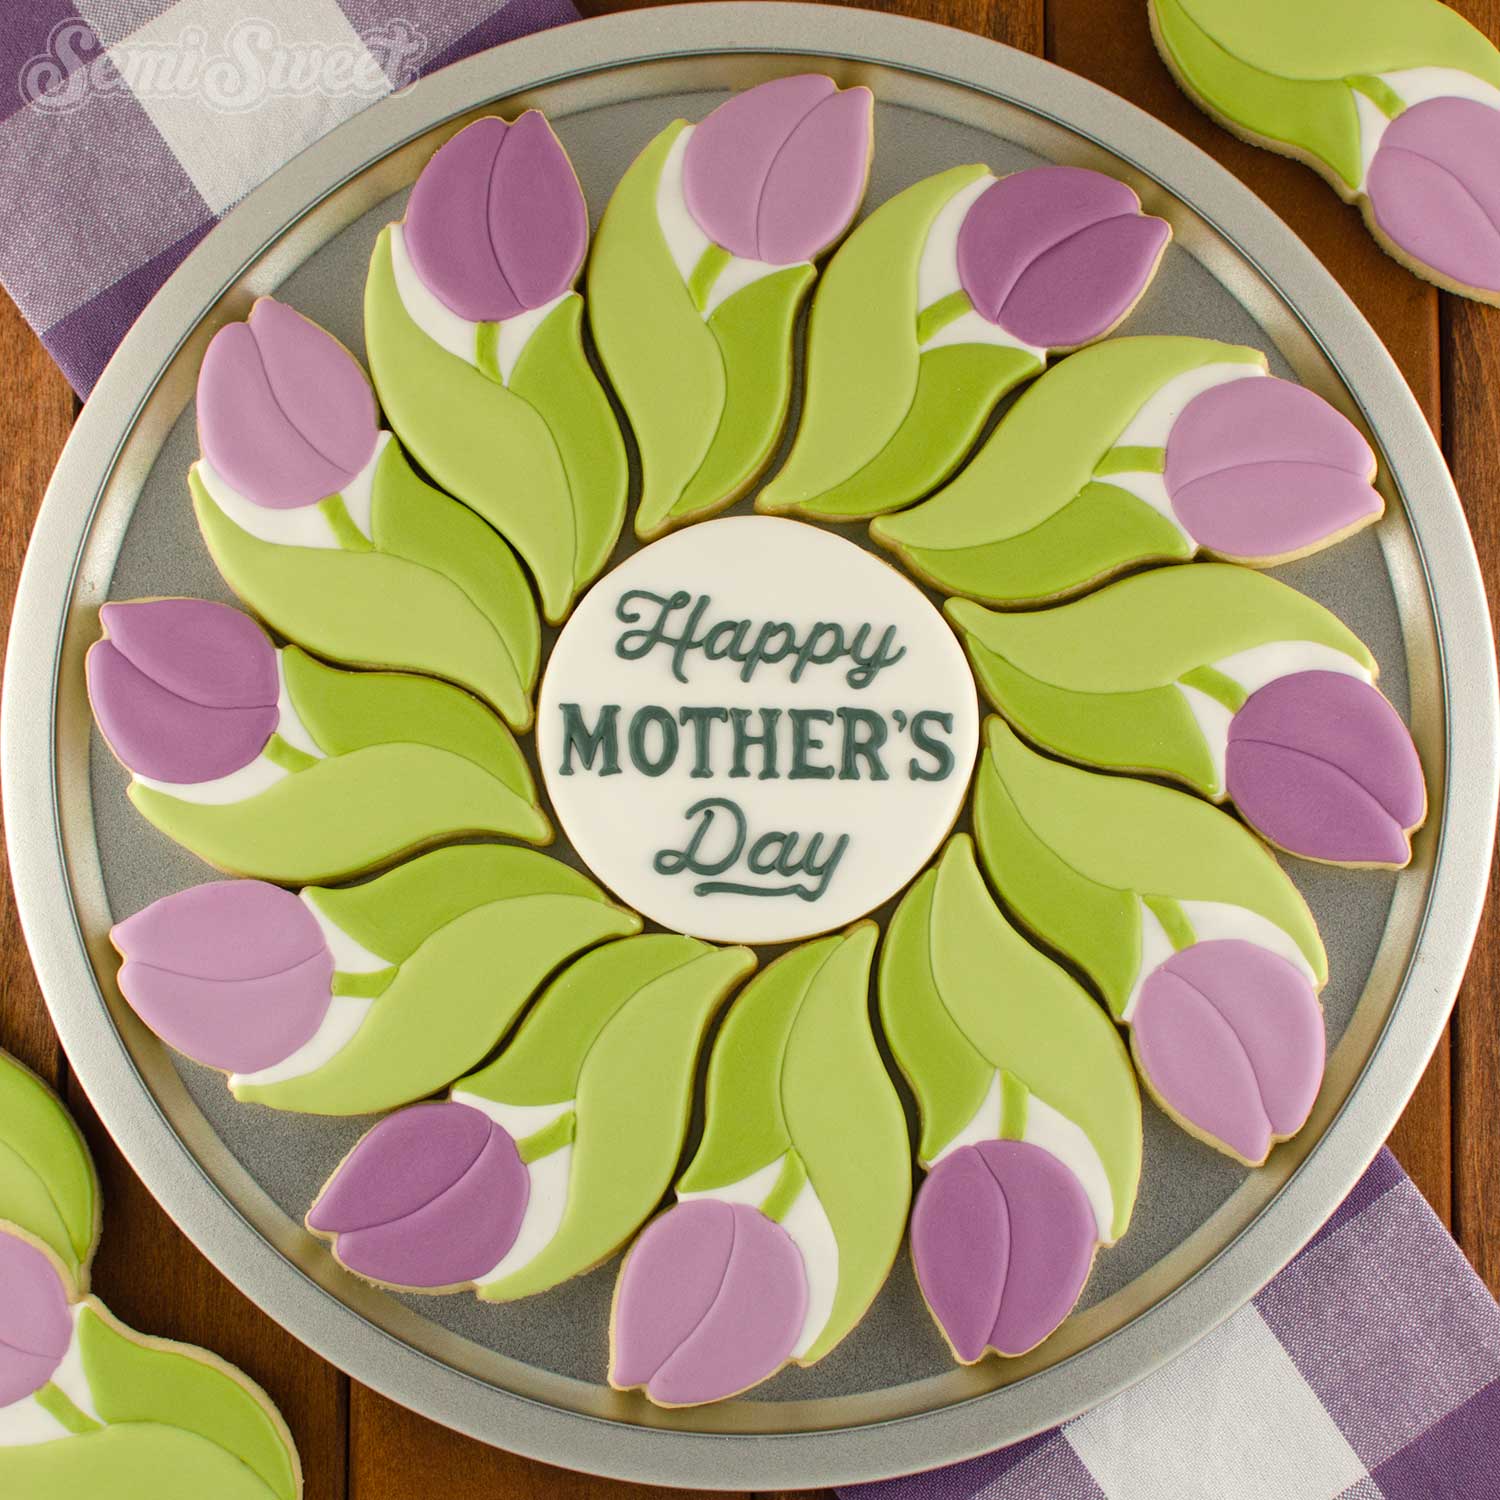
Cookie platters are a wonderful way to wow your guests without too much effort. Each cookie piece is relatively simple in design, but when assembled together as a platter, they create a stunning display for all to see.
This tulip cookie platter is a great example of this. Each tulip cookie is super simple to decorate and don't require that many icing colors to mix up. The wavy design of each flower also locks all the cookies in place to help minimize any shifting in the tray. The wavy pattern is also an interesting visual effect, which is a nice bonus.
Below, I laid out all the steps on how I put this tulip cookie platter together.
Tulip Platter Cookie Cutter Set
New this spring season is this tulip cookie platter set. This set includes 2 cookie cutters: a tulip flower, and a center circle. You can purchase both cookie cutters together, or as a single piece without the circle cutter.
(This is the same circle cutter used in all my platter sets, like this Snowflake set, Spiral Platter, and Floral Wreath, etc.)
There are two sizes available. When arranged as a platter, as shown in the example picture, the platter measures:
LARGE- 12 inches in diameter.
SMALL- 9 inches in diameter.
For this tutorial, I'll be decorating the large size.

Template for the Tulip Cookie Platter
To help with the decorating process, I made a PDF template of all of the new Mother's Day cookie cutters, including this tulip cookie platter design.
You can download all the 2021 Mother's Day cookie templates HERE.
If you have a Kopykake or Pico projector, just print it out (or pull it up on your mobile device) and you are good to go. For those without a projector, follow the suggested steps below by tracing the design onto the cookie with an edible food marker.
The Cookie Decorating Process
For this tulip cookie platter, you will need the following suggested colors:
- Purple royal icing (I used Rainbow Dust Purple.)
- Light Purple (I just added less Rainbow Dust Purple than above.)
- White icing (I used Americolor Bright White.)
- Green icing (I used Cookie Countess Succulent Green.)
- Light Green icing (I added less Cookie Countess Succulent Green than above.)
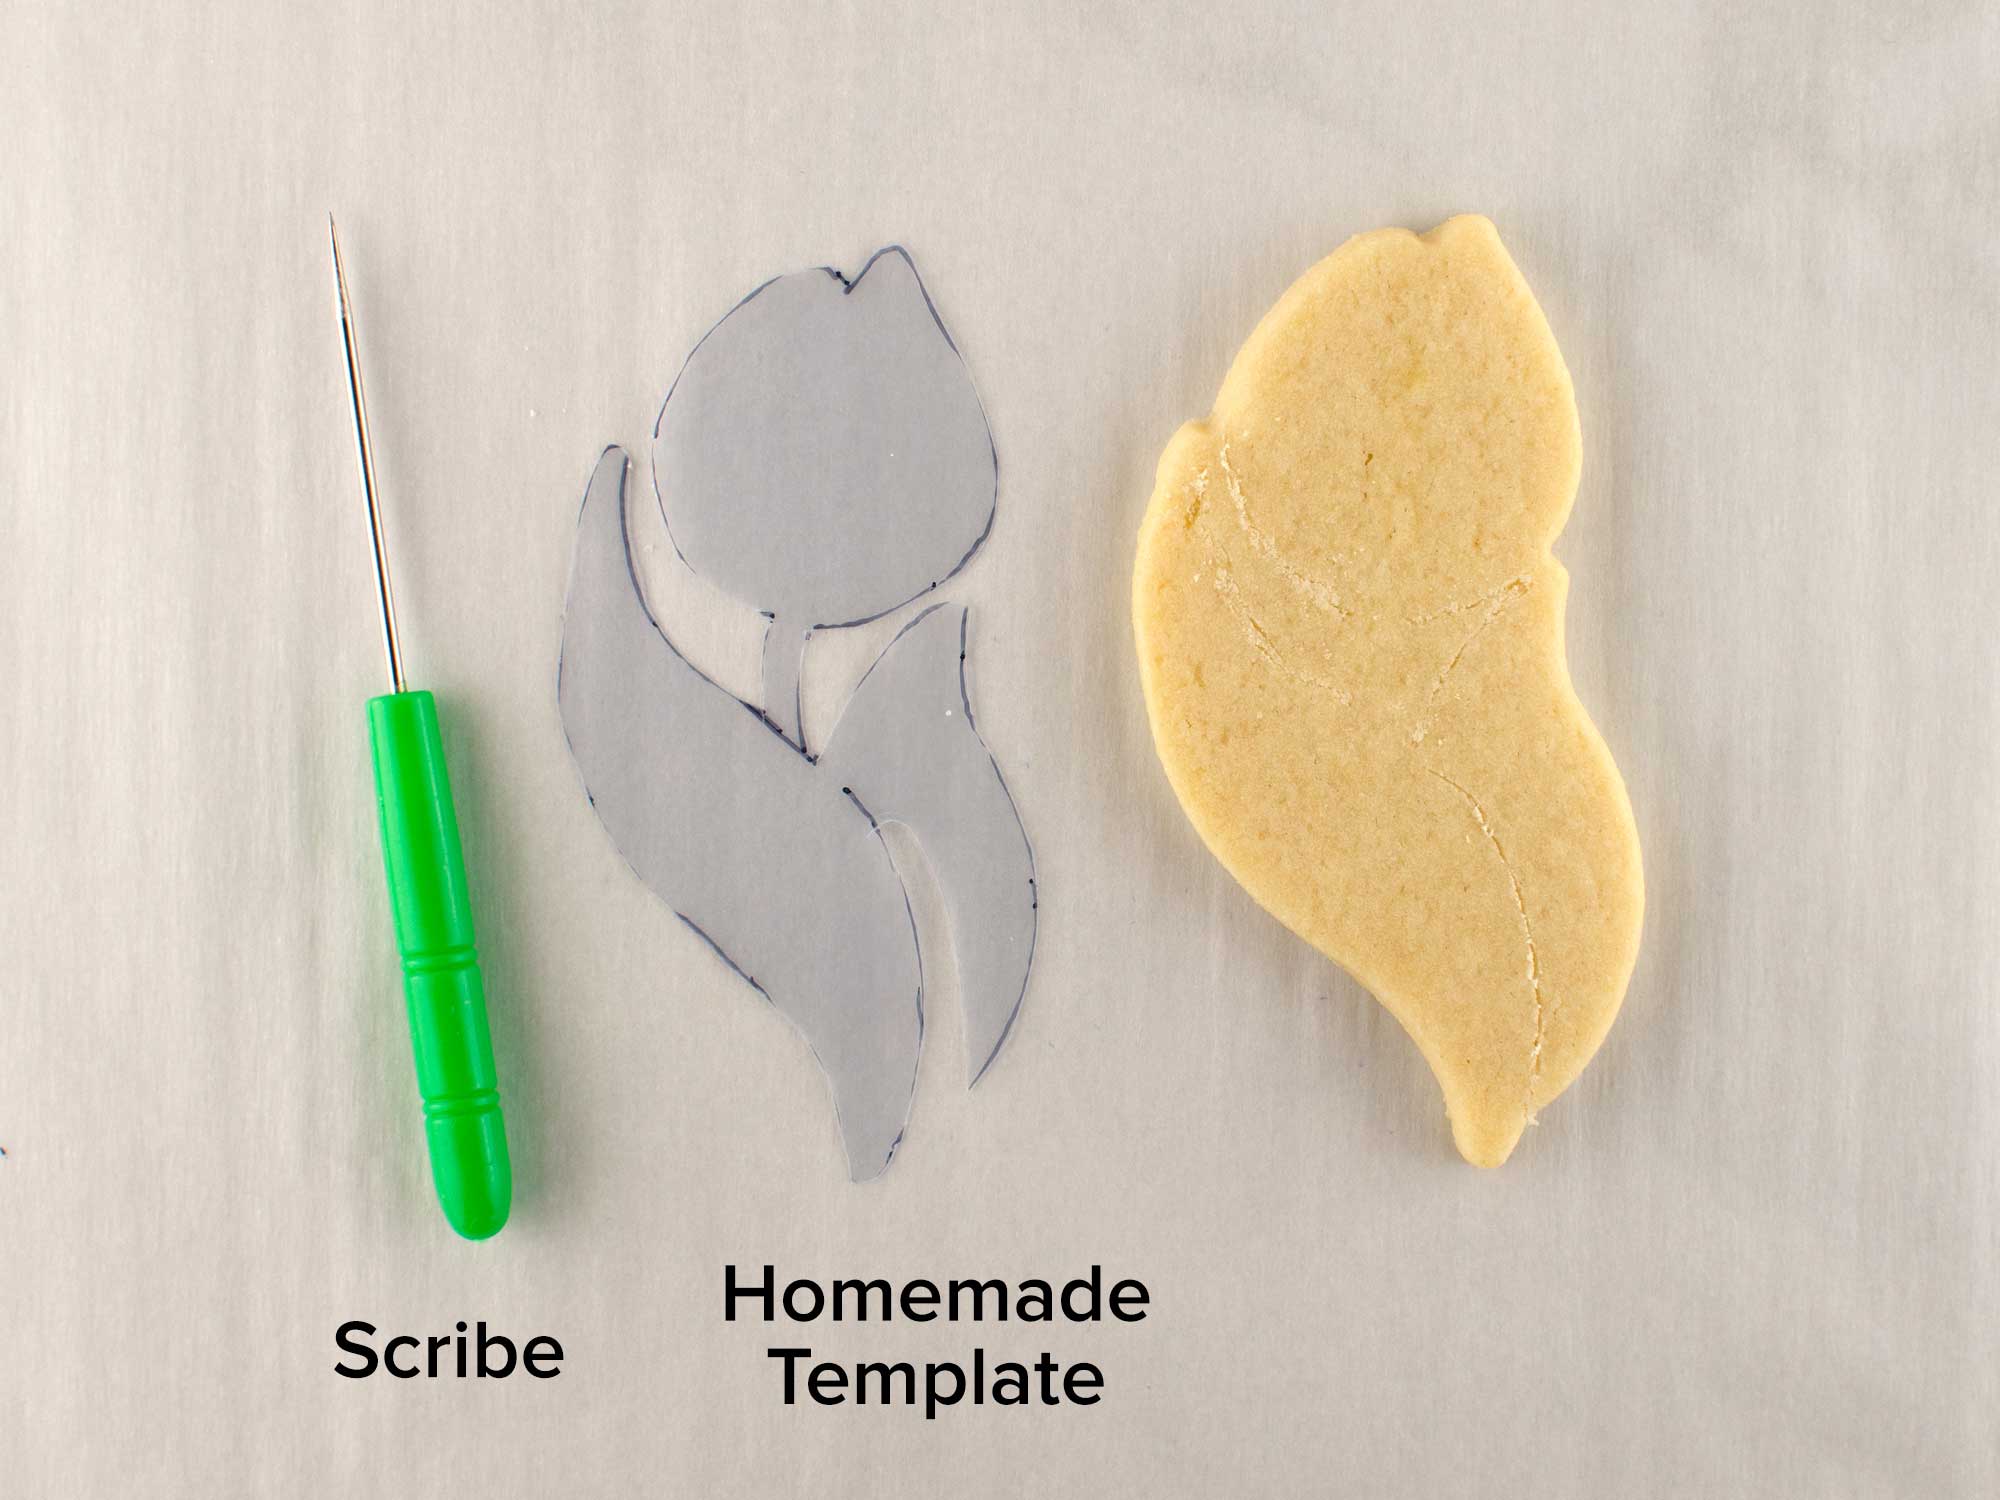
Step 1
For those without a projector, score or etch guidelines where the leaves and the top petals should be, as shown. I made a template with template plastic from the PDF file above and used a scribe tool to etch the guideline on the cookie.
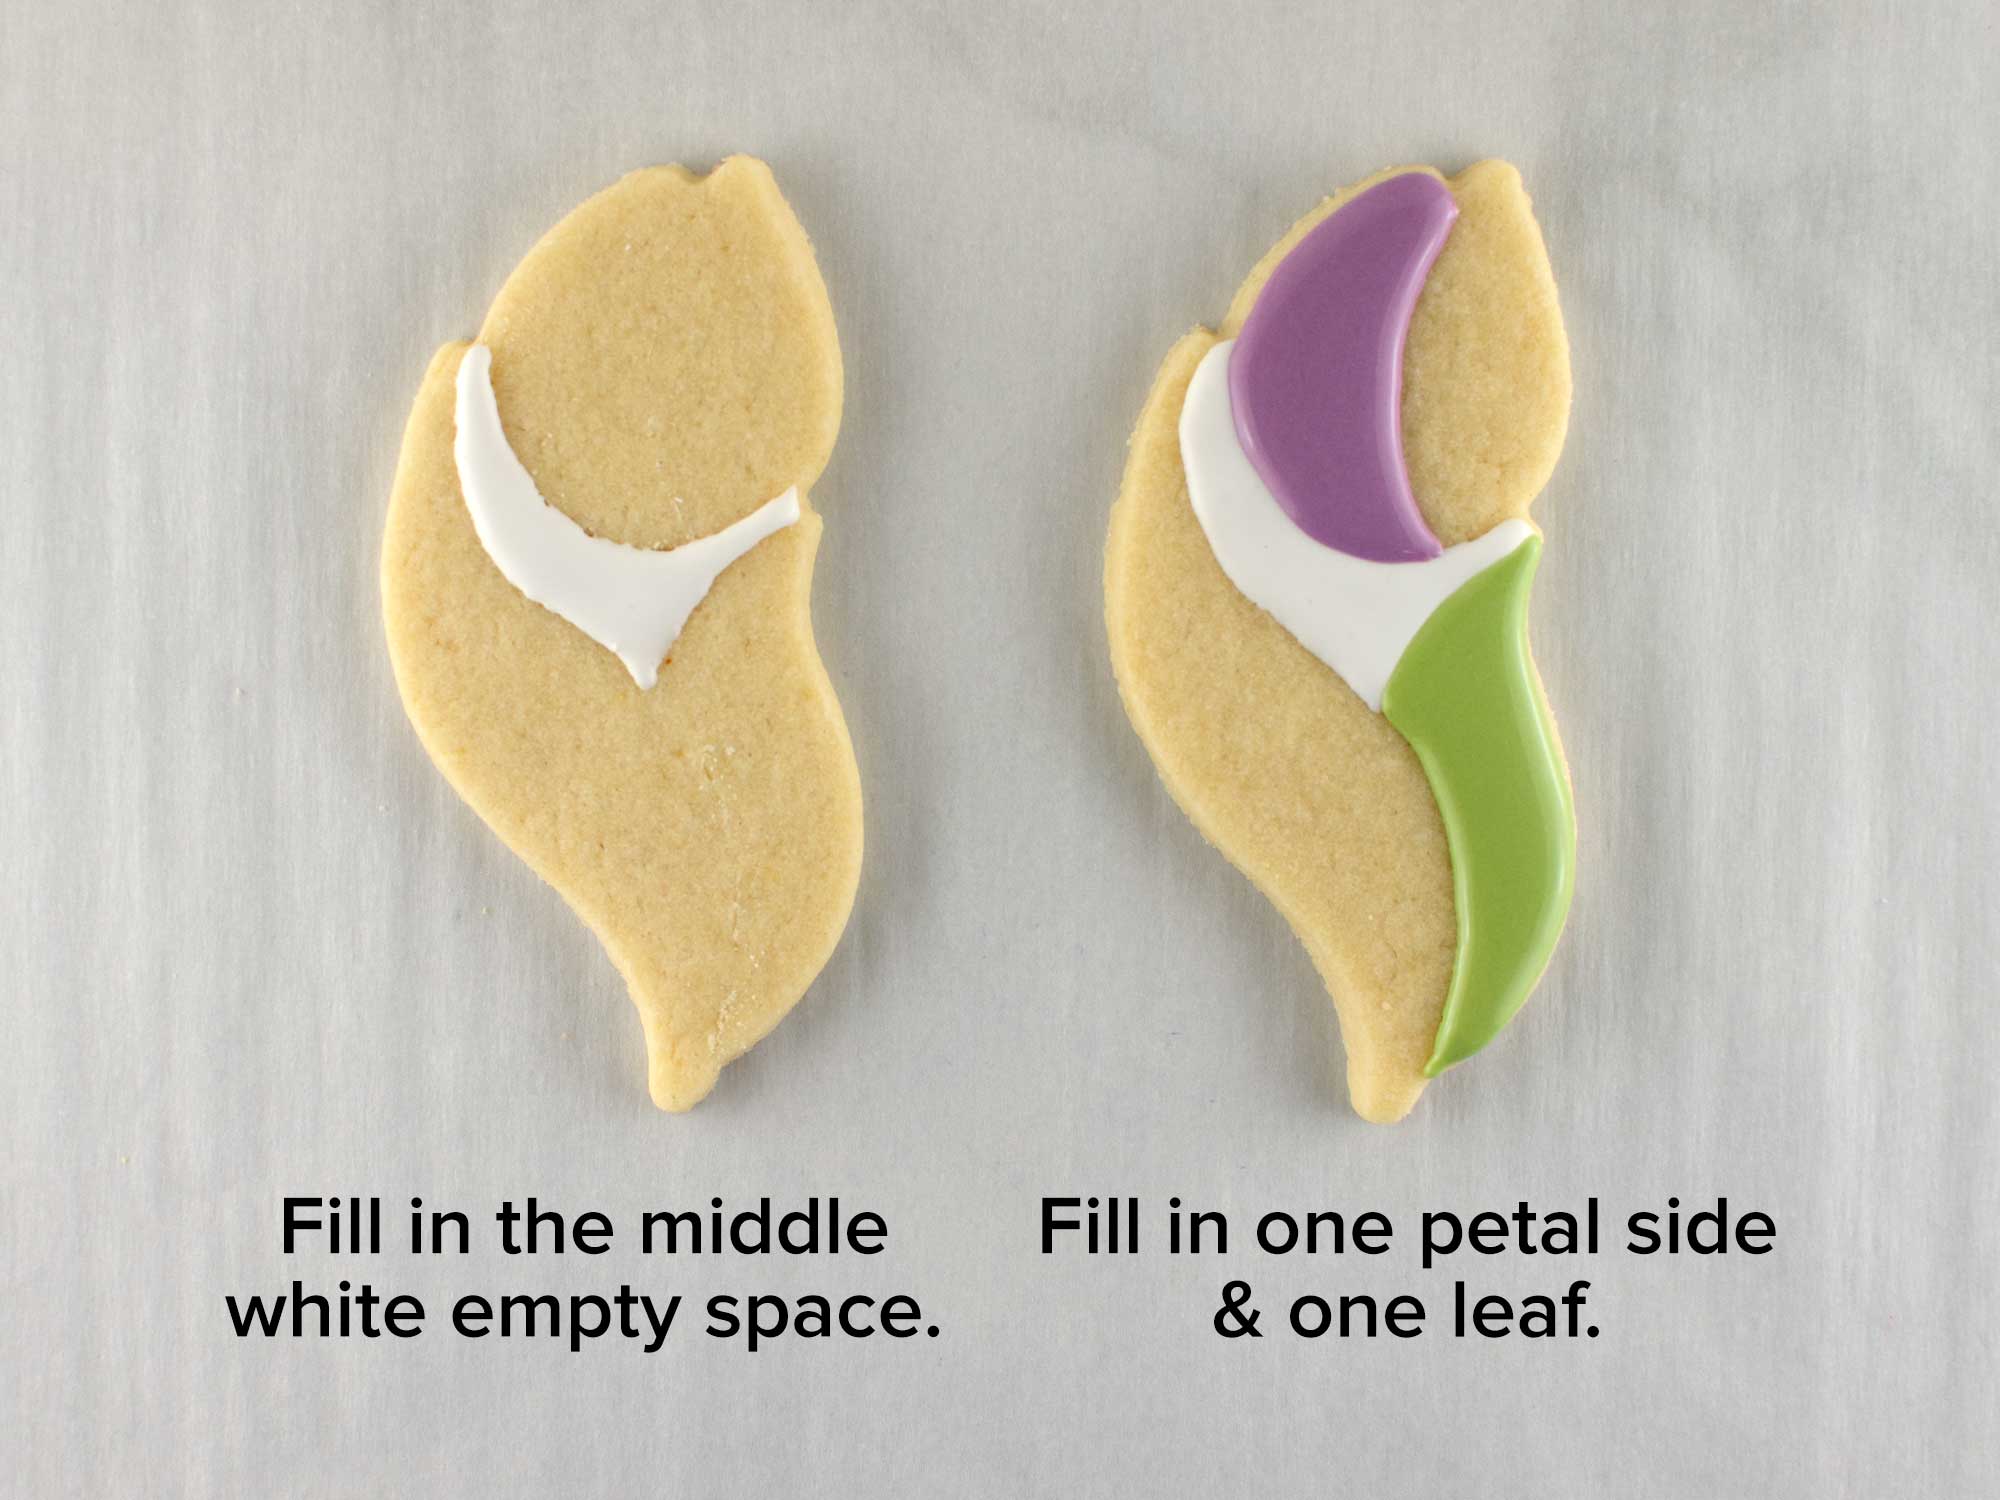
Step 2
Start by filling the empty space in the middle with a thin layer of white icing. Let that icing dry.
Then fill in one side of the petal bulb and one of the leaves. Let this icing set for about 15 minutes.
Step 3
Next, fill in the other side of the petal bulb and fill in the other leaf. Add a stem in the middle.
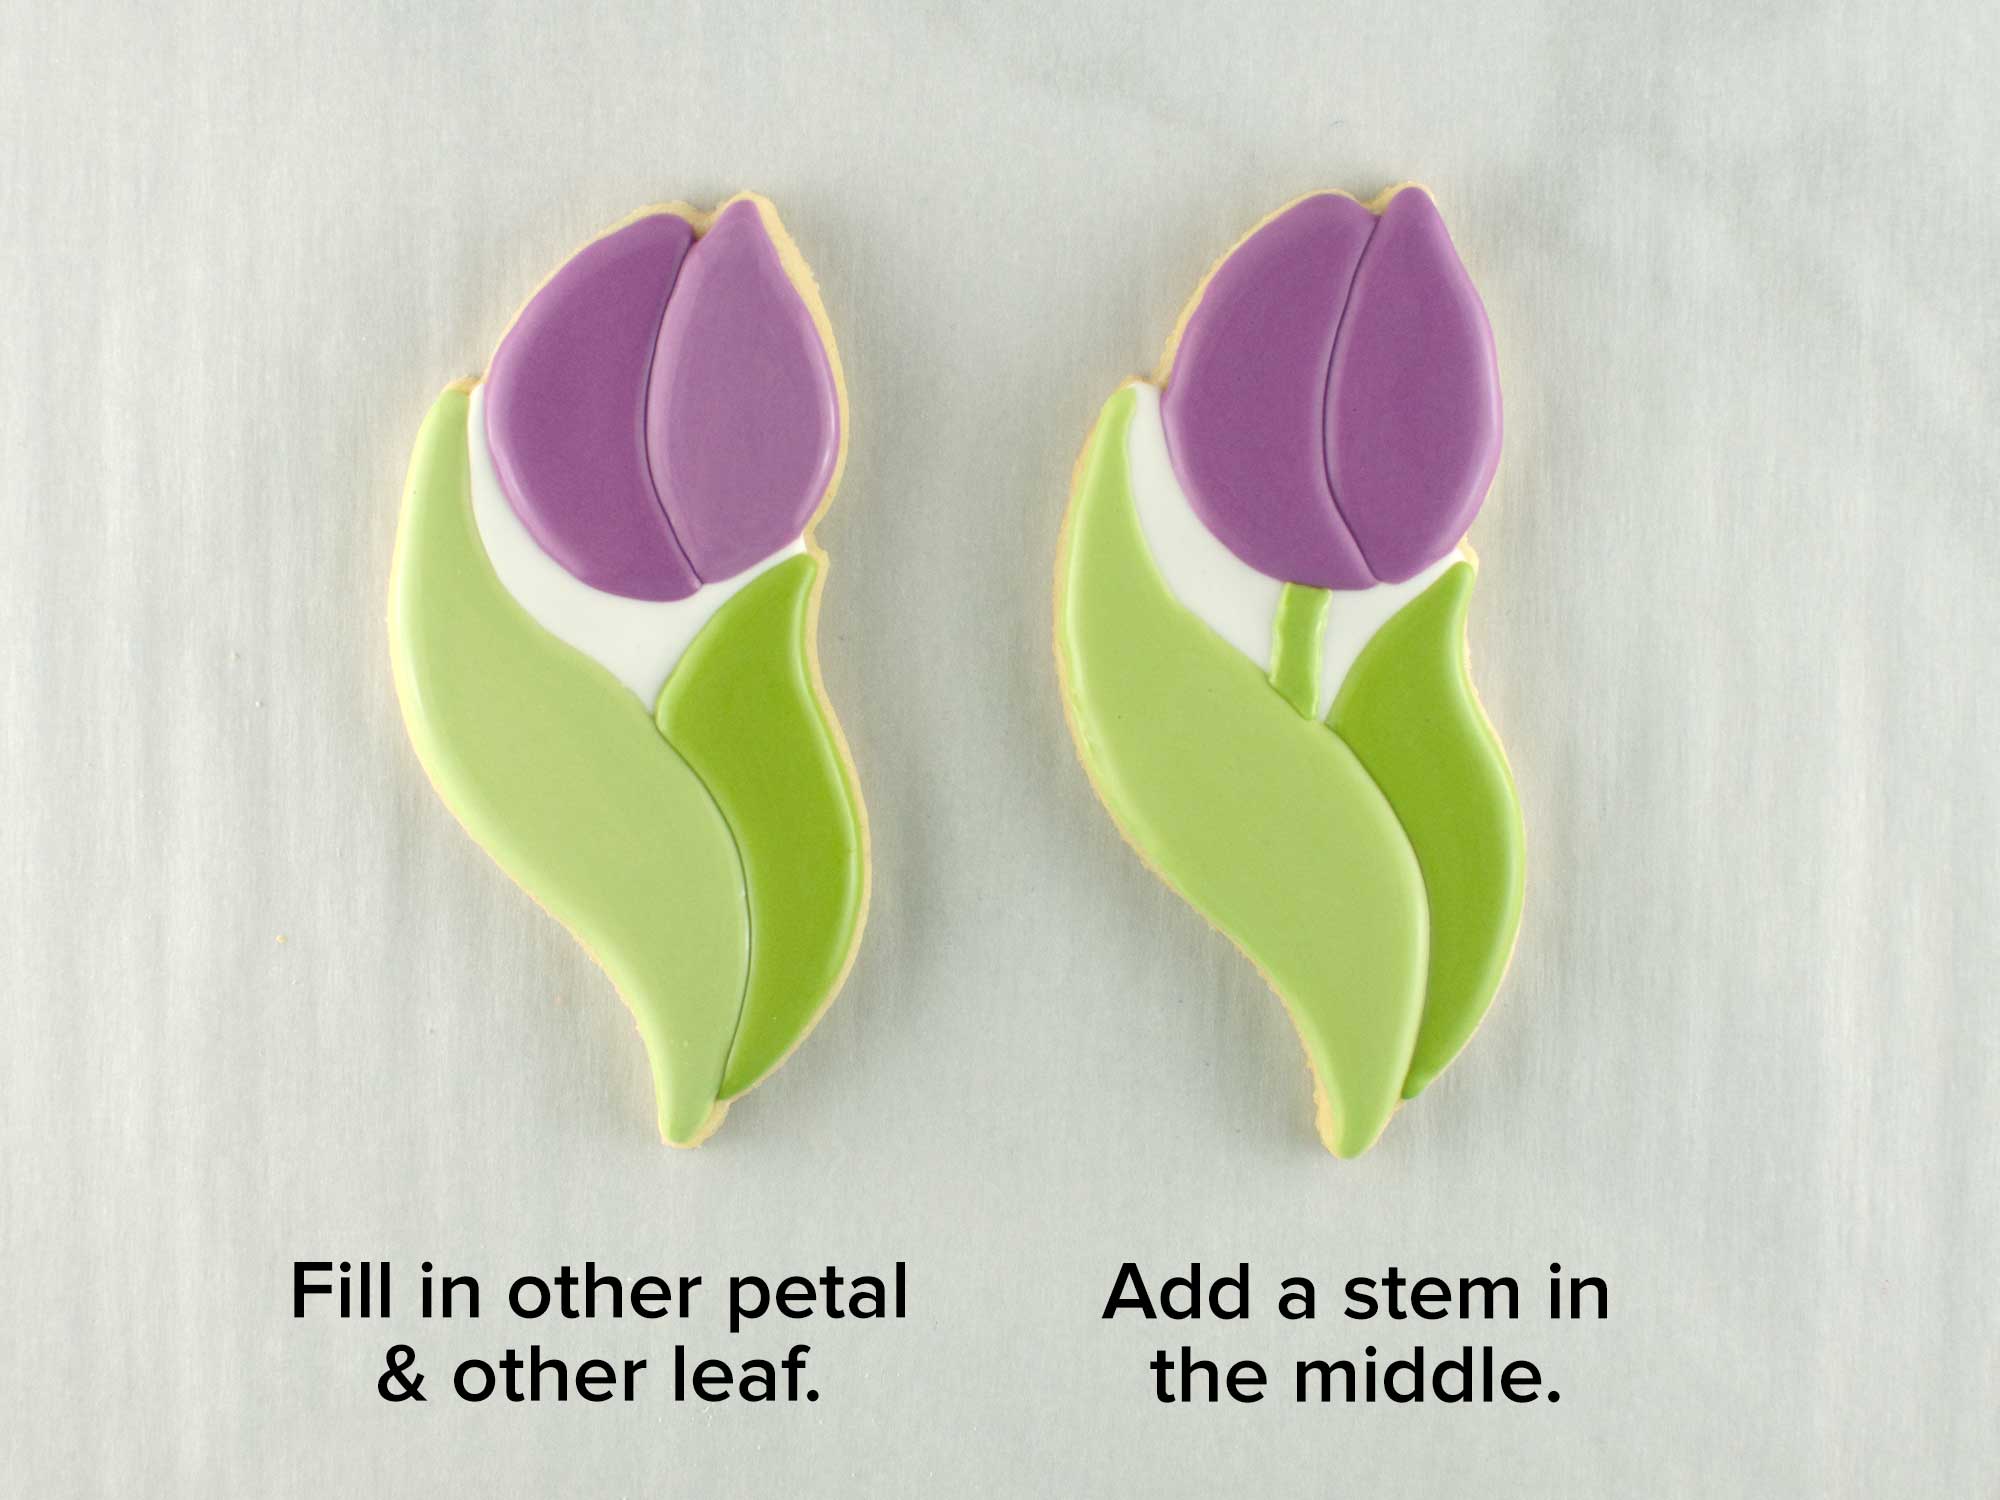
For the center circle cookie, I added the phrase "Happy Mother's Day" using my pico projector. (You can see how I piped a similar message in this sunflower platter tutorial.)
Tulip Cookie Platter Video Tutorial
The steps above are summarized in this time-lapsed video I put together.
The finished tulip cookie platter takes 12 tulip cookie pieces to complete the wreath, with one circle cookie in the middle.
For platter packaging ideas, I like this method I used on this snowflake platter. (Check the end of that post for the packaging details.)
Now that you know how to recreate this tulip cookie platter, there's tons of more Mother's Day cookie cutters in our shop worth looking into next. They are just as adorable as this tulip design and span across all decorating levels, from beginners to experts. Whatever your next cookie cutter design you pick, they're sure to be an absolute hit for any Mother's Day celebration!
For more Mother's Day cookie ideas, be sure to check out more blog tutorials down below. Happy baking!
- How to Make a Flower Cart Cookie Set
- How to Make a Tulip Watering Can Cookie
- How to Make Mother Duck Cookies
- How to Make Apron Cookies
- How to Make Stand Mixer Cookies
- How to Make Mama Bear Cookies for Mother's Day
Add Vibrant Colors with Americolor Food Coloring

To make your decorated cookies pop, use Americolor Food Coloring for bold, consistent colors. It’s my go-to brand for achieving vibrant shades without altering the consistency of the royal icing.
Buy NowTags:
You may also like...


Mike Tamplin
Hi, I’m Mike, the cookie decorator behind Semi Sweet Designs! Since 2011, I’ve been sharing recipes, tips, and tutorials to help beginners gain confidence and give experts fresh inspiration. Along with my brother, Billy, we design and offer hundreds of cookie cutters, stencils, and apparel—all made with decorators in mind.
Whether you're just starting or a seasoned pro, we’re here to make cookie decorating easier and more fun!
Read more


