How to Decorate a Beach-Themed Cookie Platter with Royal Icing
Learn how to decorate a fun summer beach cookie platter with sand castles, hermit crabs, and ocean waves using royal icing and coordinating cookie cutters from our shop.

Bring a little sunshine to your cookie decorating with this fun summer beach-themed cookie platter tutorial! In this step-by-step guide, I’ll show you how to decorate an ocean-inspired platter featuring adorable sand castle cookies, cute hermit crab cookies, and a center cookie designed with layered ocean waves. This set is beginner-friendly while still looking impressive for summer parties, beach birthdays, or vacation-themed celebrations. Grab your royal icing and let’s create a sweet seaside scene together! The coordinating cookie cutters used in this tutorial are available in our shop.
My Essential Cookie Tools for Cookie Decorating


My Essential Cookie Tools for Baking Cookies


My Essential Baking Tools for Royal Icing


Essential Decorating Tools for Royal Icing

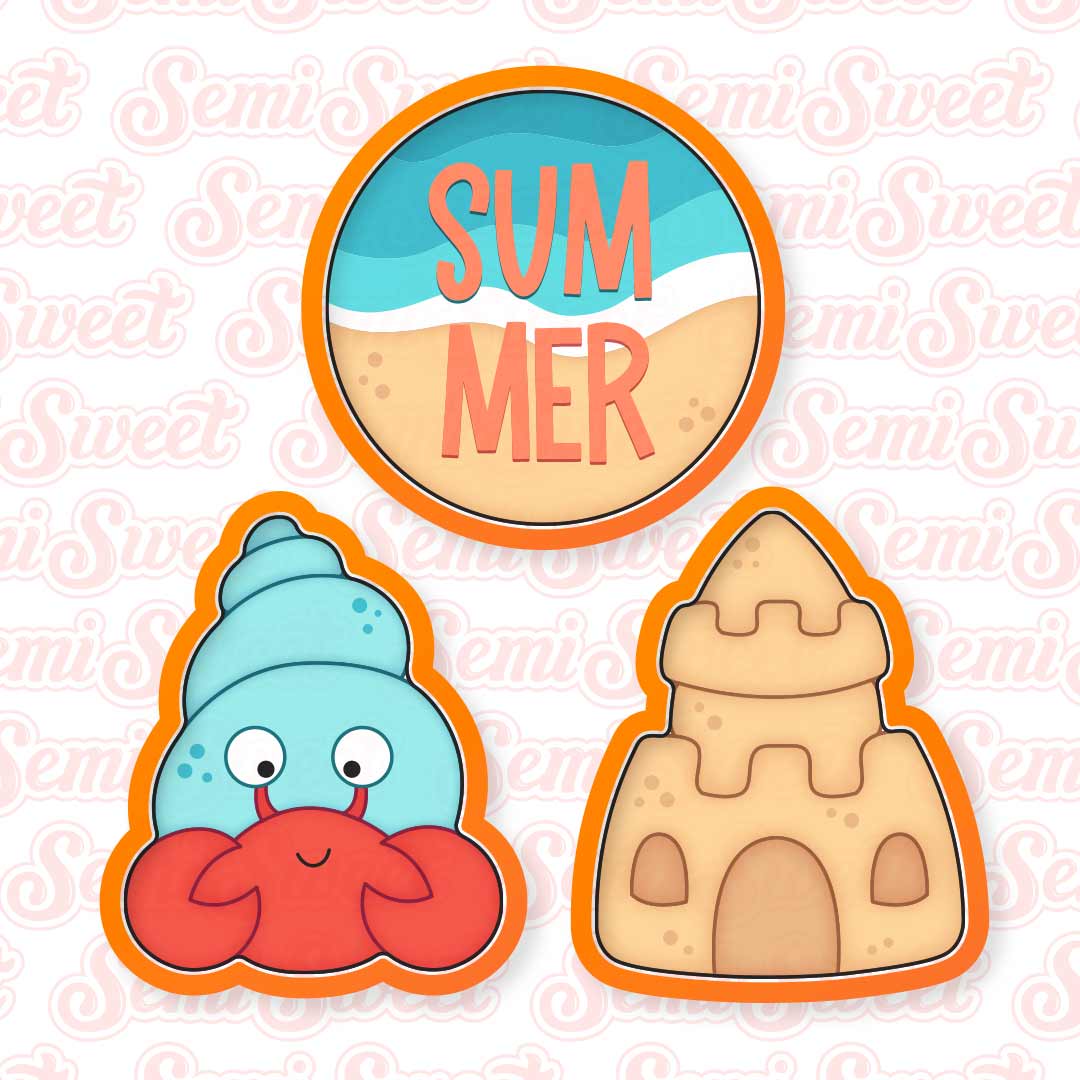
Beach Sand Castle & Hermit Crab Platter Cookie Cutters
This sand castle hermit crab platter cookie cutter set includes a sand castle cookie cutter, a hermit crab cookie cutter, and a center circle cutter. You can purchase cookie cutters together as a 3-piece set, or as a 2-piece cutter set without the center circle.
(This is the same circle cutter used in all my platter sets, like this fruit cookie platter, hibiscus cookie platter, and flamingo cookie platter, etc.)
There are two sizes available. When arranged as a platter, as shown in the example picture, the platter measures:
LARGE- 12 inches in diameter.
SMALL- 9 inches in diameter.
For this tutorial, I'll be decorating the large size.
Template for the Beach Cookie Platter
To help with the decorating process, I made a PDF template of all of the new cookie platter cutters, including this beach cookie platter design.
You can download all the 2025 platter cookie templates HERE.
If you have a Kopykake or Pico projector, just print it out (or pull it up on your mobile device) and you are good to go. For those without a projector, follow the suggested steps below by tracing the design onto the cookie with an edible food marker.
The Cookie Decorating Process
Decorating cookies always starts with a good royal icing recipe. This is my favorite royal icing recipe that I use to decorate sugar cookies.
For this beach cookie platter, you will need the following suggested colors:
- Light Teal icing (I used Americolor Teal.)
- Medium Teal icing (I added a little more Americolor Teal.)
- Dark Teal icing (I mixed Americolor Teal with a touch of Americolor Super Black.)
- Light Tan icing (I mixed Americolor Ivory with a touch of Americolor Warm Brown and Americolor Electric Green.)
- Dark Tan icing (I mixed more concentration of light tan icing.)
- White icing (I used Americolor Bright White.)
- Black icing (I used Americolor Super Black.)
- Red icing (I used Americolor Super Red.)
Step 1
For the sand castle cookie, begin by first filling in the top tower space with light tan icing (then quickly add dark tan dots, as shown). Also, fill in the door and windows with a thin layer of dark tan icing. Let that icing set.
Next, add the top crown detail with light tan icing. Then fill the bottom section around the door and windows with light tan icing. Immediately add the dark tan dot details.

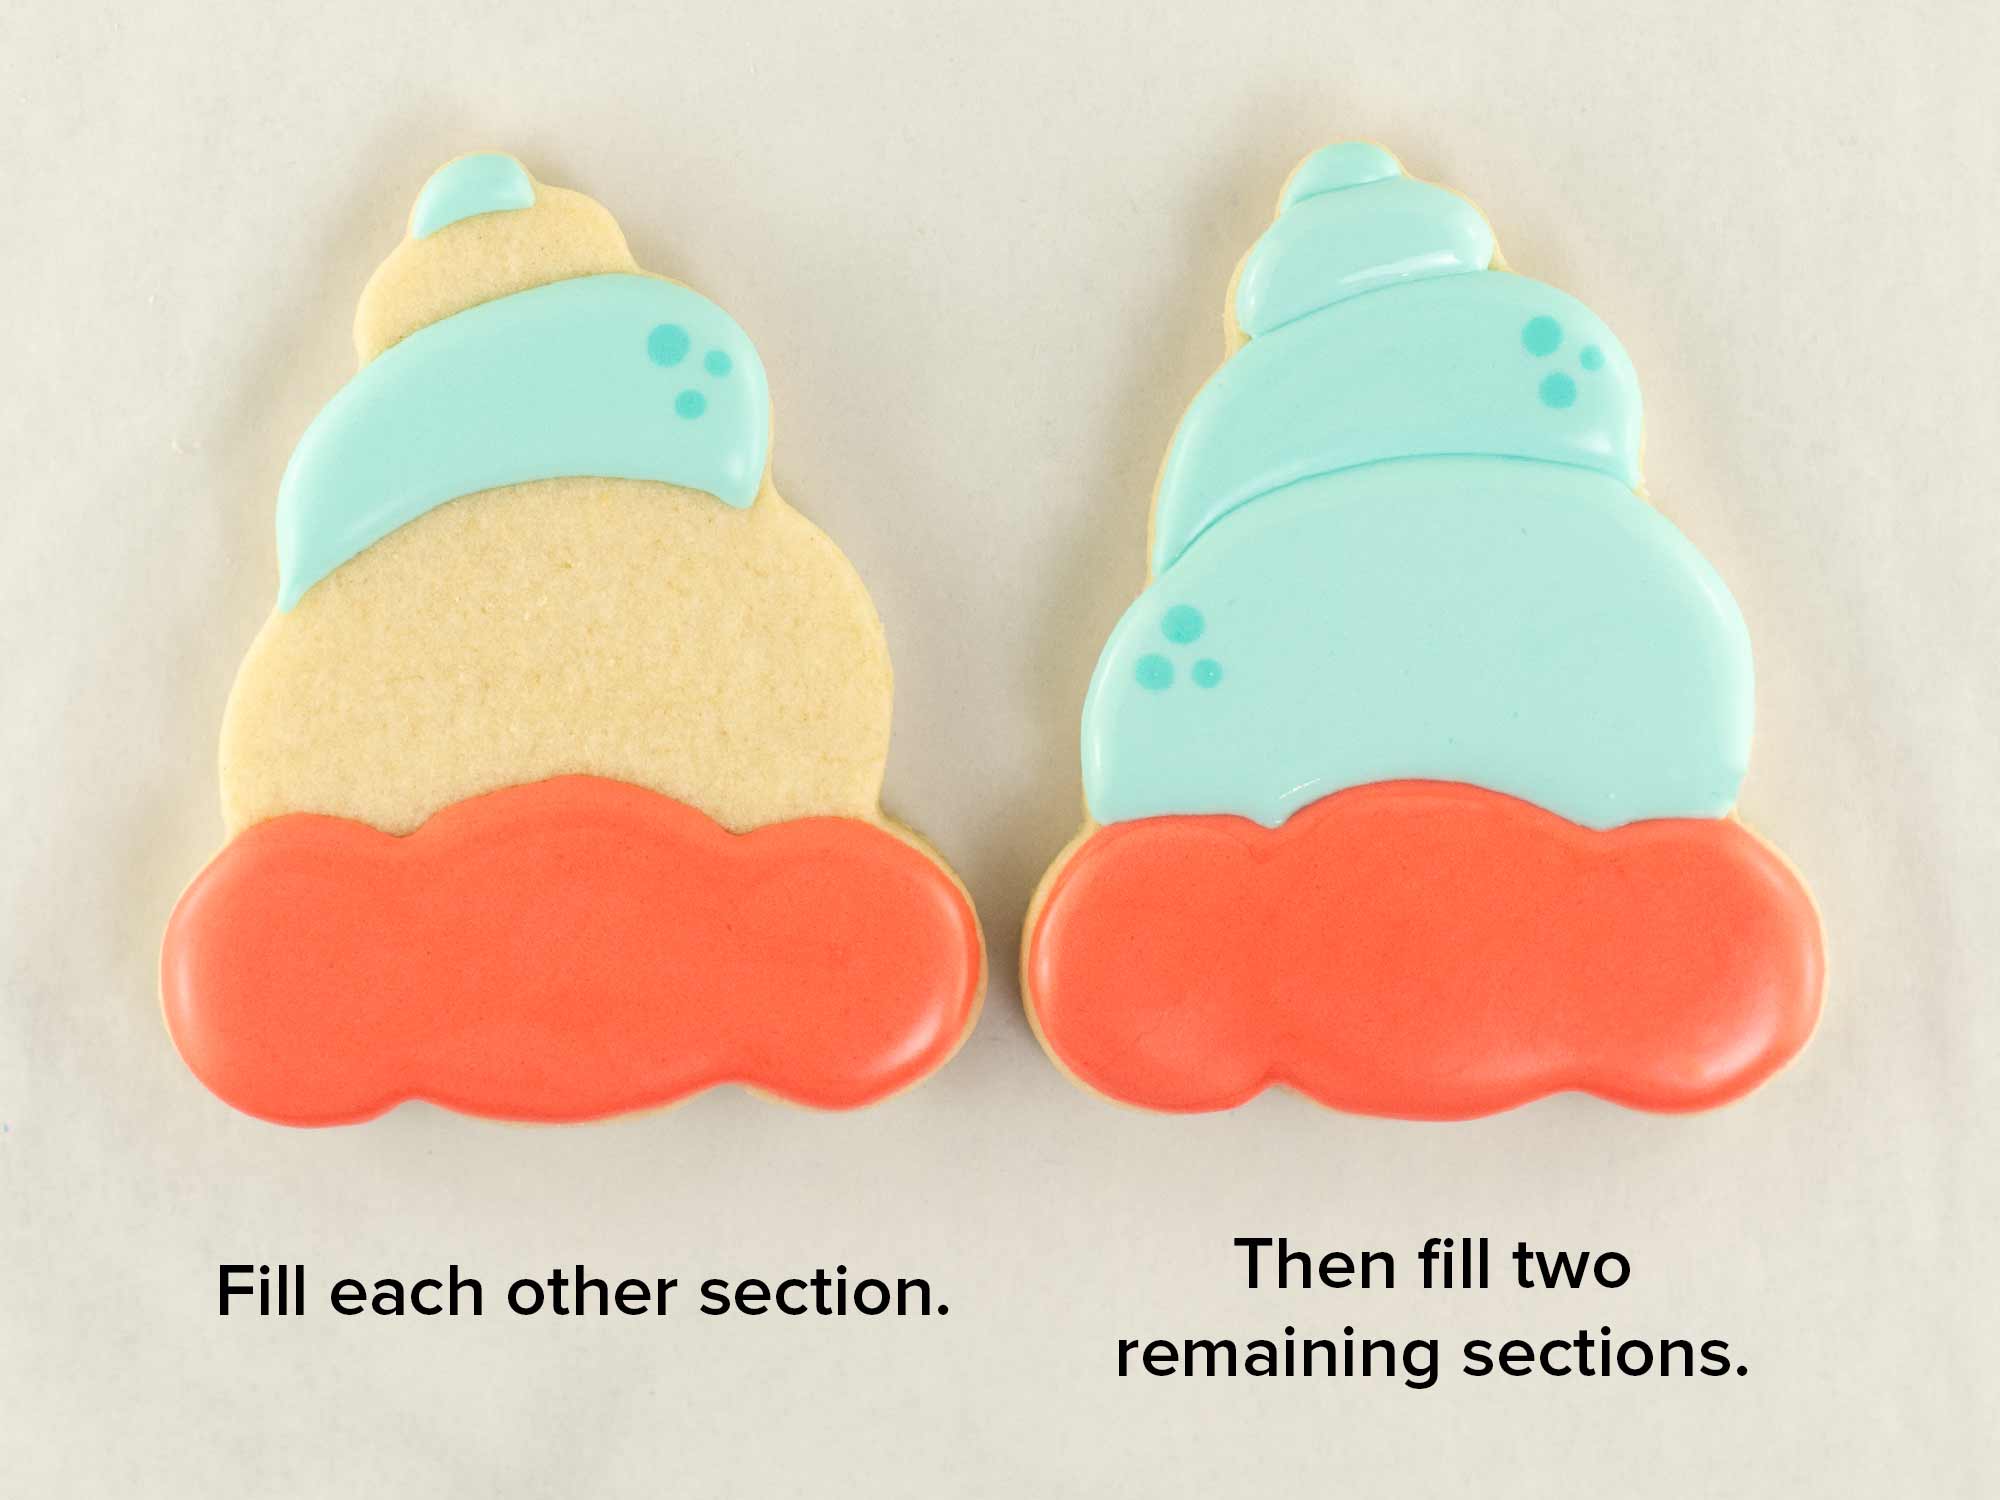
Step 2
For the hermit crab cookie, begin by filling in every other section. I filled the red crab body, and the middle and top sections of the shell. Quickly add the dark teal dots to the shell. Let that icing set.
Next, fill in the remaining two sections of the shell. Add the dark dots, as well.
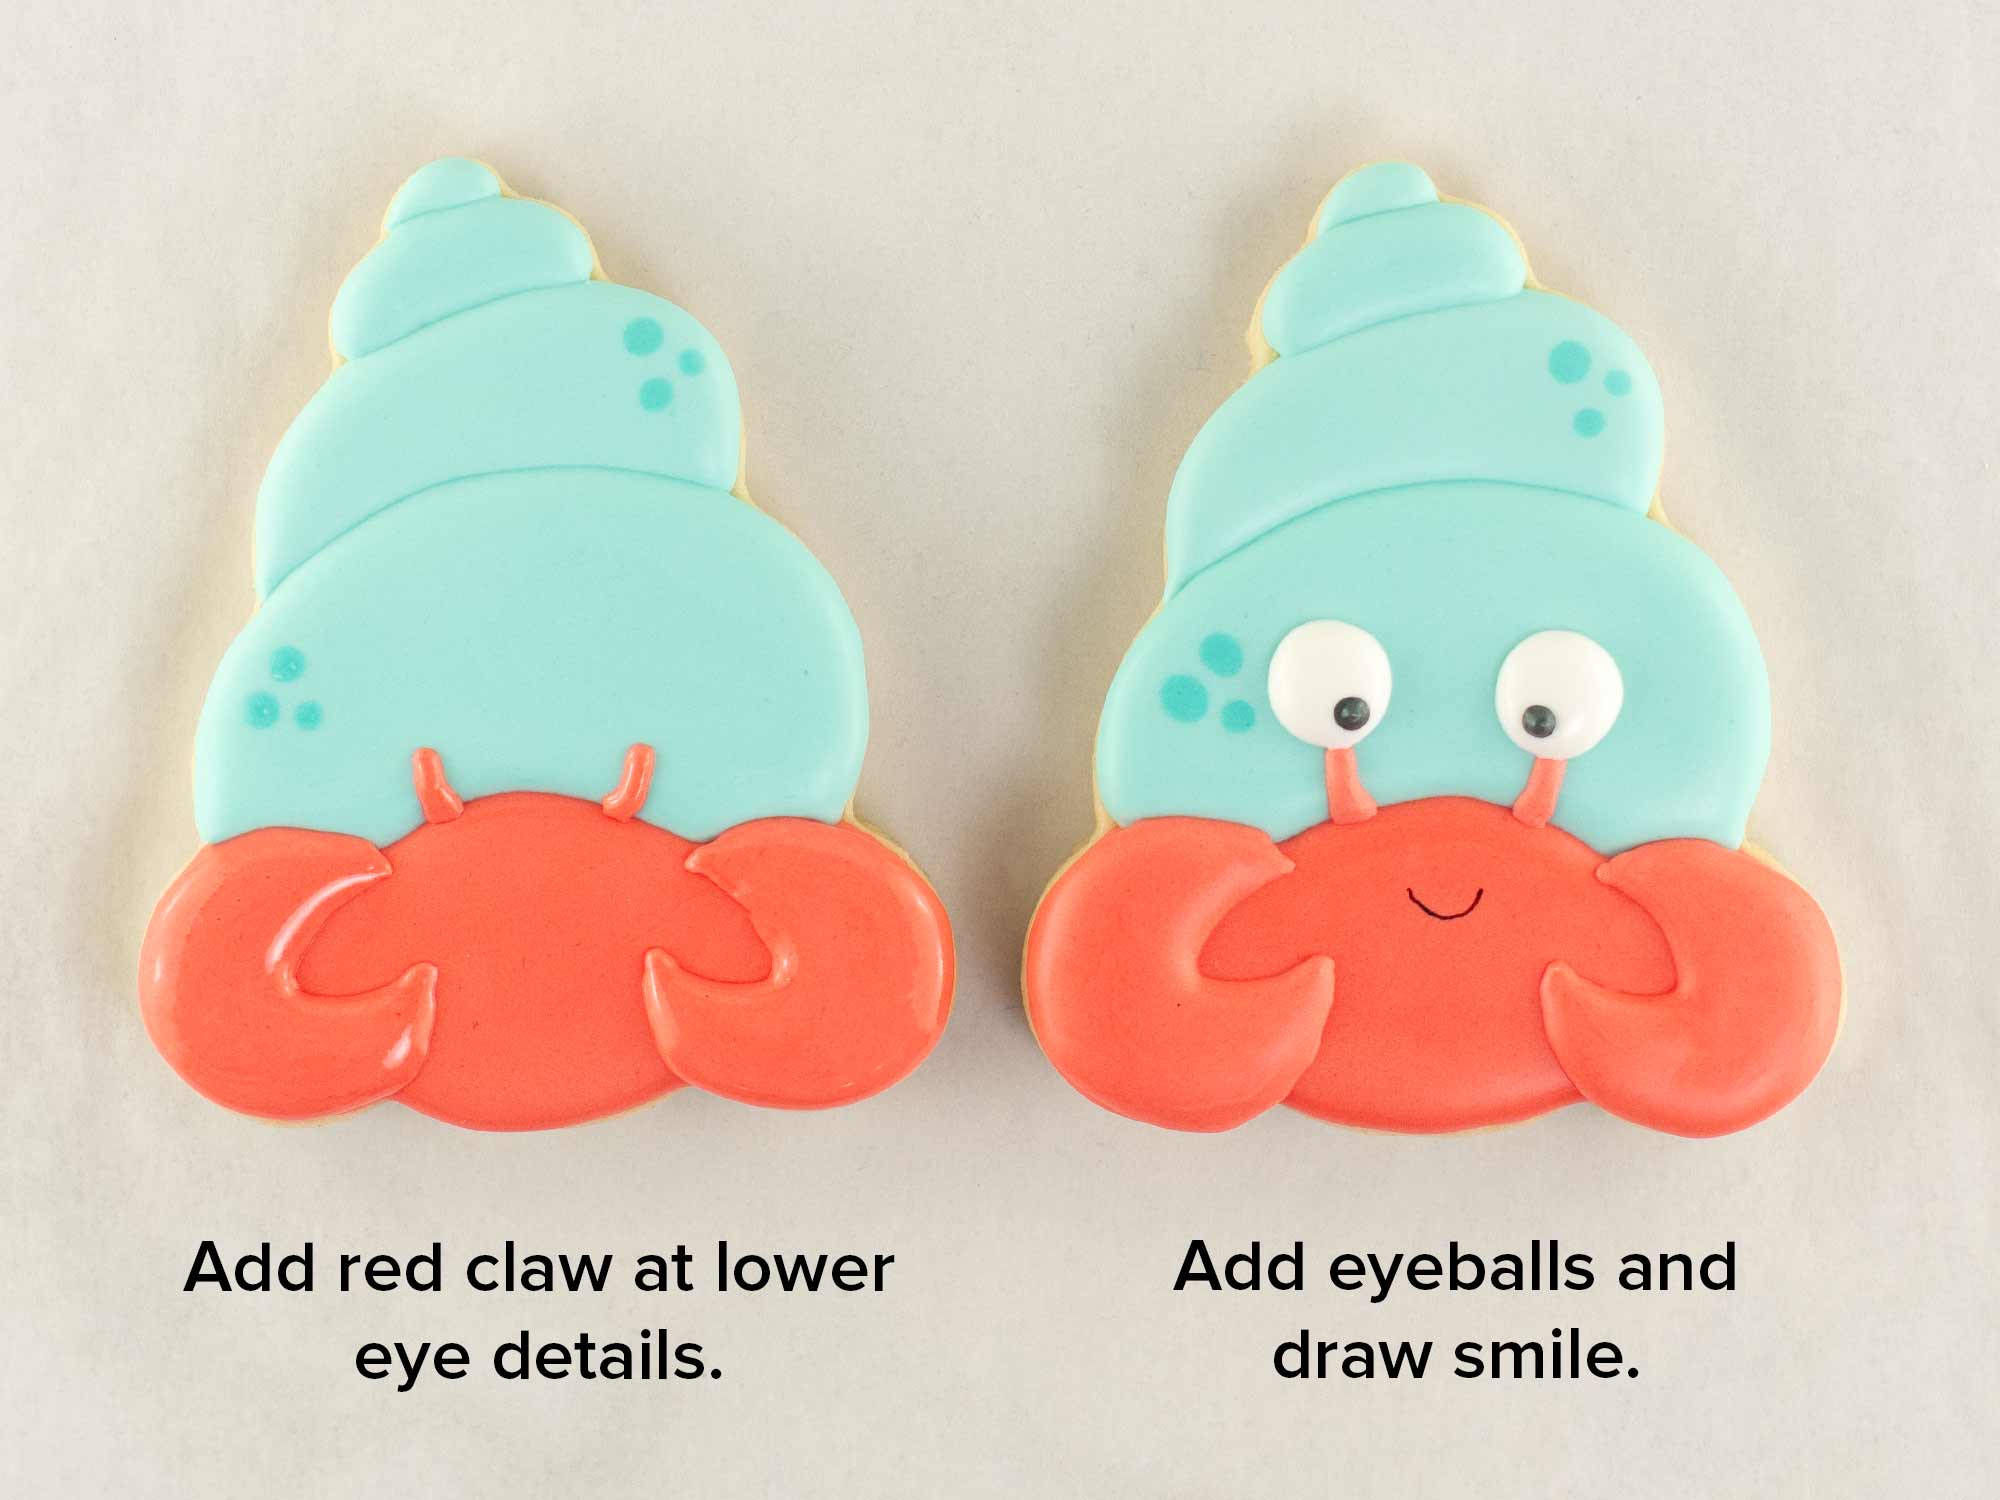
Step 3
Next, add the red claw and lower eye details, as shown.
Then add the white and black eye balls. Draw on the smile with a black food pen.
Step 4
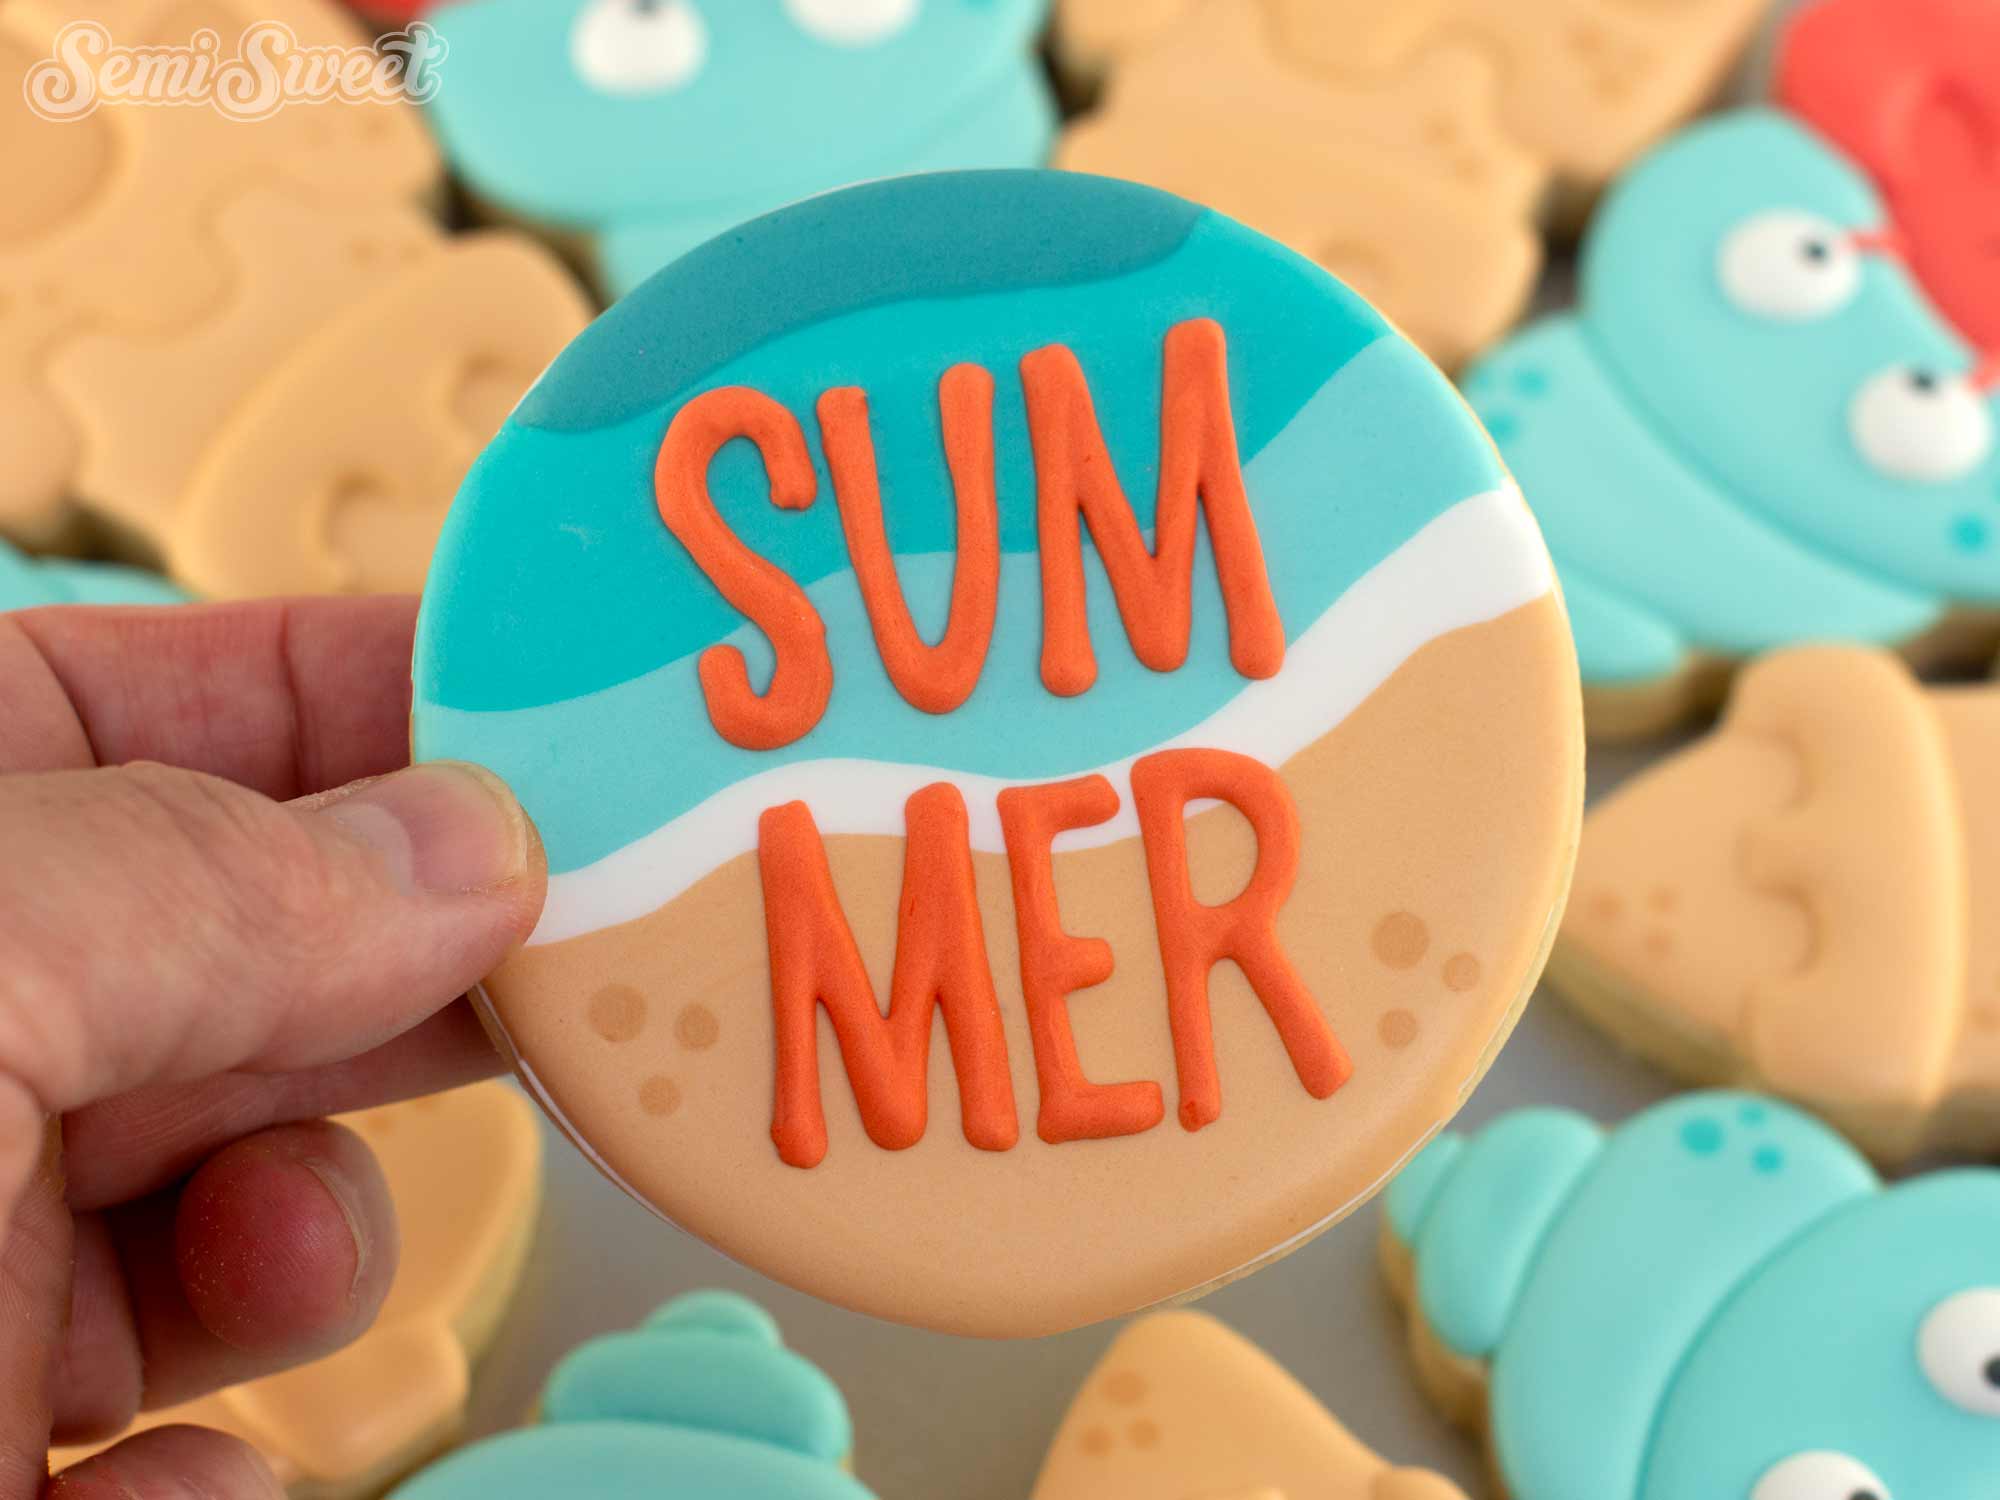
For the center beach ocean waves cookie, begin by outlining the edge of the cookie and the different sections of the ocean, as shown, with white icing.
Then fill in the different wave sections quickly, going from top to bottom, from darkest teal to light teal to white to tan.

Step 5
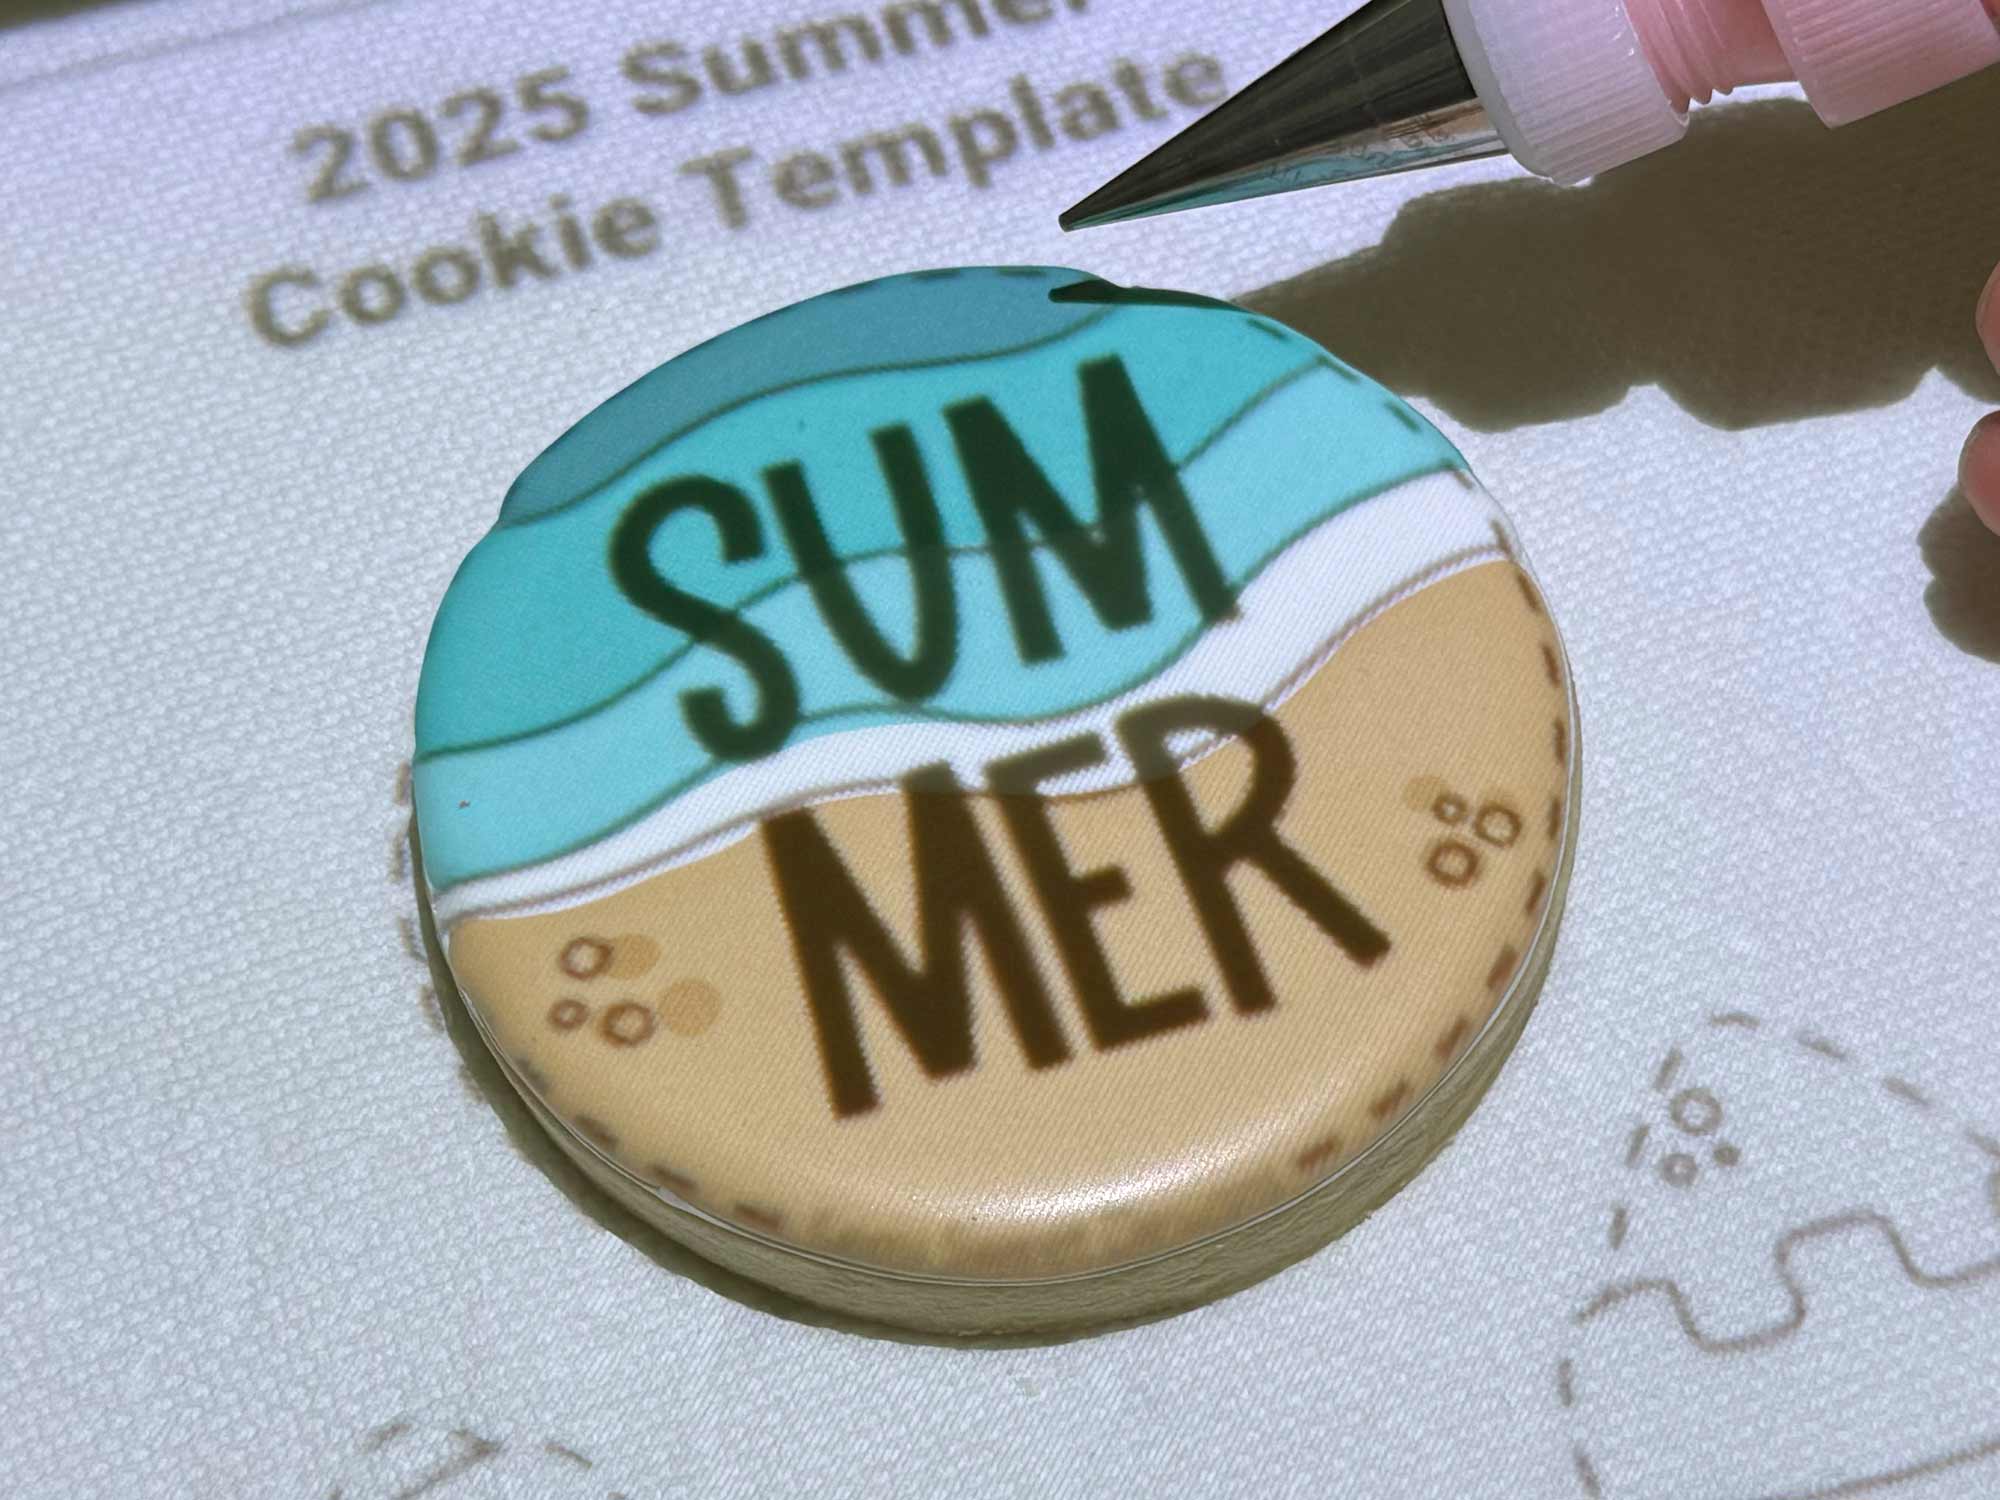
Next, I used a cookie pico projector to help add the word, "SUMMER", to the middle of the cookie.
Beach Cookie Platter Decorating Video Tutorial
The steps above are summarized in this time-lapsed video I put together below.
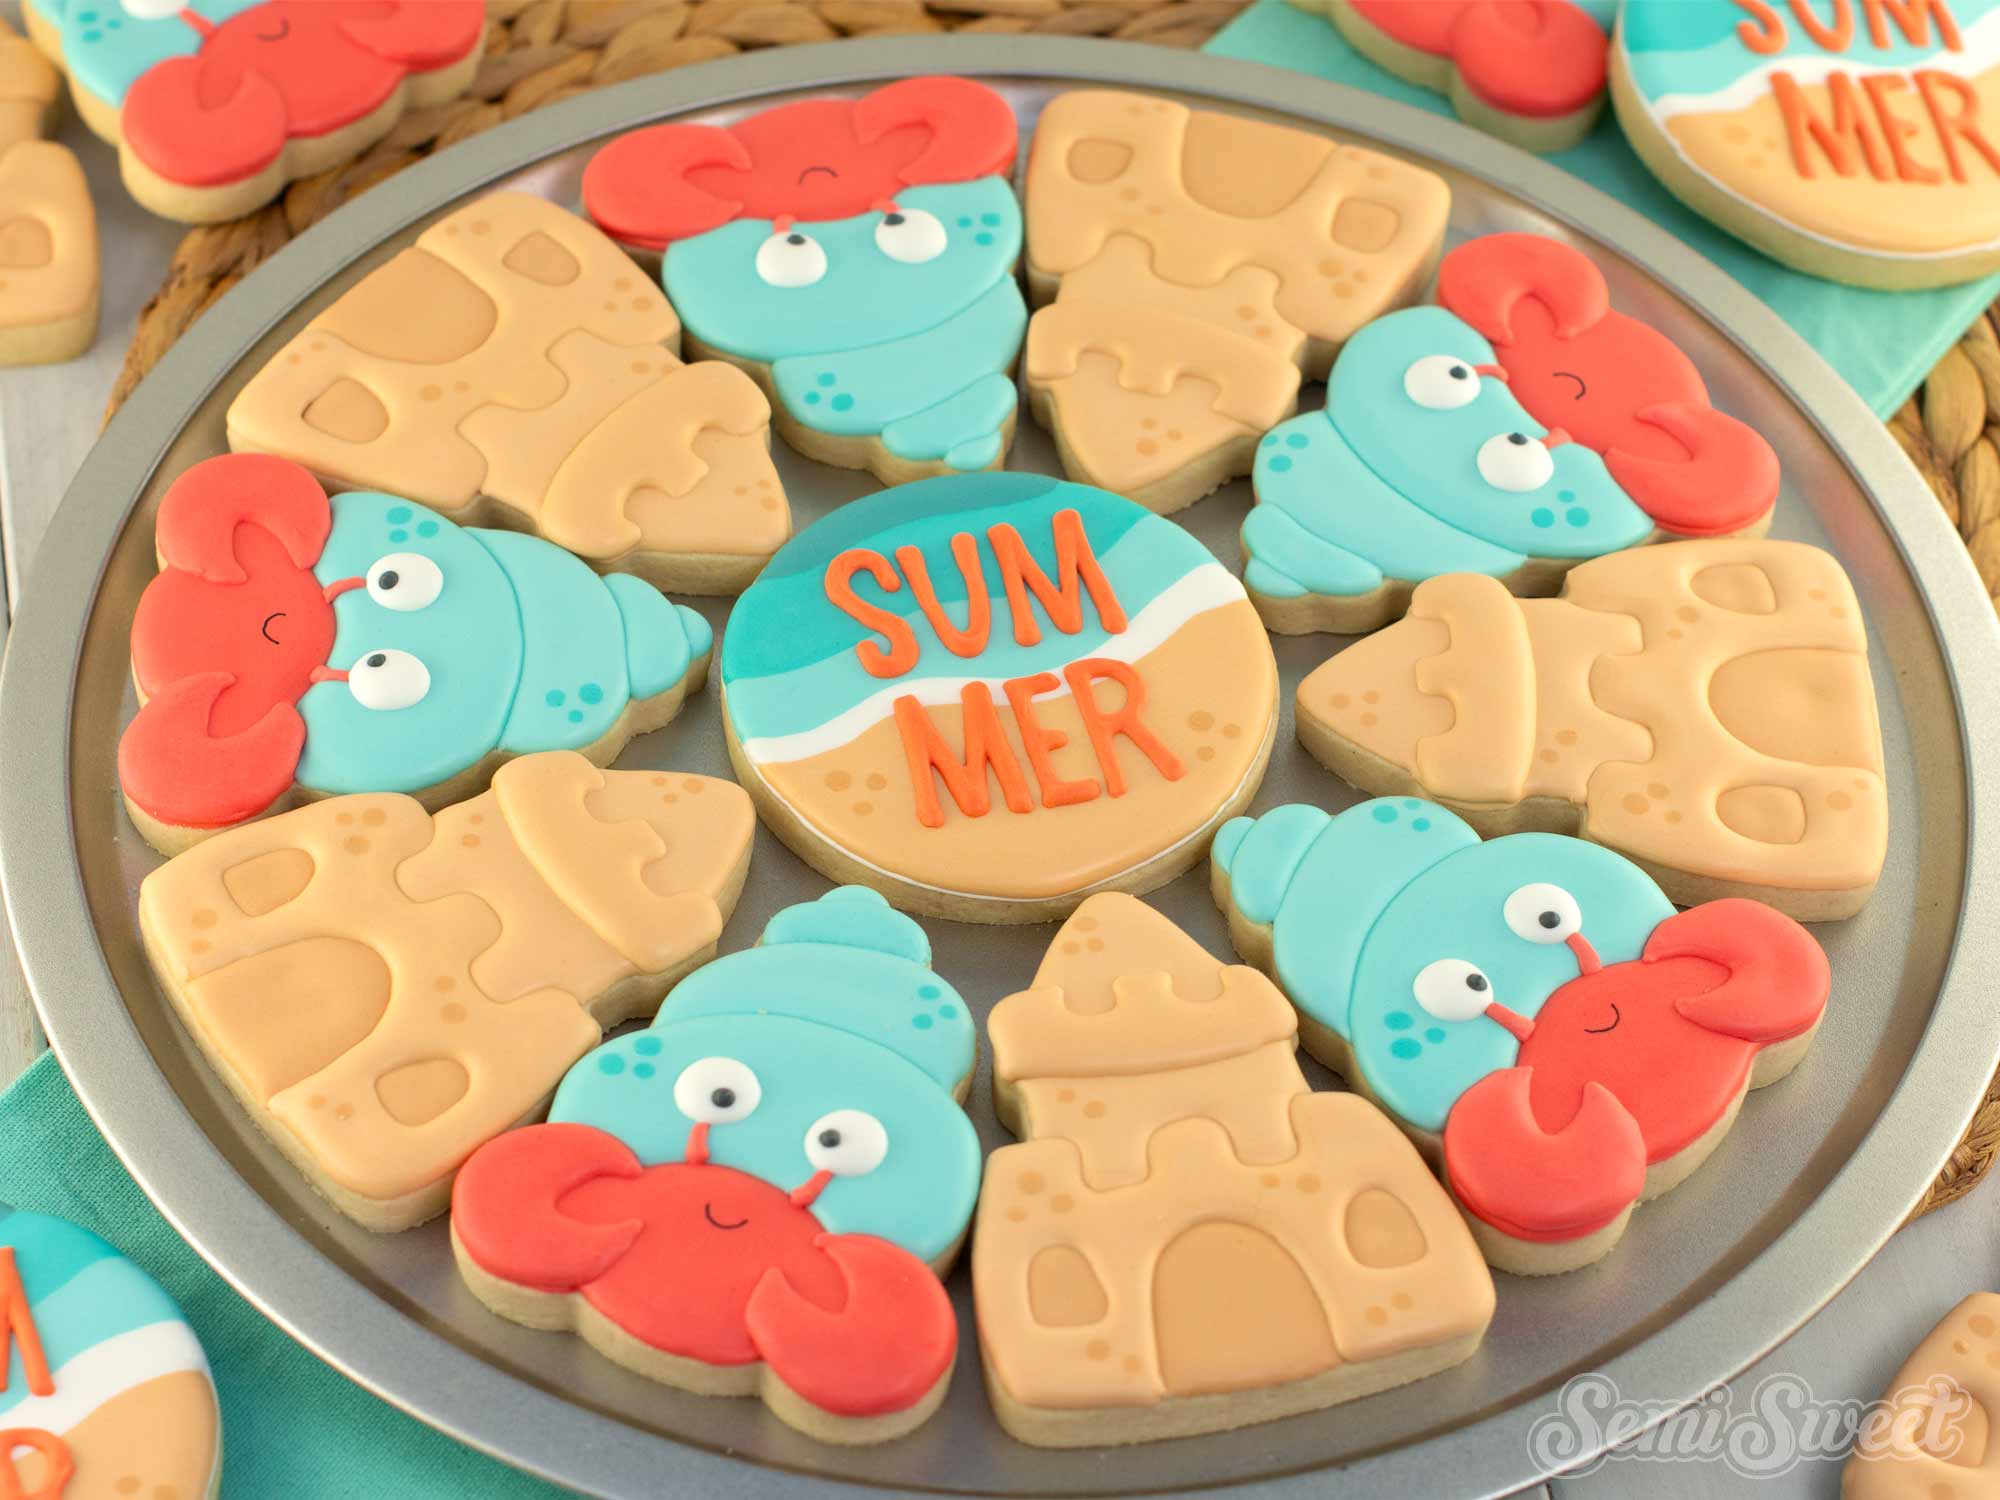
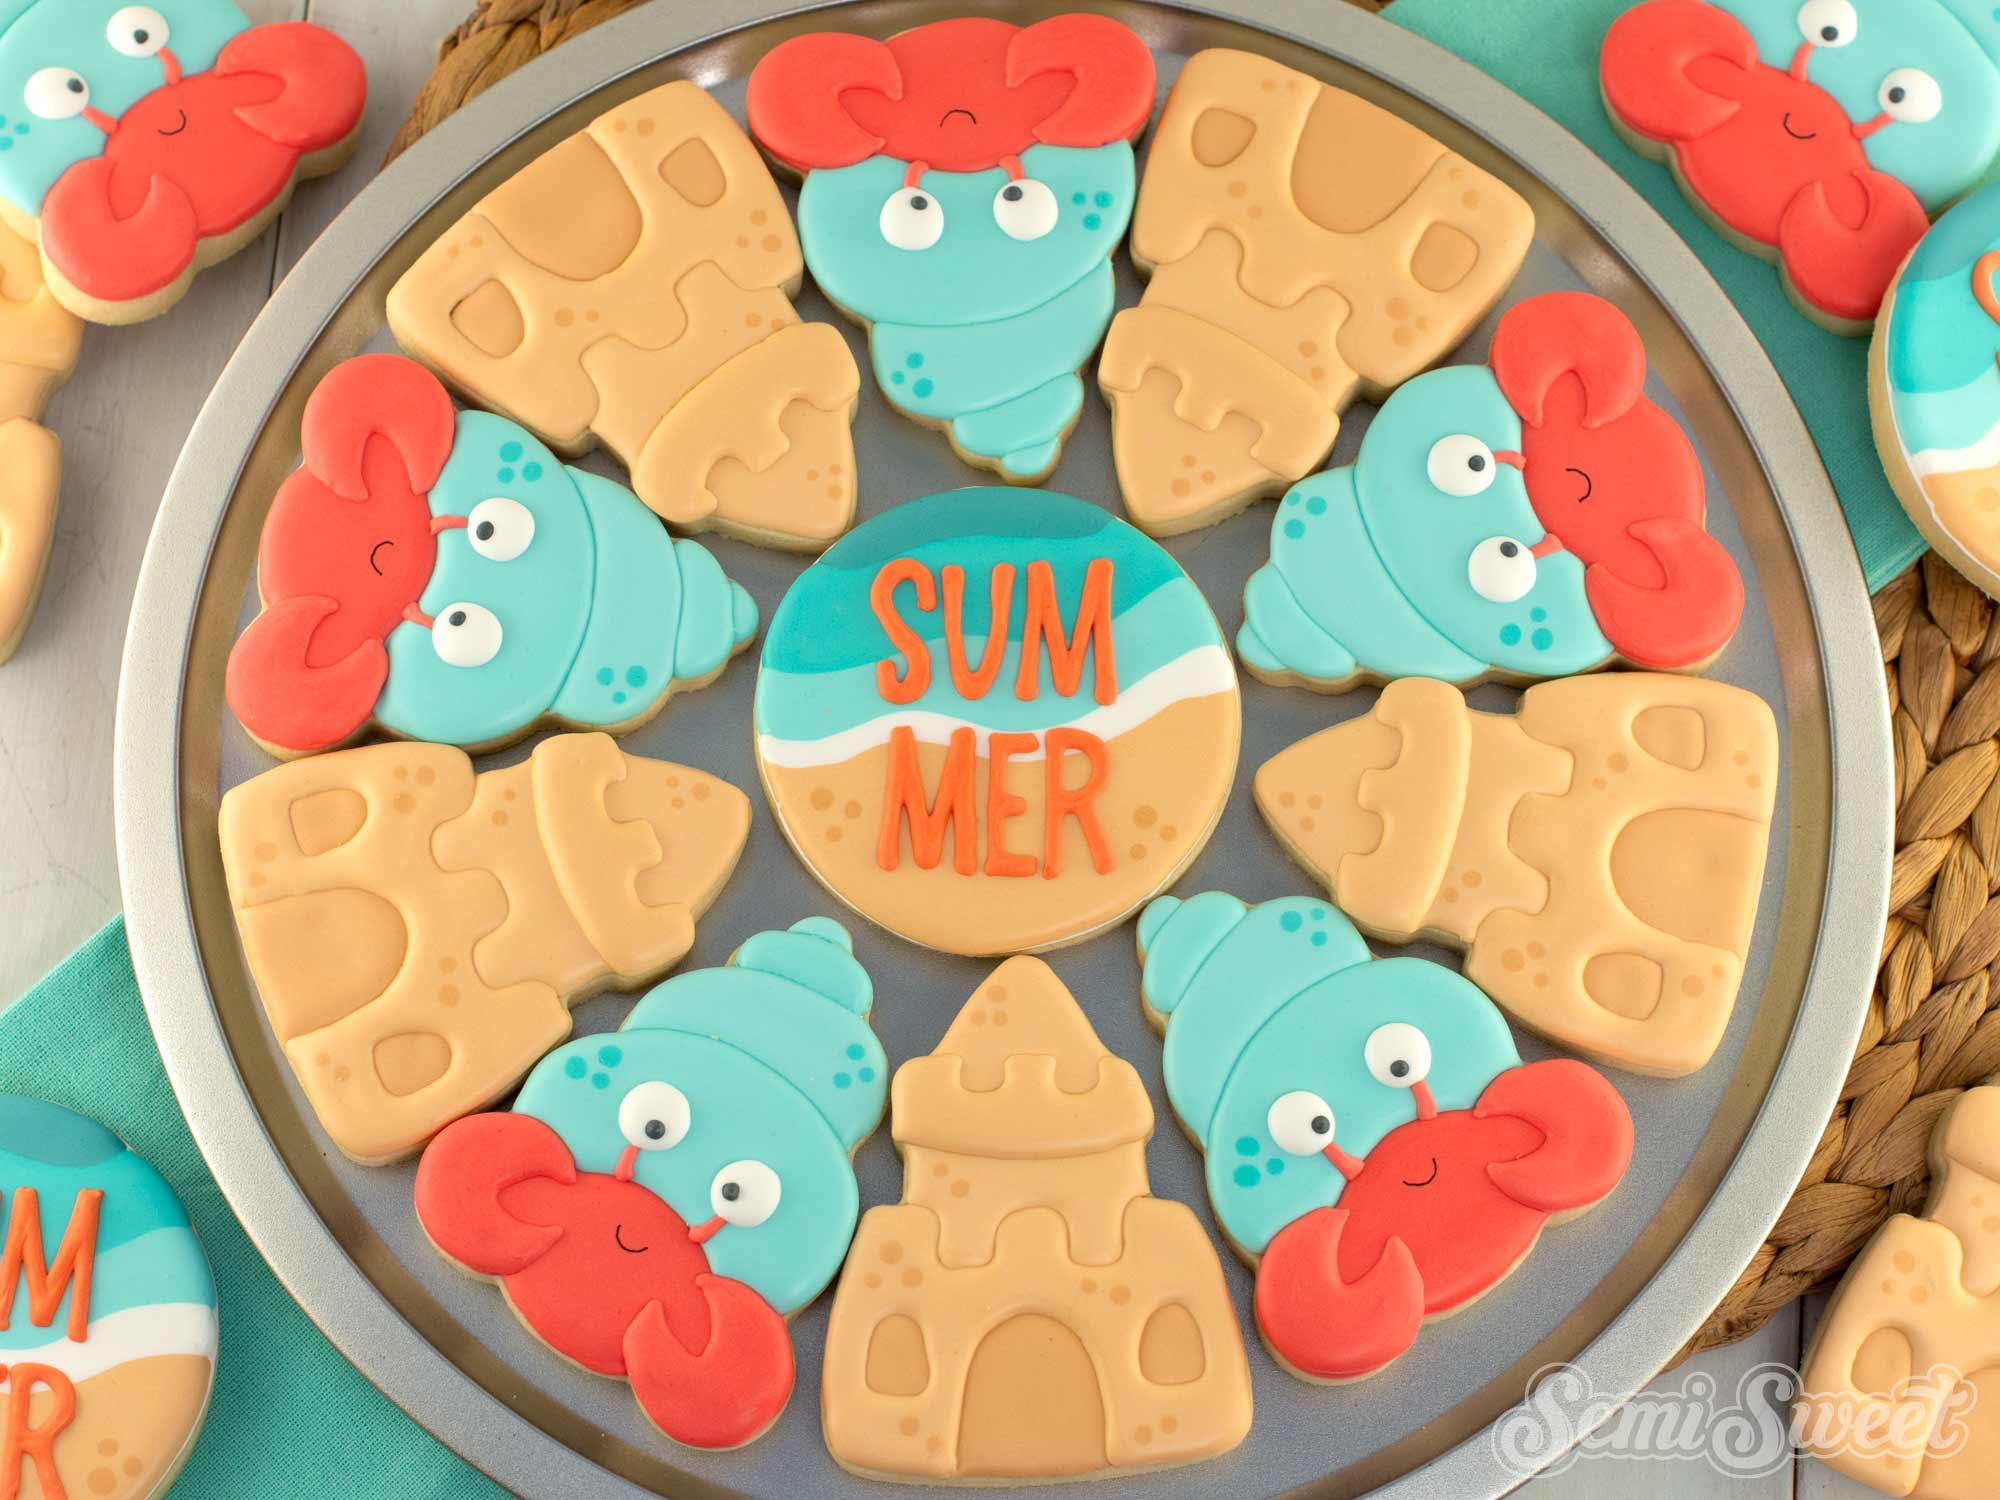
Here's the final beach-themed cookie platter all assembled. To create this entire platter required 11 cookies-- 5 sand castle cookies, 5 hermit crab cookies, and 1 center ocean circle cookie.
This is the large, 12" version. For the tray it's on, I like to use the 12" pizza pans from Dollar Tree. They are cheap and sturdy for transporting around.
This beach-themed cookie platter is such a fun way to celebrate summer with royal icing! From the textured sand castles to the cute hermit crabs and layered ocean waves, this set comes together to create an eye-catching platter that’s perfect for parties, beach lovers, and summertime gifting. I hope this tutorial inspires you to try new decorating techniques and create your own seaside cookie display. If you’d like to make this set yourself, the coordinating cookie cutters are available in our shop!
Add Vibrant Colors with Americolor Food Coloring

To make your decorated cookies pop, use Americolor Food Coloring for bold, consistent colors. It’s my go-to brand for achieving vibrant shades without altering the consistency of the royal icing.
Buy NowTags:
You may also like...


Mike Tamplin
Hi, I’m Mike, the cookie decorator behind Semi Sweet Designs! Since 2011, I’ve been sharing recipes, tips, and tutorials to help beginners gain confidence and give experts fresh inspiration. Along with my brother, Billy, we design and offer hundreds of cookie cutters, stencils, and apparel—all made with decorators in mind.
Whether you're just starting or a seasoned pro, we’re here to make cookie decorating easier and more fun!
Read more


