Decorate a Cute Easter Chick on Eggs Cookie
Learn how to decorate a tall and skinny Easter chick stacked on colorful eggs with this step-by-step royal icing tutorial to create the perfect Easter basket gift.

If you’re looking for a sweet and eye-catching design to tuck into Easter baskets this year, this tall and skinny chick-on-eggs cookie is the perfect choice! In this step-by-step tutorial, I’ll show you how to decorate an adorable Easter chick perched on a colorful stack of eggs using royal icing techniques that are simple and beginner-friendly. The vertical design makes it ideal for gifting, packaging and slipping into Easter baskets. You can find the coordinating cookie cutter in our shop, so you can easily recreate this exact design for your own Easter baskets and gifts. Let’s bring this cute little chick to life!
My Essential Cookie Tools for Cookie Decorating


My Essential Cookie Tools for Baking Cookies


My Essential Baking Tools for Royal Icing


Essential Decorating Tools for Royal Icing

Easter Chick on Eggs Cookie Cutter
Added to the cookie cutter shop are new Easter cookie designs, including this Chick on Egg Stack cookie cutter.
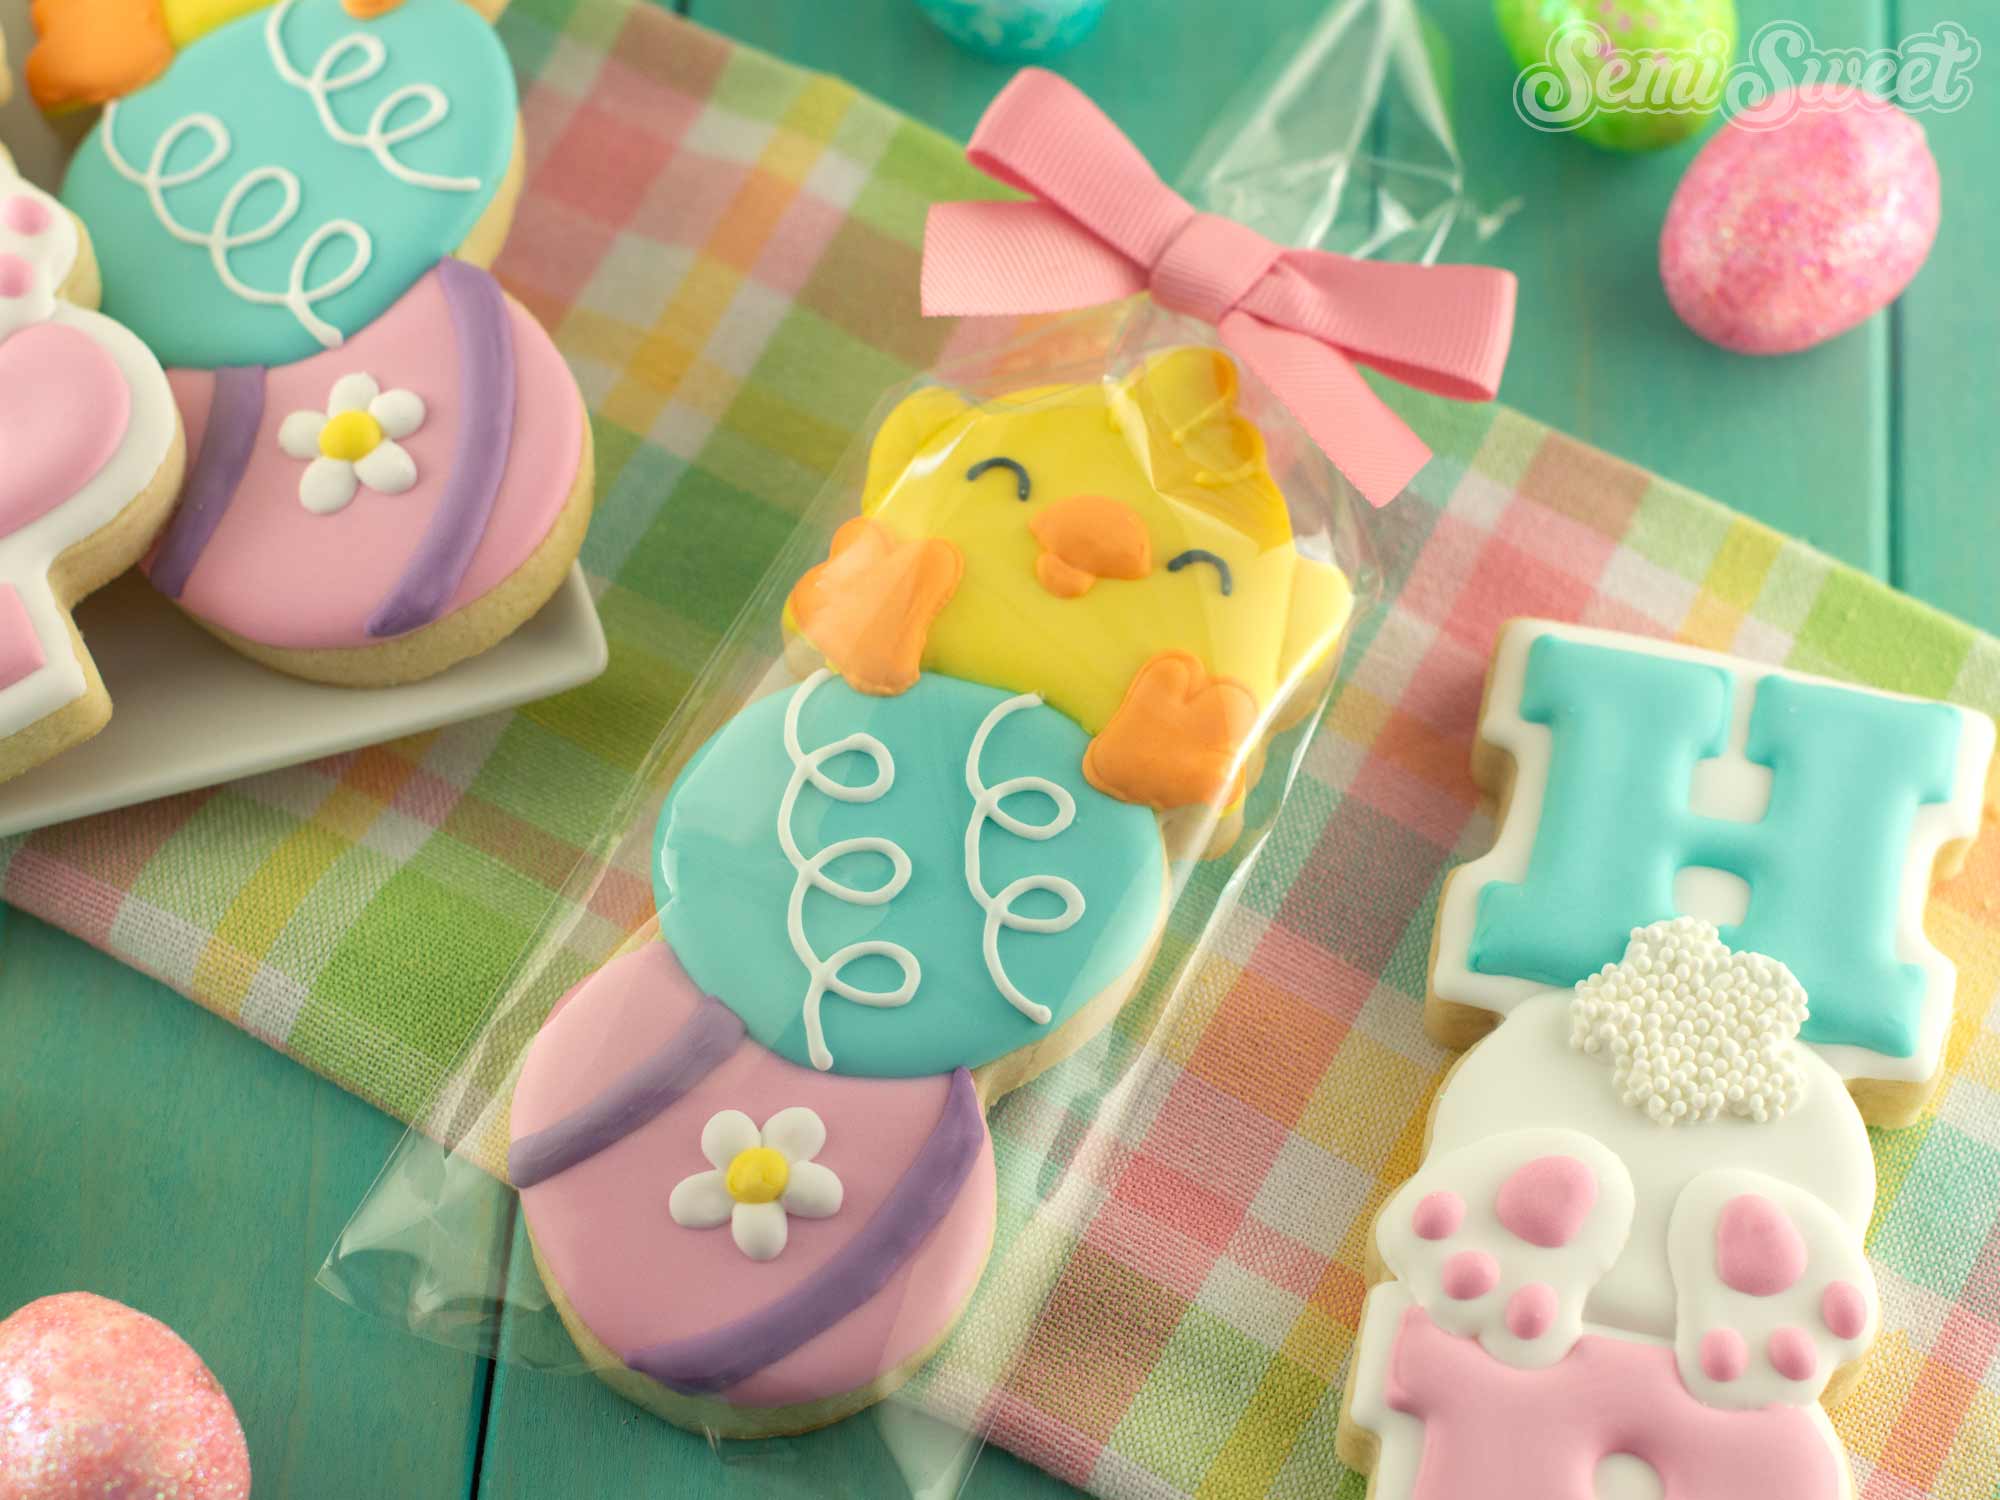
This cookie will fit in our 3" x 12" cellophane cookie bags.
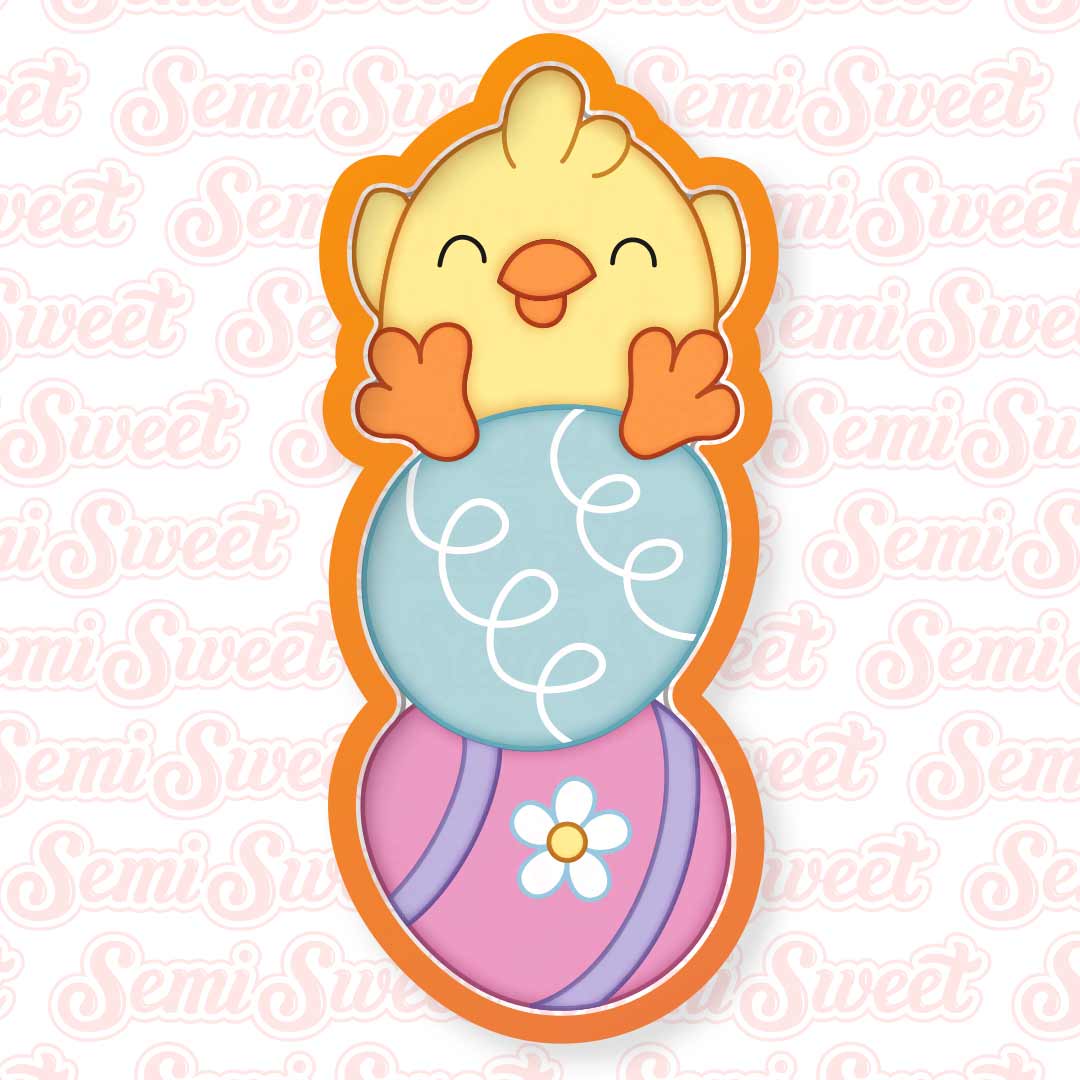
Template for the Easter Chick on Eggs Cookie Cutter
To help with the decorating process, I made a PDF template available for this season's Easter collection, including this Easter chick on eggs design.
You can download these cookie templates HERE.
If you have a Kopykake or Pico projector, just print it out (or pull it up on your mobile device) and you are good to go. For those without a projector, follow the suggested steps below by tracing the design onto the cookie with an edible food marker.
The Cookie Decorating Process
To decorate these cookies, my icing of choice is royal icing. Here's how to make royal icing for cookie decorating.
For the colors used for this Easter cookie, you will need the following suggested colors:
- Pink icing (I used Americolor Deep Pink.)
- White icing. (I used Americolor Bright White.)
- Yellow icing (I used Americolor Egg Yellow.)
- Purple icing (I used Americolor Regal Purple.)
- Blue icing (I mixed Americolor Sky Blue with Americolor Teal.)
- Orange icing (I used Americolor Orange.)
- Black icing (I used Americolor Super Black.)
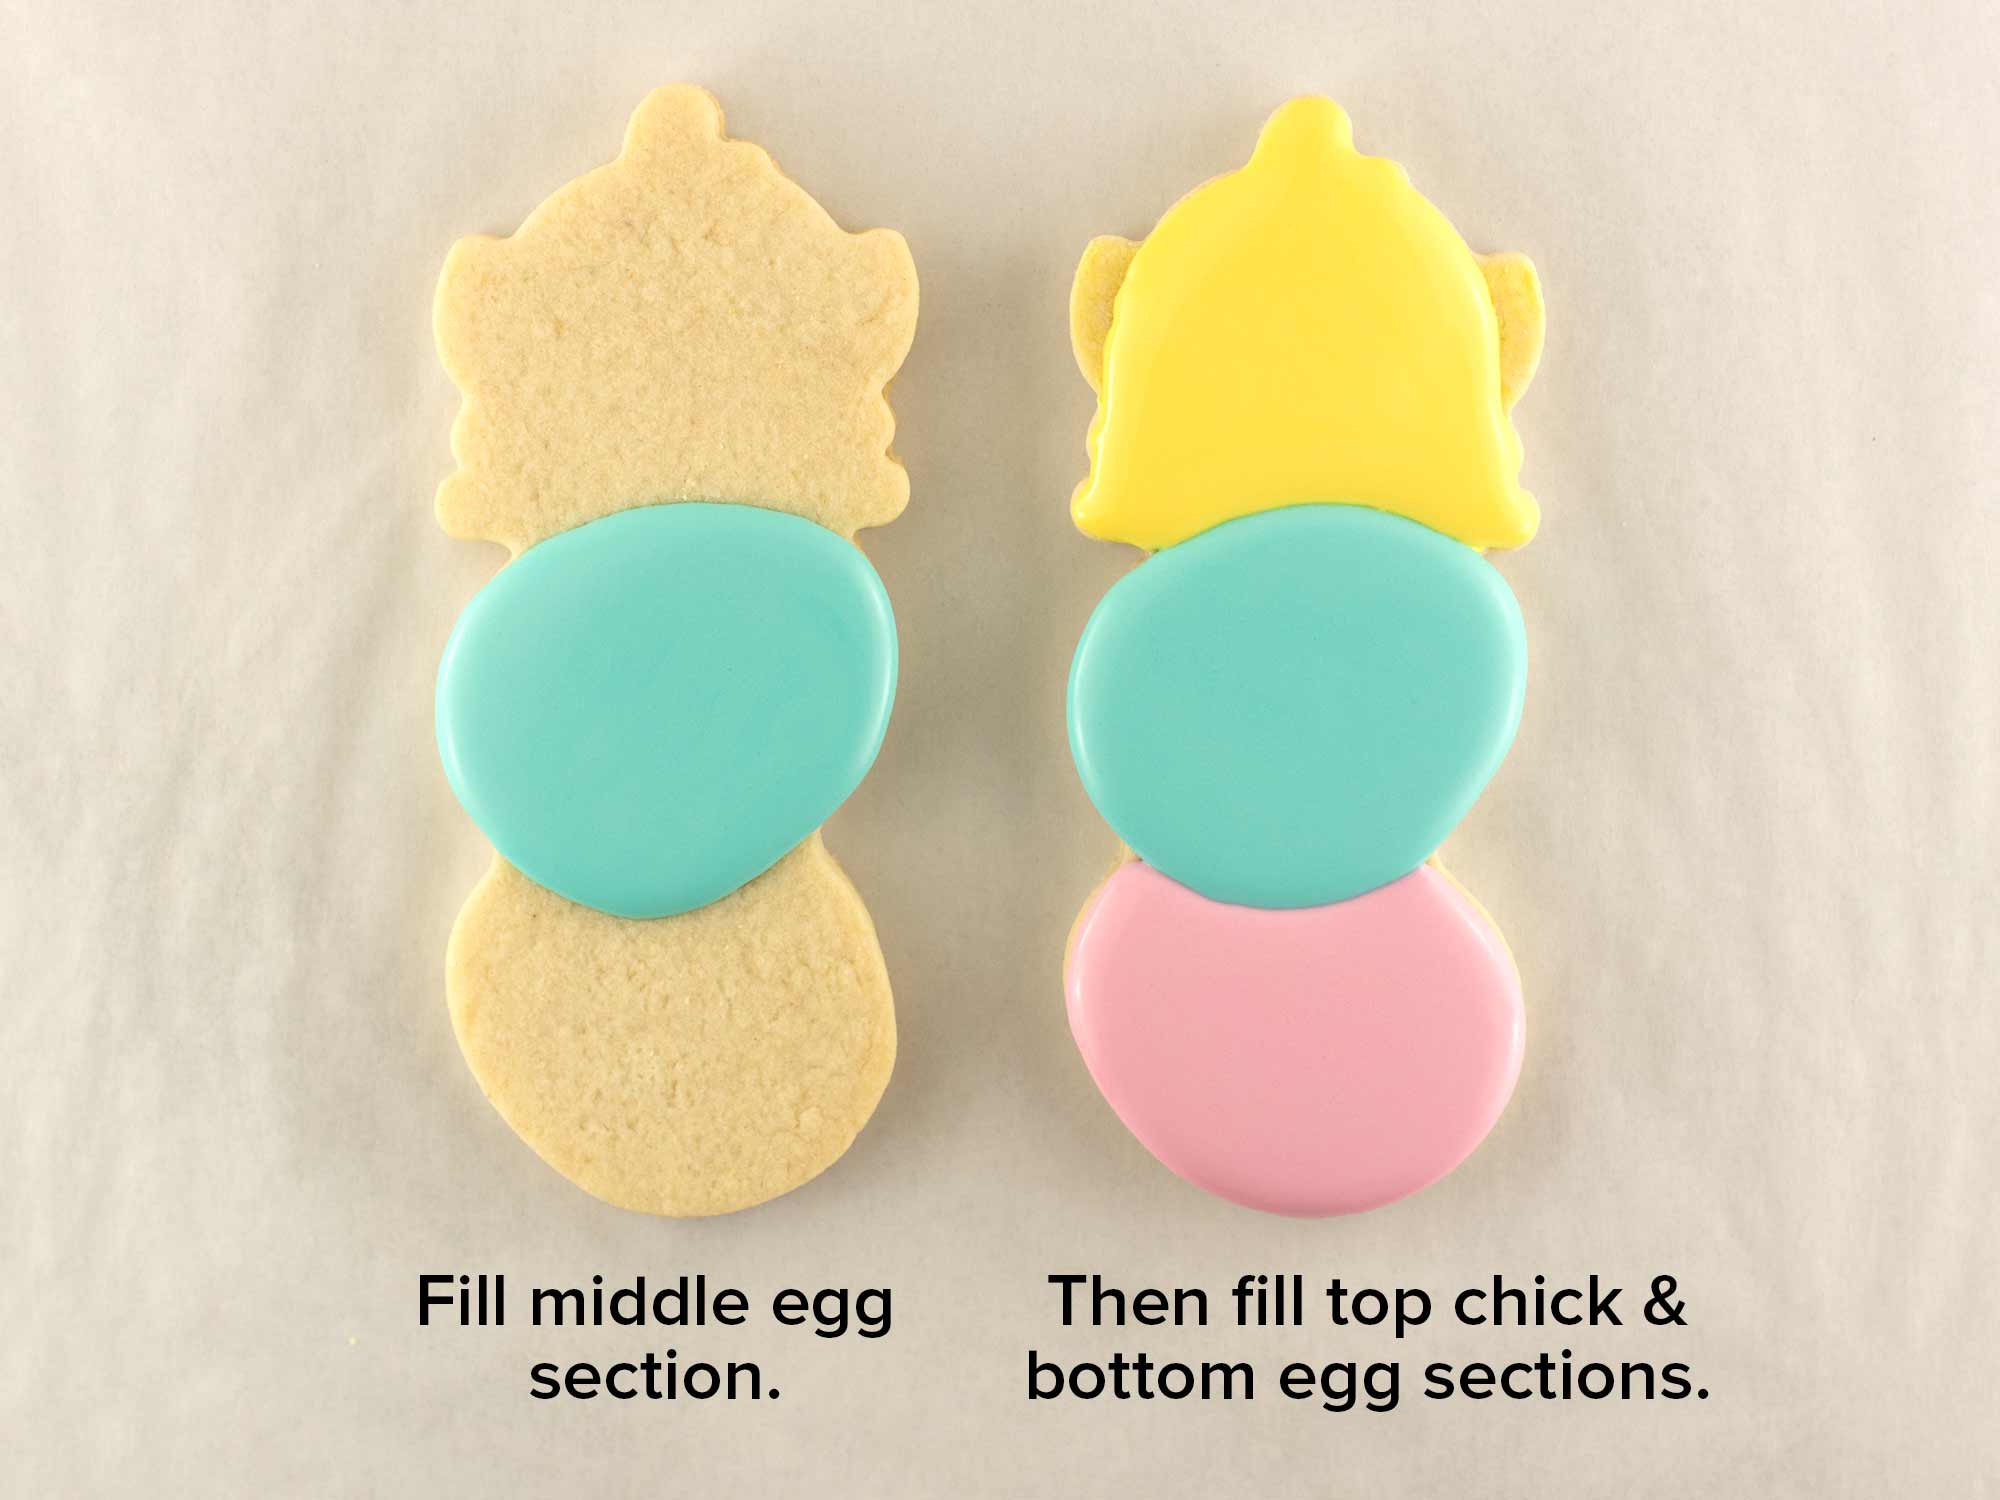
Step 1
Begin by flooding alternating sections. I started with the middle blue egg, let that icing setup, then move on to flood the top yellow chick body (minus the arms) and the bottom pink egg.
Let this icing set for about an hour.
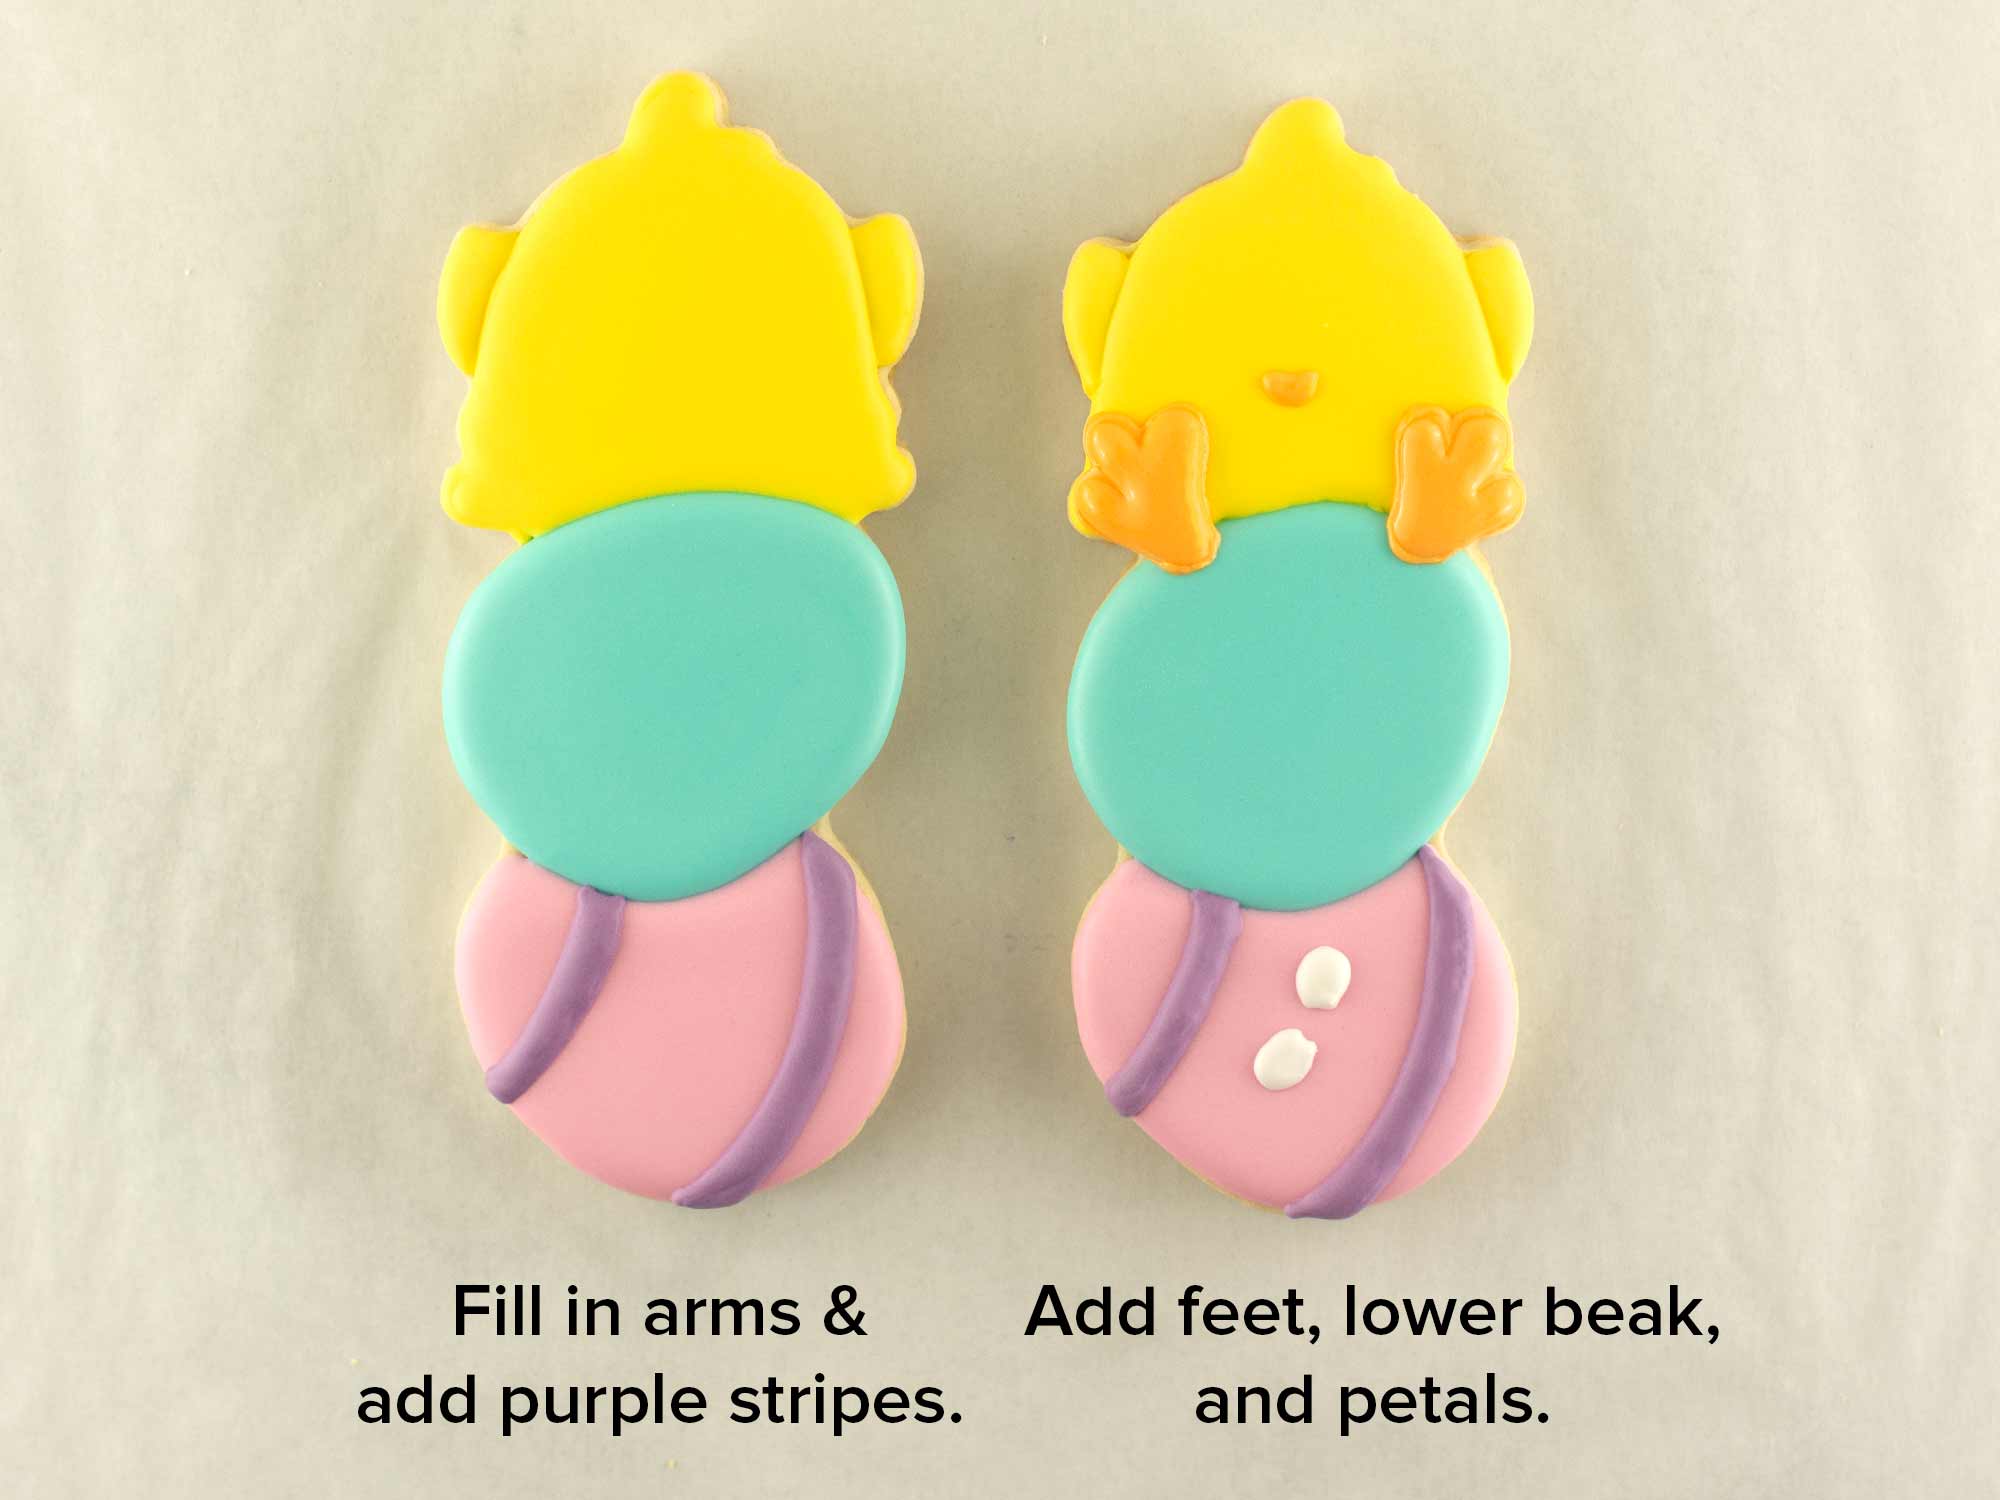
Step 2
Next, fill in the arm sections of the top chick. Add purple stripes to the bottom pink egg, as shown.
Then add the orange feet detail, along with the lower beak detail. Then start adding two non-touching petals of the white flower on the bottom egg.
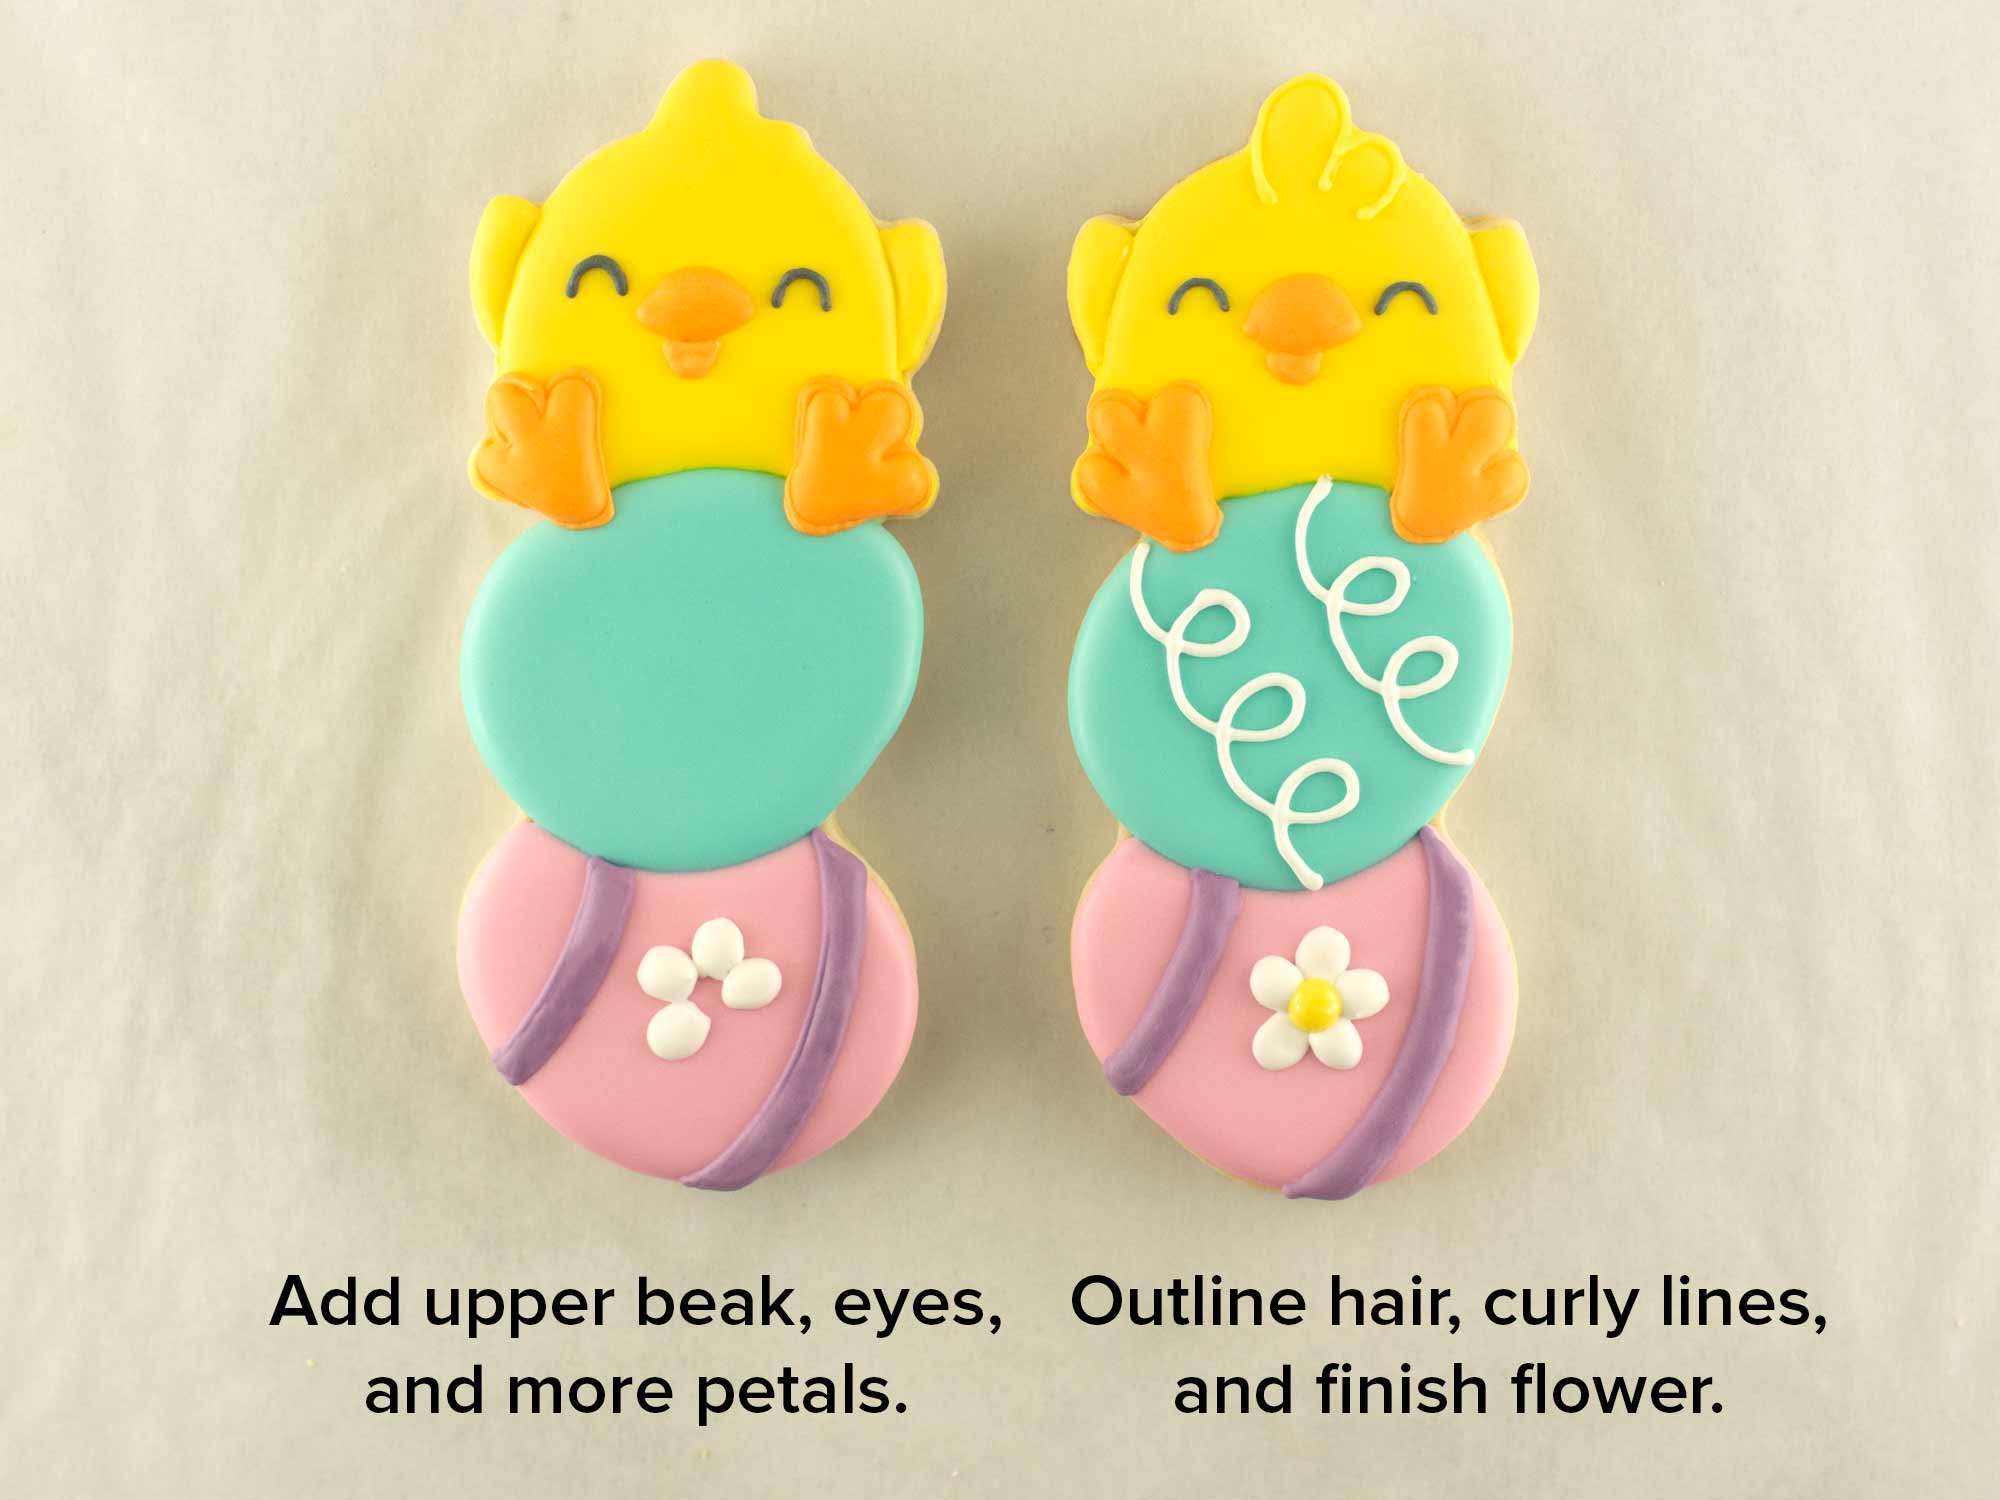
Step 3
Move on to adding the upper beak detail, the black eye lines, and two more non-touching petals.
Lastly, outline the hair feathers, add the white curly lines of the middle egg, and finish the final flower details.
Easter Chick on Eggs Cookie Decorating Video Tutorial
The steps above are summarized in this time-lapsed video I put together below.
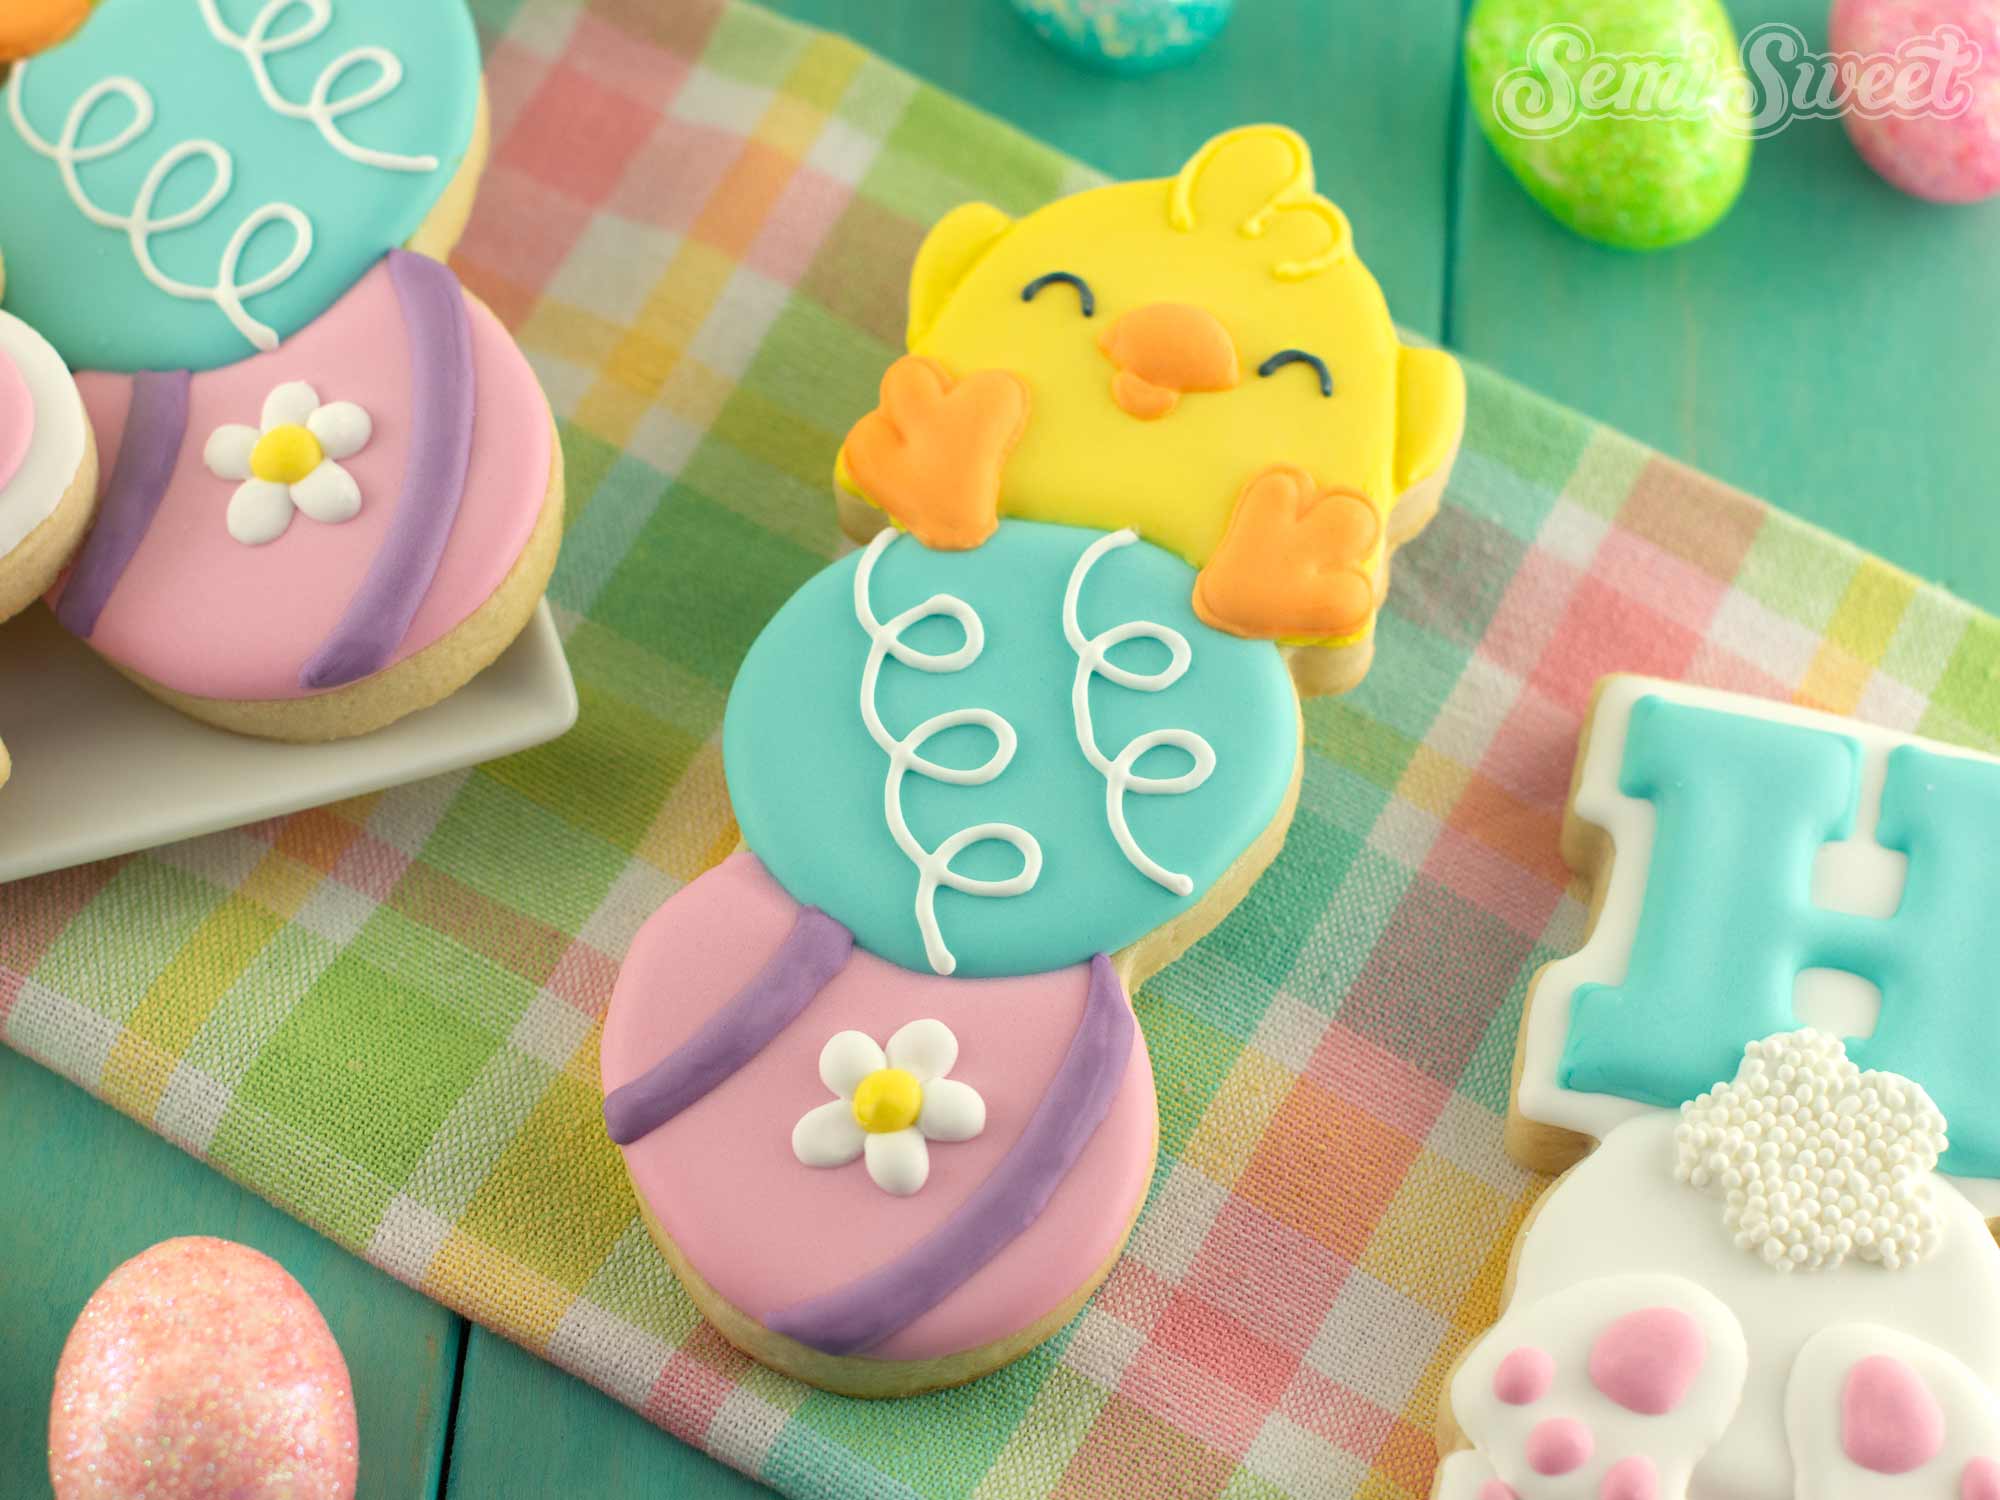
Here's the completed Easter chick cookie! So cute!
For packaging this tall and skinny cookie, I used our 3" x 12" cellophane cookie bags and tied off the top with a pink peony pre-tied bow.
I hope this sweet chick-on-eggs design inspires you to add something tall, fun, and giftable to your Easter lineup this year! Whether you’re baking for baskets, customer orders, or spring markets, this design is sure to stand out. If you loved this tutorial, be sure to visit our shop to browse all of our Easter cookie cutters, including more tall and skinny designs, personalized options, and platter sets to make your Easter baking extra special. Happy decorating!
Add Vibrant Colors with Americolor Food Coloring

To make your decorated cookies pop, use Americolor Food Coloring for bold, consistent colors. It’s my go-to brand for achieving vibrant shades without altering the consistency of the royal icing.
Buy NowTags:
You may also like...


Mike Tamplin
Hi, I’m Mike, the cookie decorator behind Semi Sweet Designs! Since 2011, I’ve been sharing recipes, tips, and tutorials to help beginners gain confidence and give experts fresh inspiration. Along with my brother, Billy, we design and offer hundreds of cookie cutters, stencils, and apparel—all made with decorators in mind.
Whether you're just starting or a seasoned pro, we’re here to make cookie decorating easier and more fun!
Read more


