How to Decorate an Overlapping Pumpkin Cookie Platter
Learn how to decorate and assemble this fall pumpkin cookie platter featuring overlapping pumpkins, colorful leaves, and a “Hand Picked Pumpkins” centerpiece.
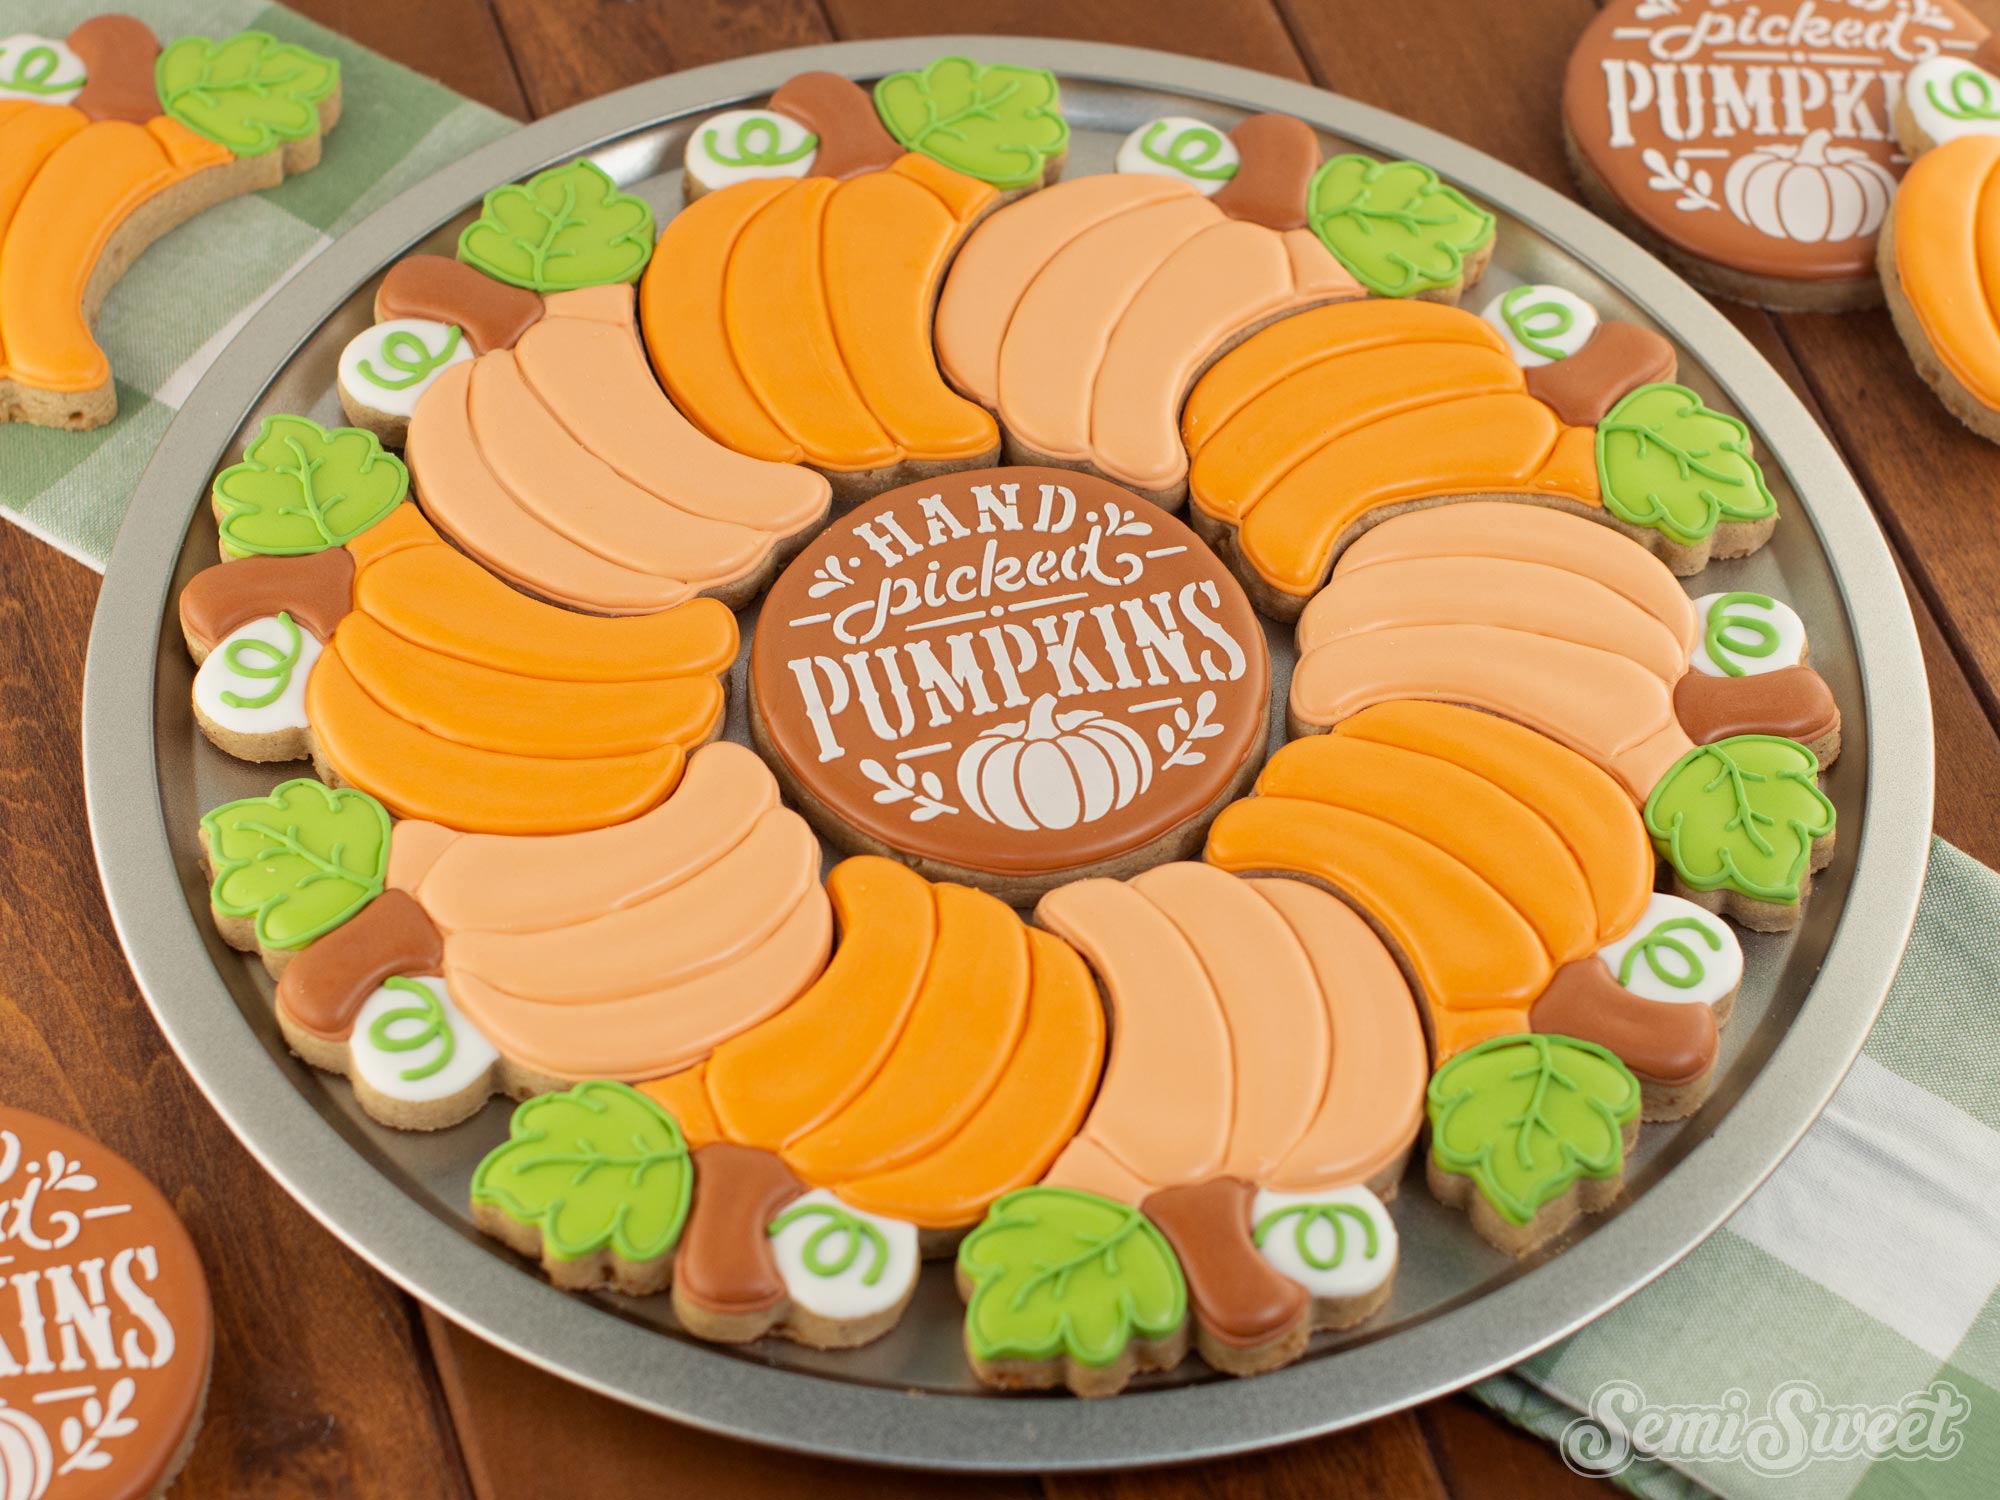
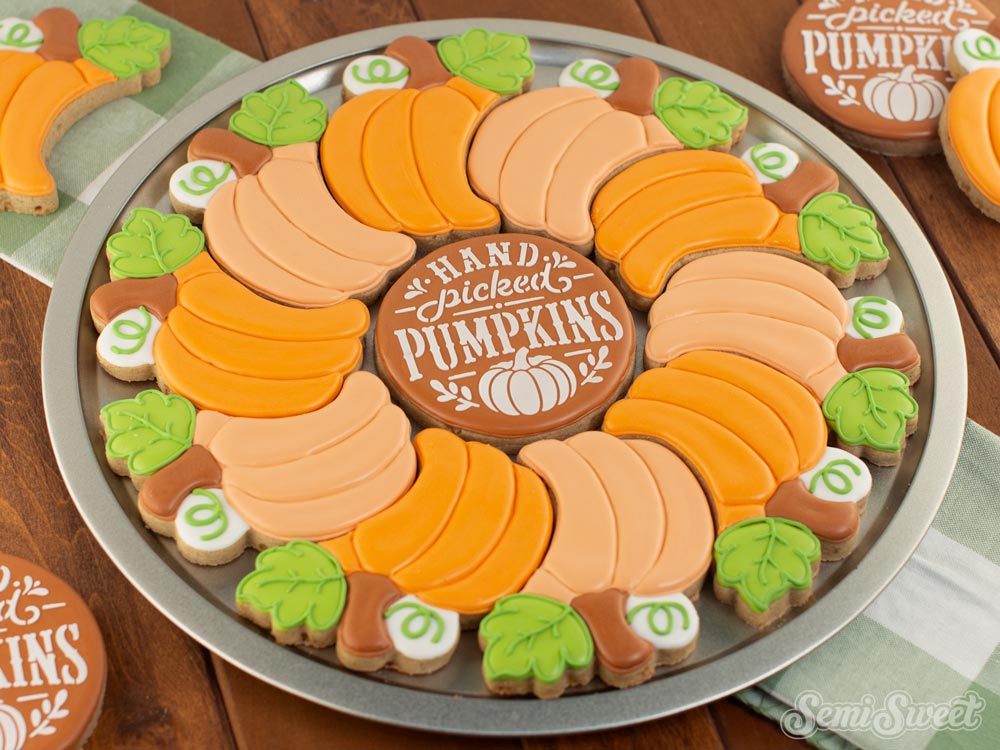
Pumpkin cookies are a fall classic, but this overlapping pumpkin platter gives them a fun new twist! Individual pumpkin cookies fit together in a circle to create a full pumpkin patch around a coordinating “Hand Picked Pumpkins” centerpiece. I alternated shades of orange and lighter orange to add some variety, while the green leaves, and stems, bring the whole platter together. In this tutorial, I’ll walk you through how to decorate each section with royal icing and assemble the finished cookies into the complete platter.
My Essential Cookie Tools for Cookie Decorating


My Essential Cookie Tools for Baking Cookies


My Essential Baking Tools for Royal Icing


Essential Decorating Tools for Royal Icing

About This Overlapping Pumpkin Cookie Platter
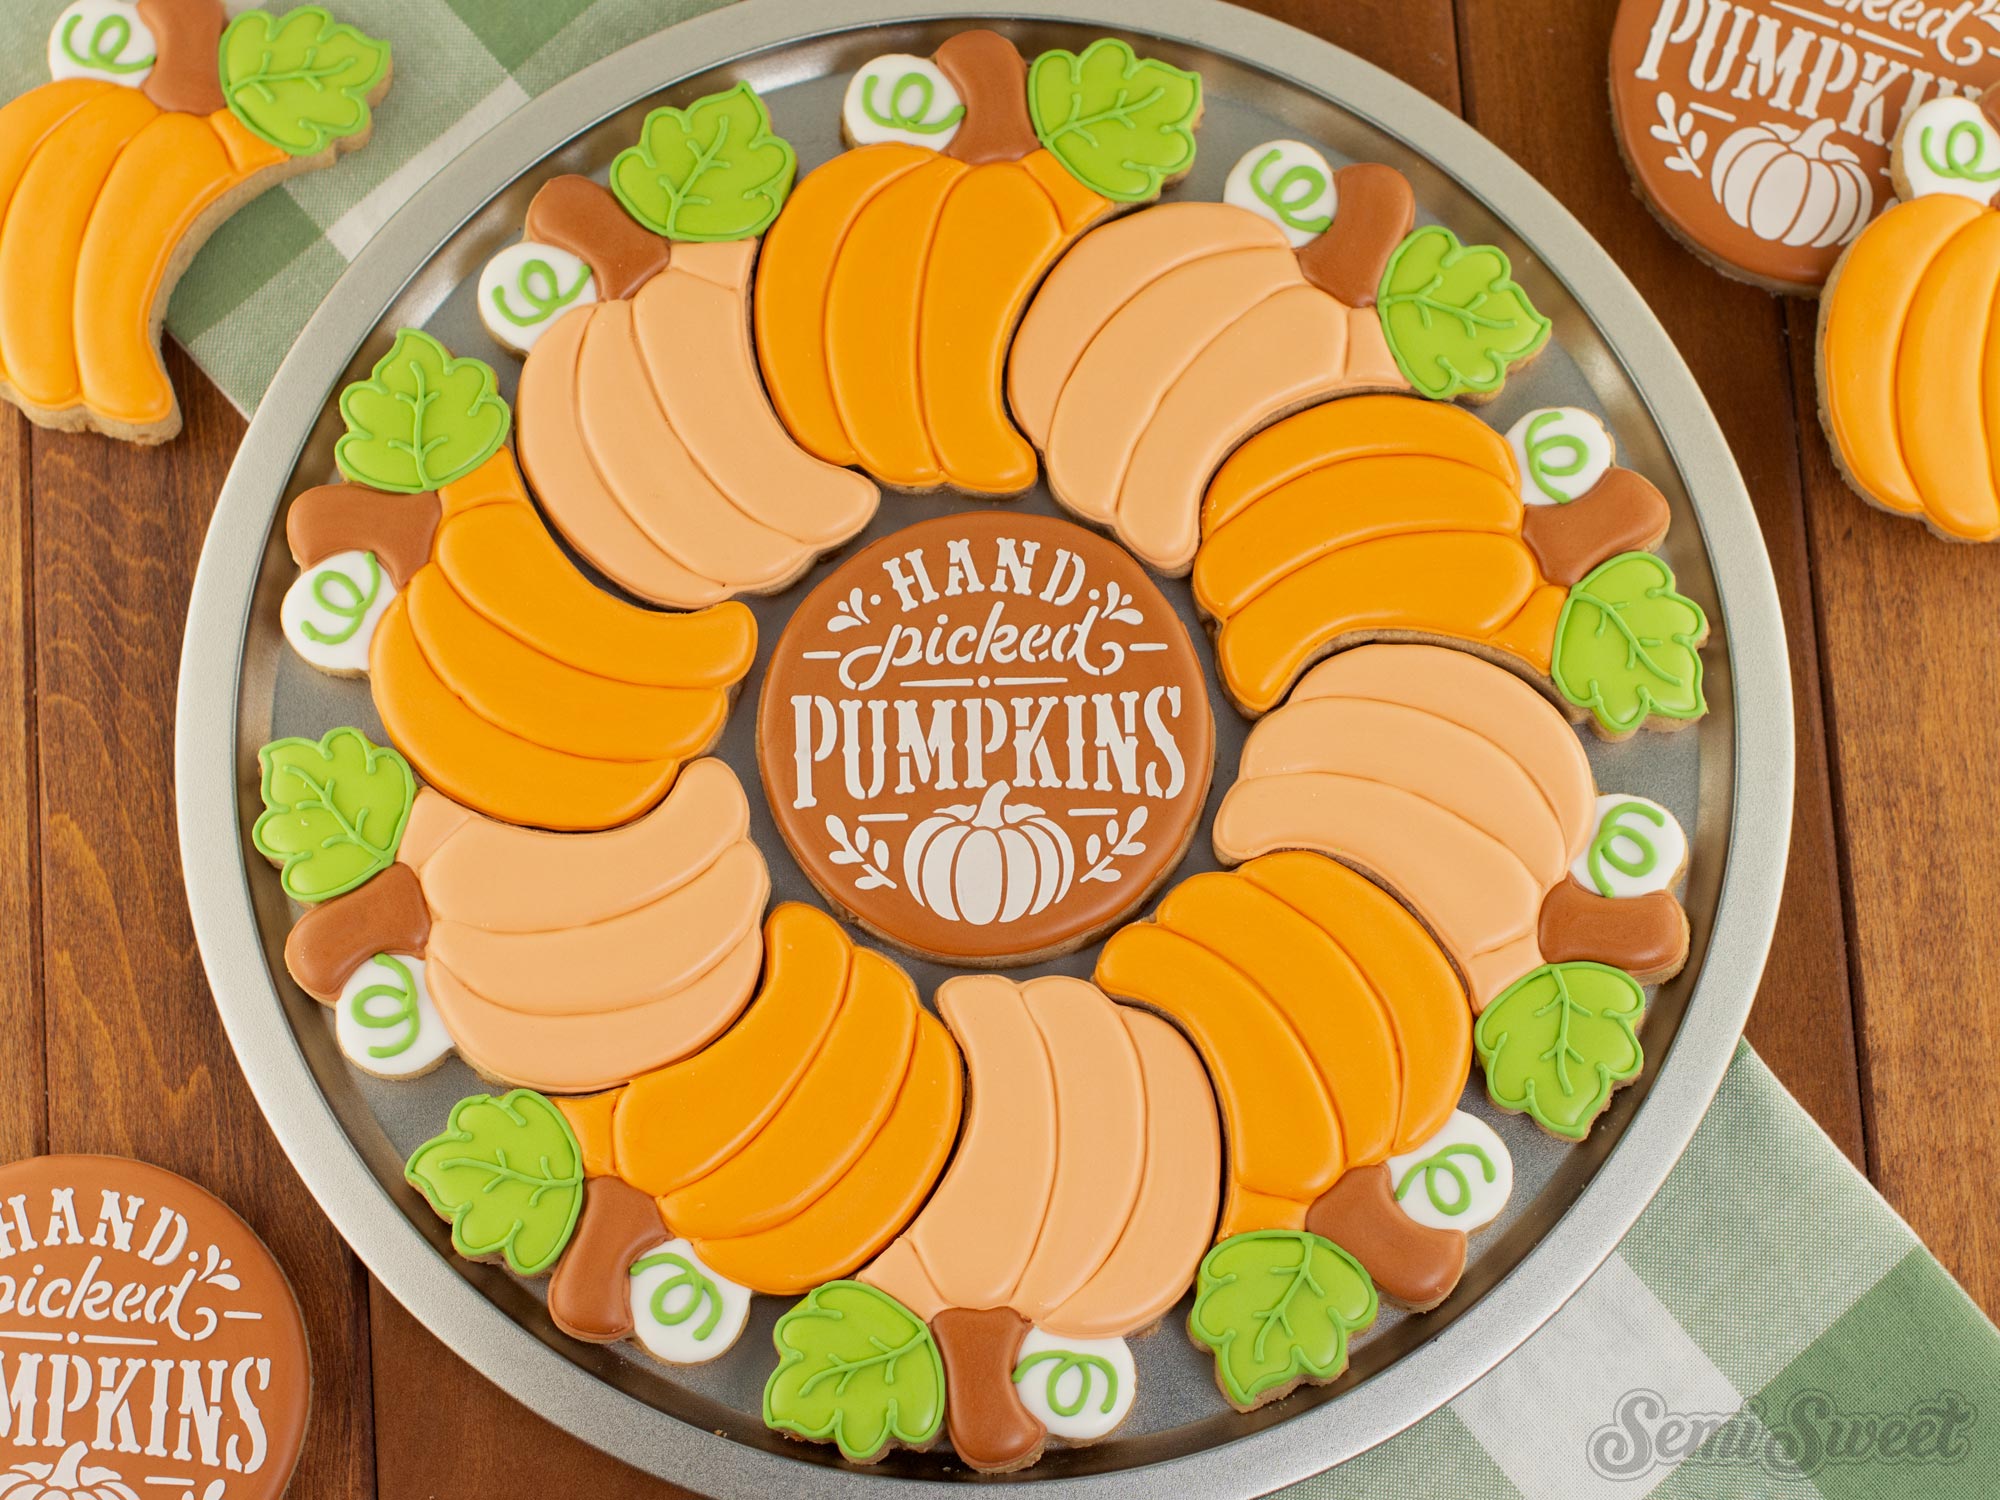
What makes this pumpkin cookie platter unique is how each cookie visually overlaps with the next. Rather than looking like a collection of separate pumpkin cookies, the pieces form a continuous ring when arranged together.
Each pumpkin includes its own stem, leaf, and small pumpkin vine accent, which helps fill in the outside edge of the platter. A large round “Hand Picked Pumpkins” cookie finishes the design in the center.
The finished platter is perfect for fall gatherings, Thanksgiving dessert tables, pumpkin-themed parties, or even as an edible centerpiece.
A Tip for Getting a Good Fit
Because these cookies are designed to sit closely together, I recommend checking their fit while they're still warm from the oven. If any of the cookies spread slightly while baking, you can gently press neighboring pieces together while they're still soft to help them fit more snugly once cooled.
This little step can make a big difference when it’s time to assemble the finished platter.
Overlapping Pumpkin Platter Cookie Cutters
This overlapping pumpkin platter cookie cutter set includes an overlapping pumpkin cookie cutter and a center circle cutter. You can purchase cookie cutters together as a 2-piece set, or as a single cutter without the center circle.
(This is the same circle cutter used in all my platter sets, like this acorn and leaves cookie platter, overlapping pumpkin cookie platter, and this pumpkin pie cookie platter, etc.)
There are two sizes available. When arranged as a platter, as shown in the example picture, the platter measures:
LARGE- 12 inches in diameter.
SMALL- 9 inches in diameter.
For this tutorial, I'll be decorating the large size.

Template for the Pumpkin Cookie Platter
To help with the decorating process, I made a PDF template of all of the new fall cookie cutters, including this pumpkin cookie platter design.
You can download all the 2026 platter cookie templates HERE.
If you have a Kopykake or Pico projector, just print it out (or pull it up on your mobile device) and you are good to go. For those without a projector, follow the suggested steps below by tracing the design onto the cookie with an edible food marker.
The Cookie Decorating Process
Decorating cookies always starts with a good royal icing recipe. This is my favorite royal icing recipe that I use to decorate sugar cookies.
Royal Icing Colors
For my pumpkin platter, I kept the icing palette warm and traditional with a few contrasting fall colors.
You'll need royal icing in:
- Brown icing (I used Americolor Chocolate Brown.)
- Burnt Orange icing (I mixed AmeriColor Orange and a touch of Americolor Chocolate Brown.)
- Light Orange icing (I mixed the burnt orange icing above with fresh white icing.)
- Green icing (I mixed Americolor Leaf Green, AmeriColor Lemon Yellow and Americolor Chocolate Brown.)
- White icing (I used Americolor Bright White.)
Using two different pumpkin colors is an easy way to add visual interest without making the overall color palette feel too busy. Alternating the colors around the platter also helps emphasize the overlapping pattern.
Decorating the Pumpkin Cookies
Step 1
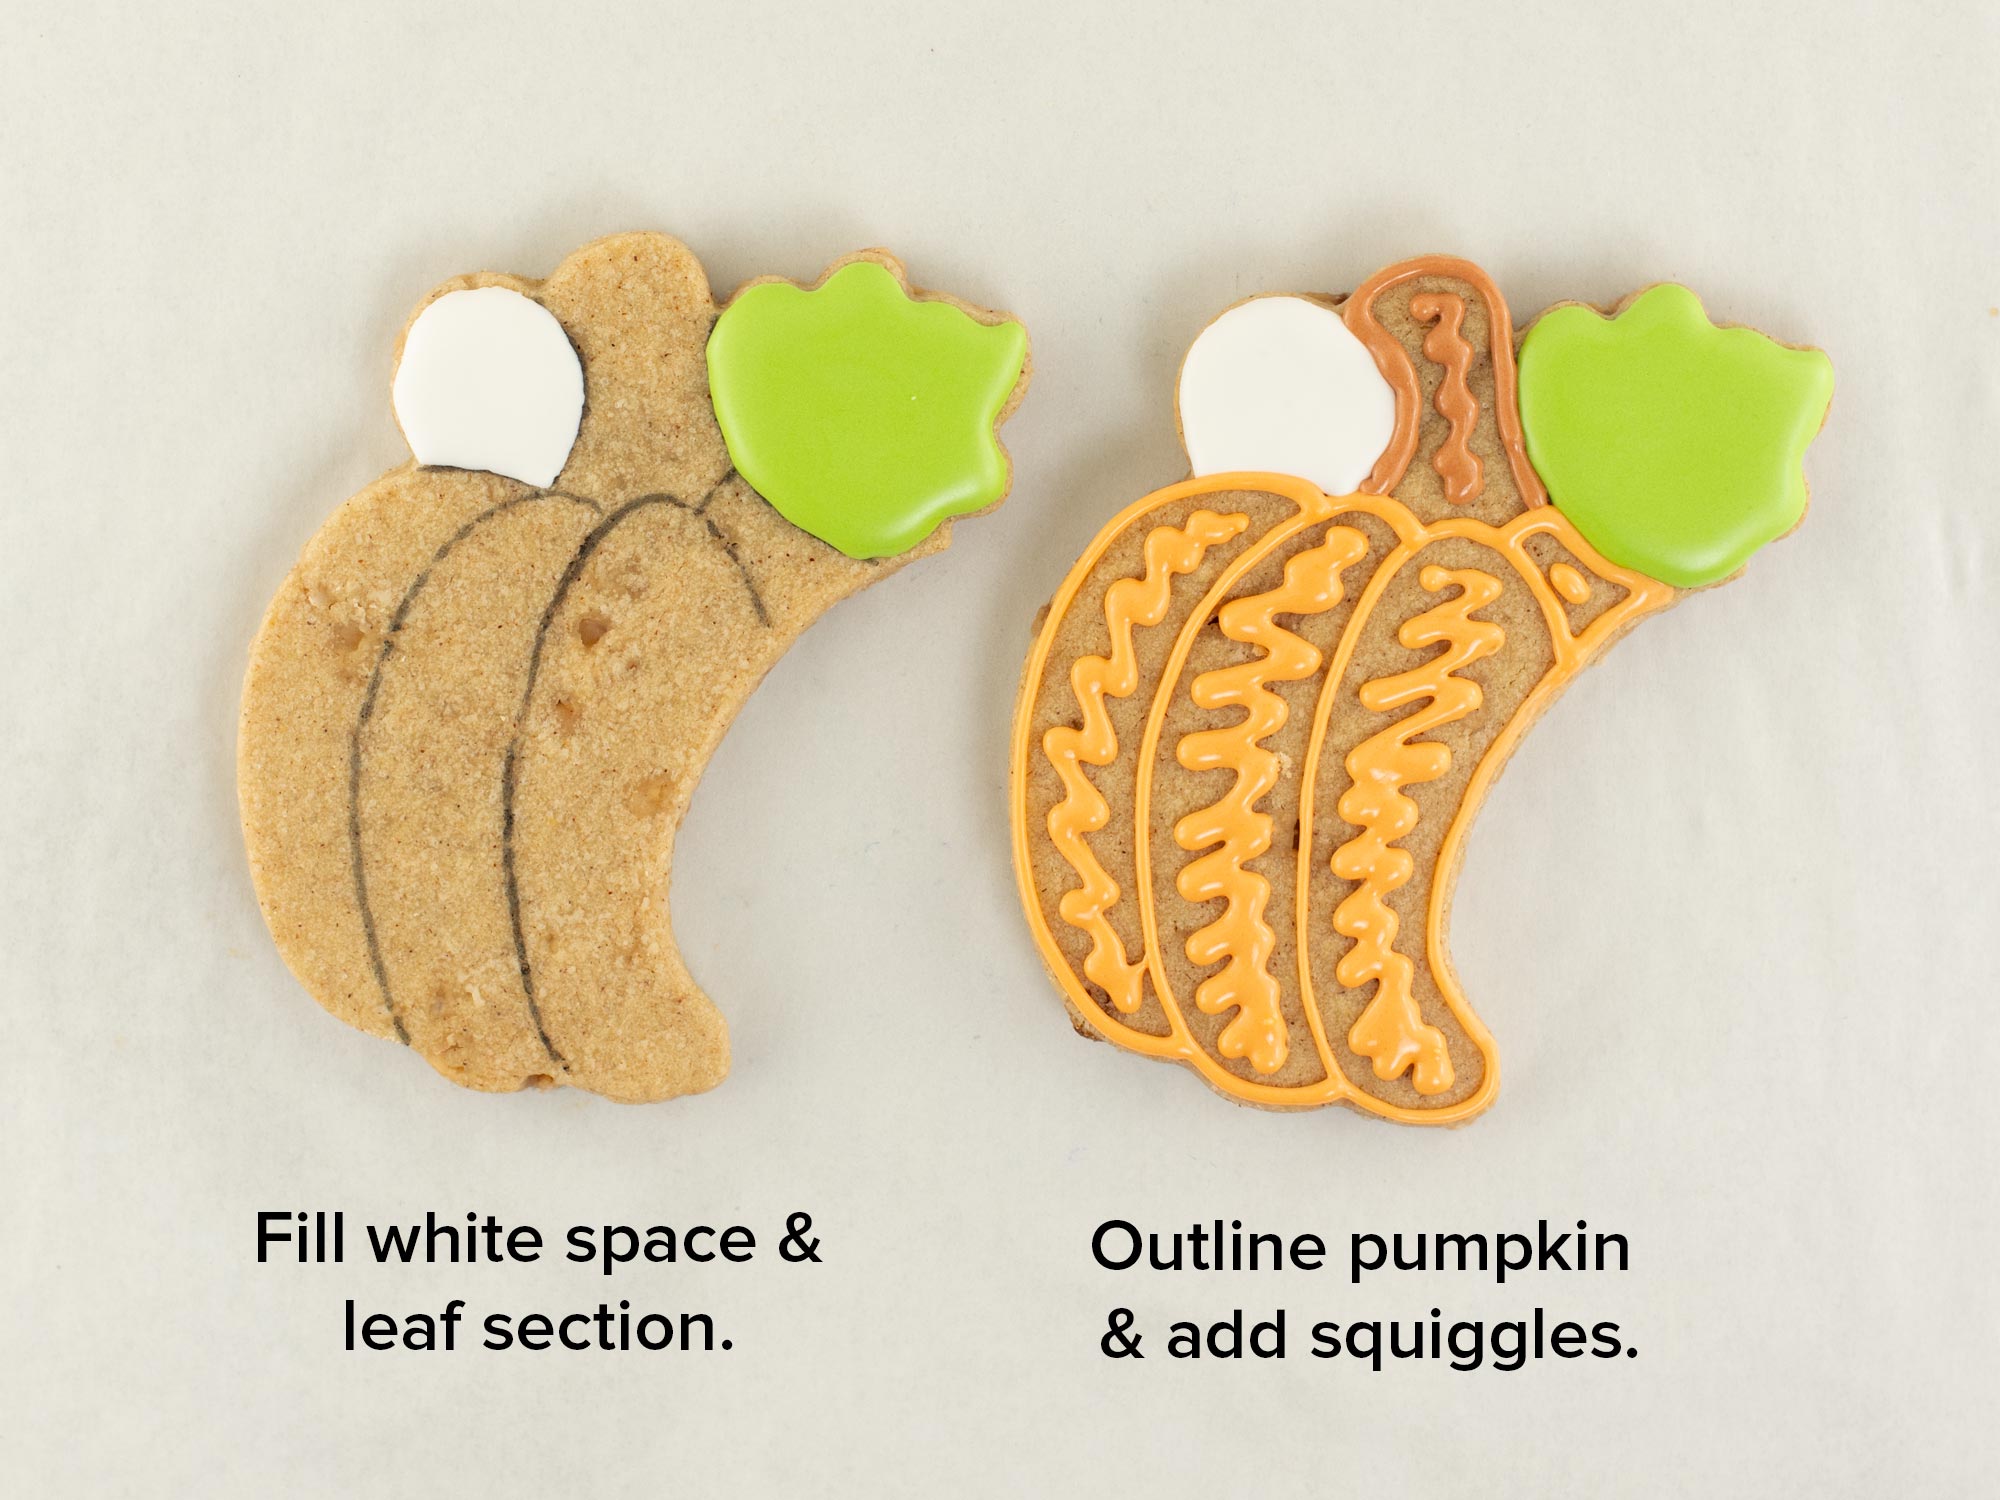
Begin by filling in the green leaf section, and the white empty space section at the top. Let that icing set.
Next outline each section of the pumpkin, and also the stem, as shown.
Cratering Tip: These long, somewhat narrow pumpkin sections can be prone to cratering as the royal icing dries. You can pipe a small squiggle of icing through the center of the section before flooding over it. The extra icing underneath can help support the surface as it dries.
It isn't a guaranteed fix every time, but I've found that it can help. Fresh icing, a slightly thicker flood consistency, and placing the cookies in a dehydrator to help the icing set more quickly can also reduce cratering.
Step 2
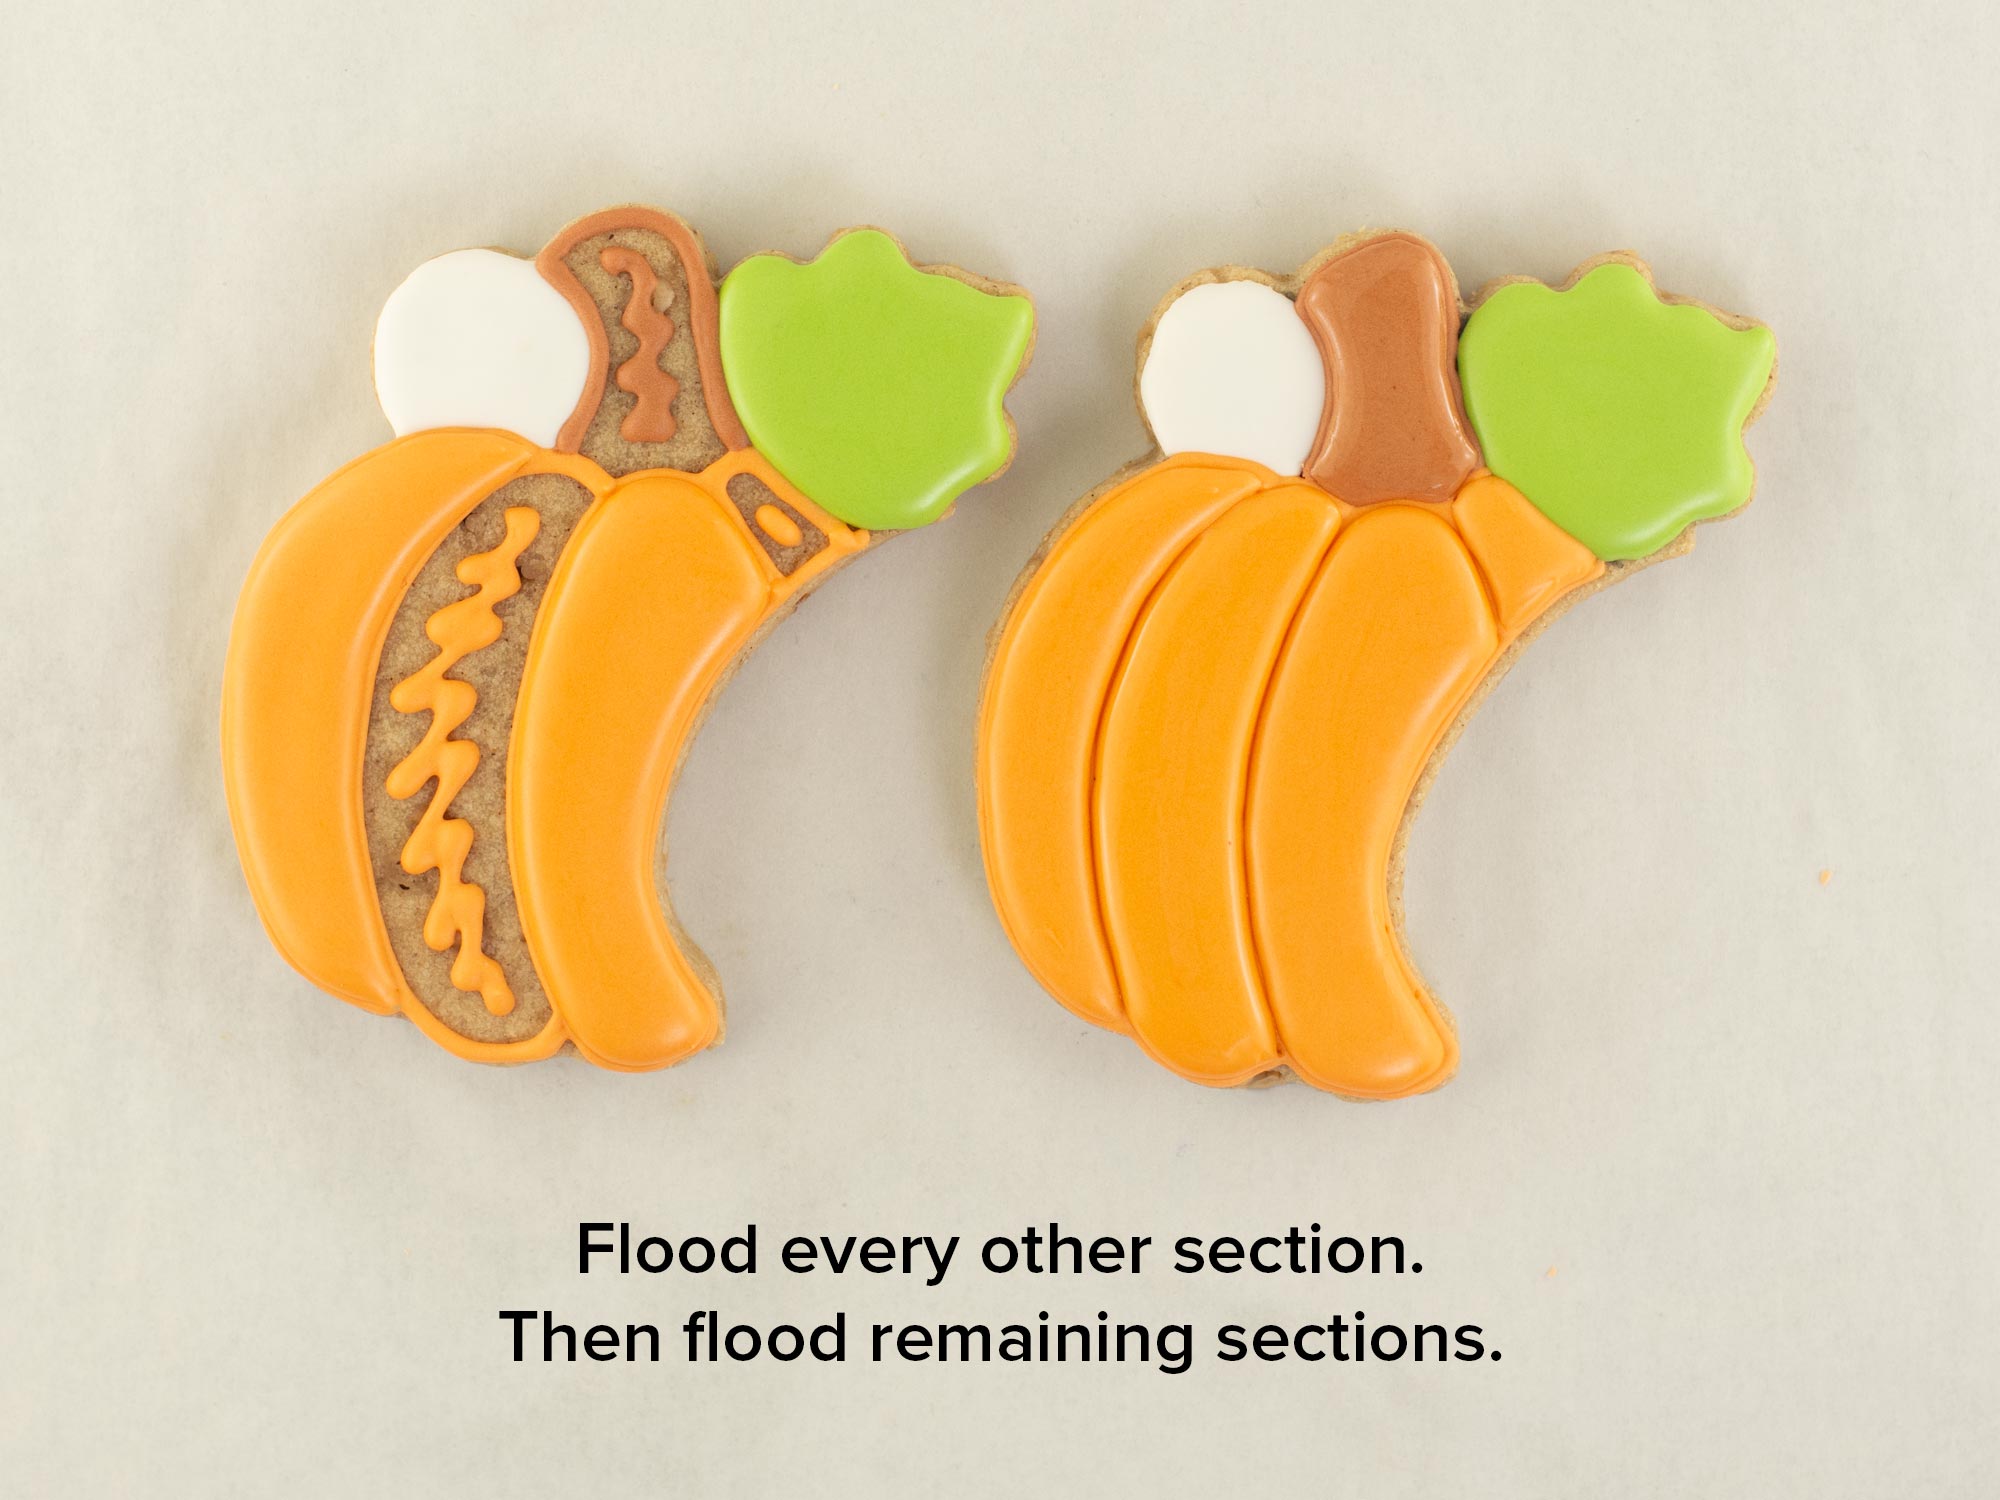
Rather than flooding the entire pumpkin at once, work on alternating sections first. Allow those sections to crust before filling in the sections next to them. This helps create definition between each pumpkin segment.
Once the first sections have had time to crust, flood the remaining pumpkin sections with the same icing color.
Use a scribe tool to guide the icing into the curved edges and smooth out any uneven areas.
Step 3
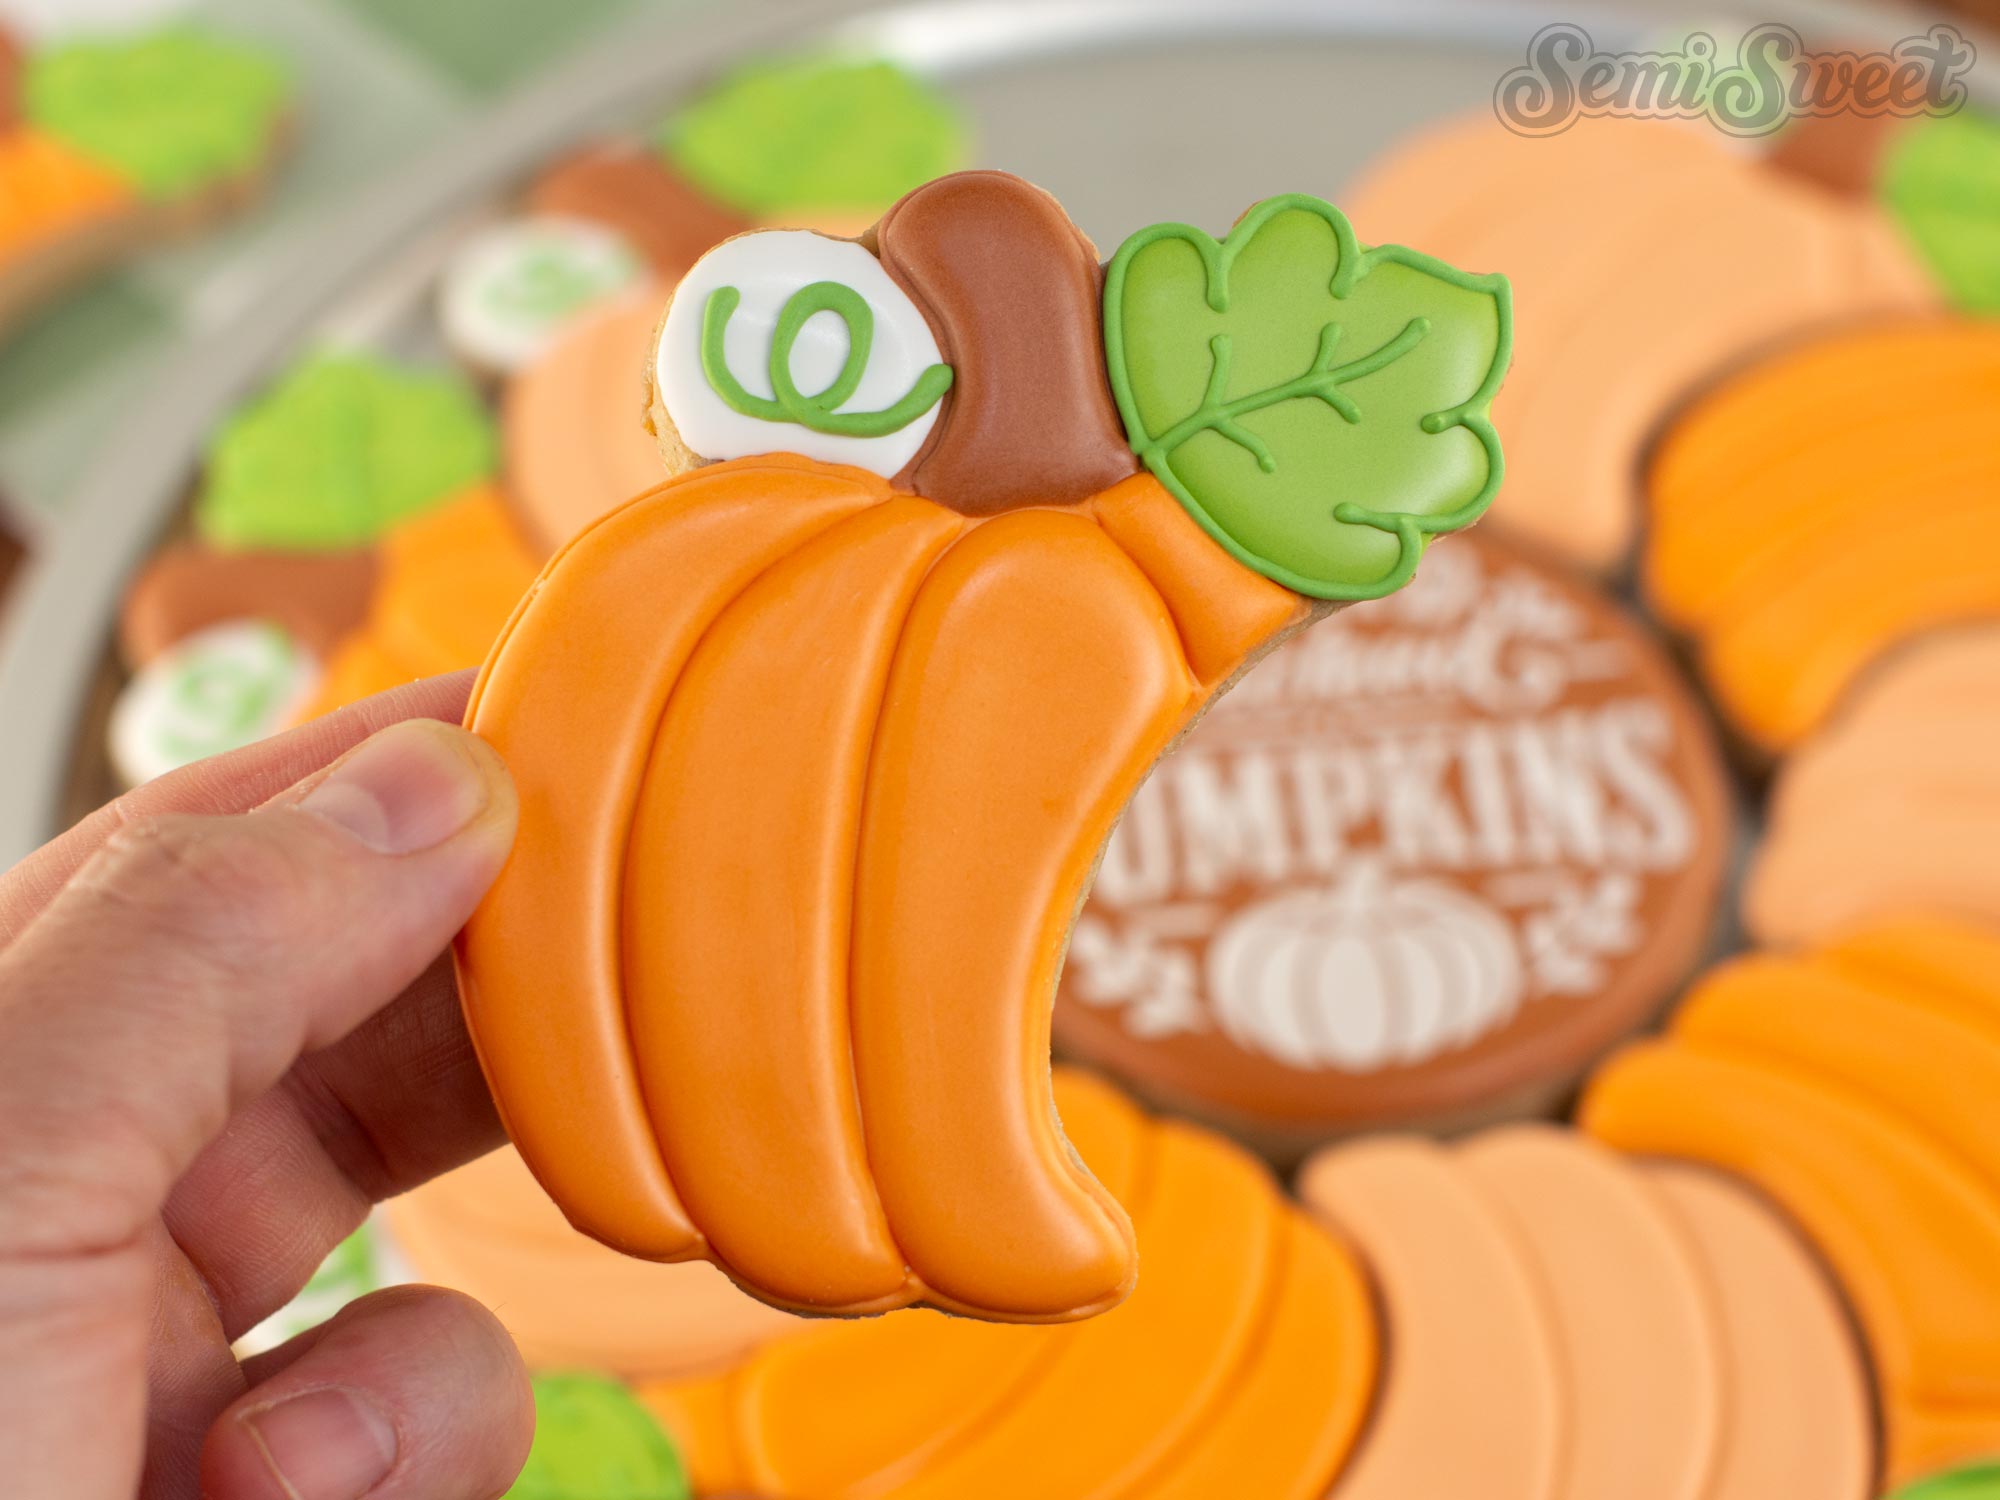
Lastly, add the green vine and leaf outline details. I used a slightly darker green to make these details pop.
Decorate the “Hand Picked Pumpkins” Center Cookie
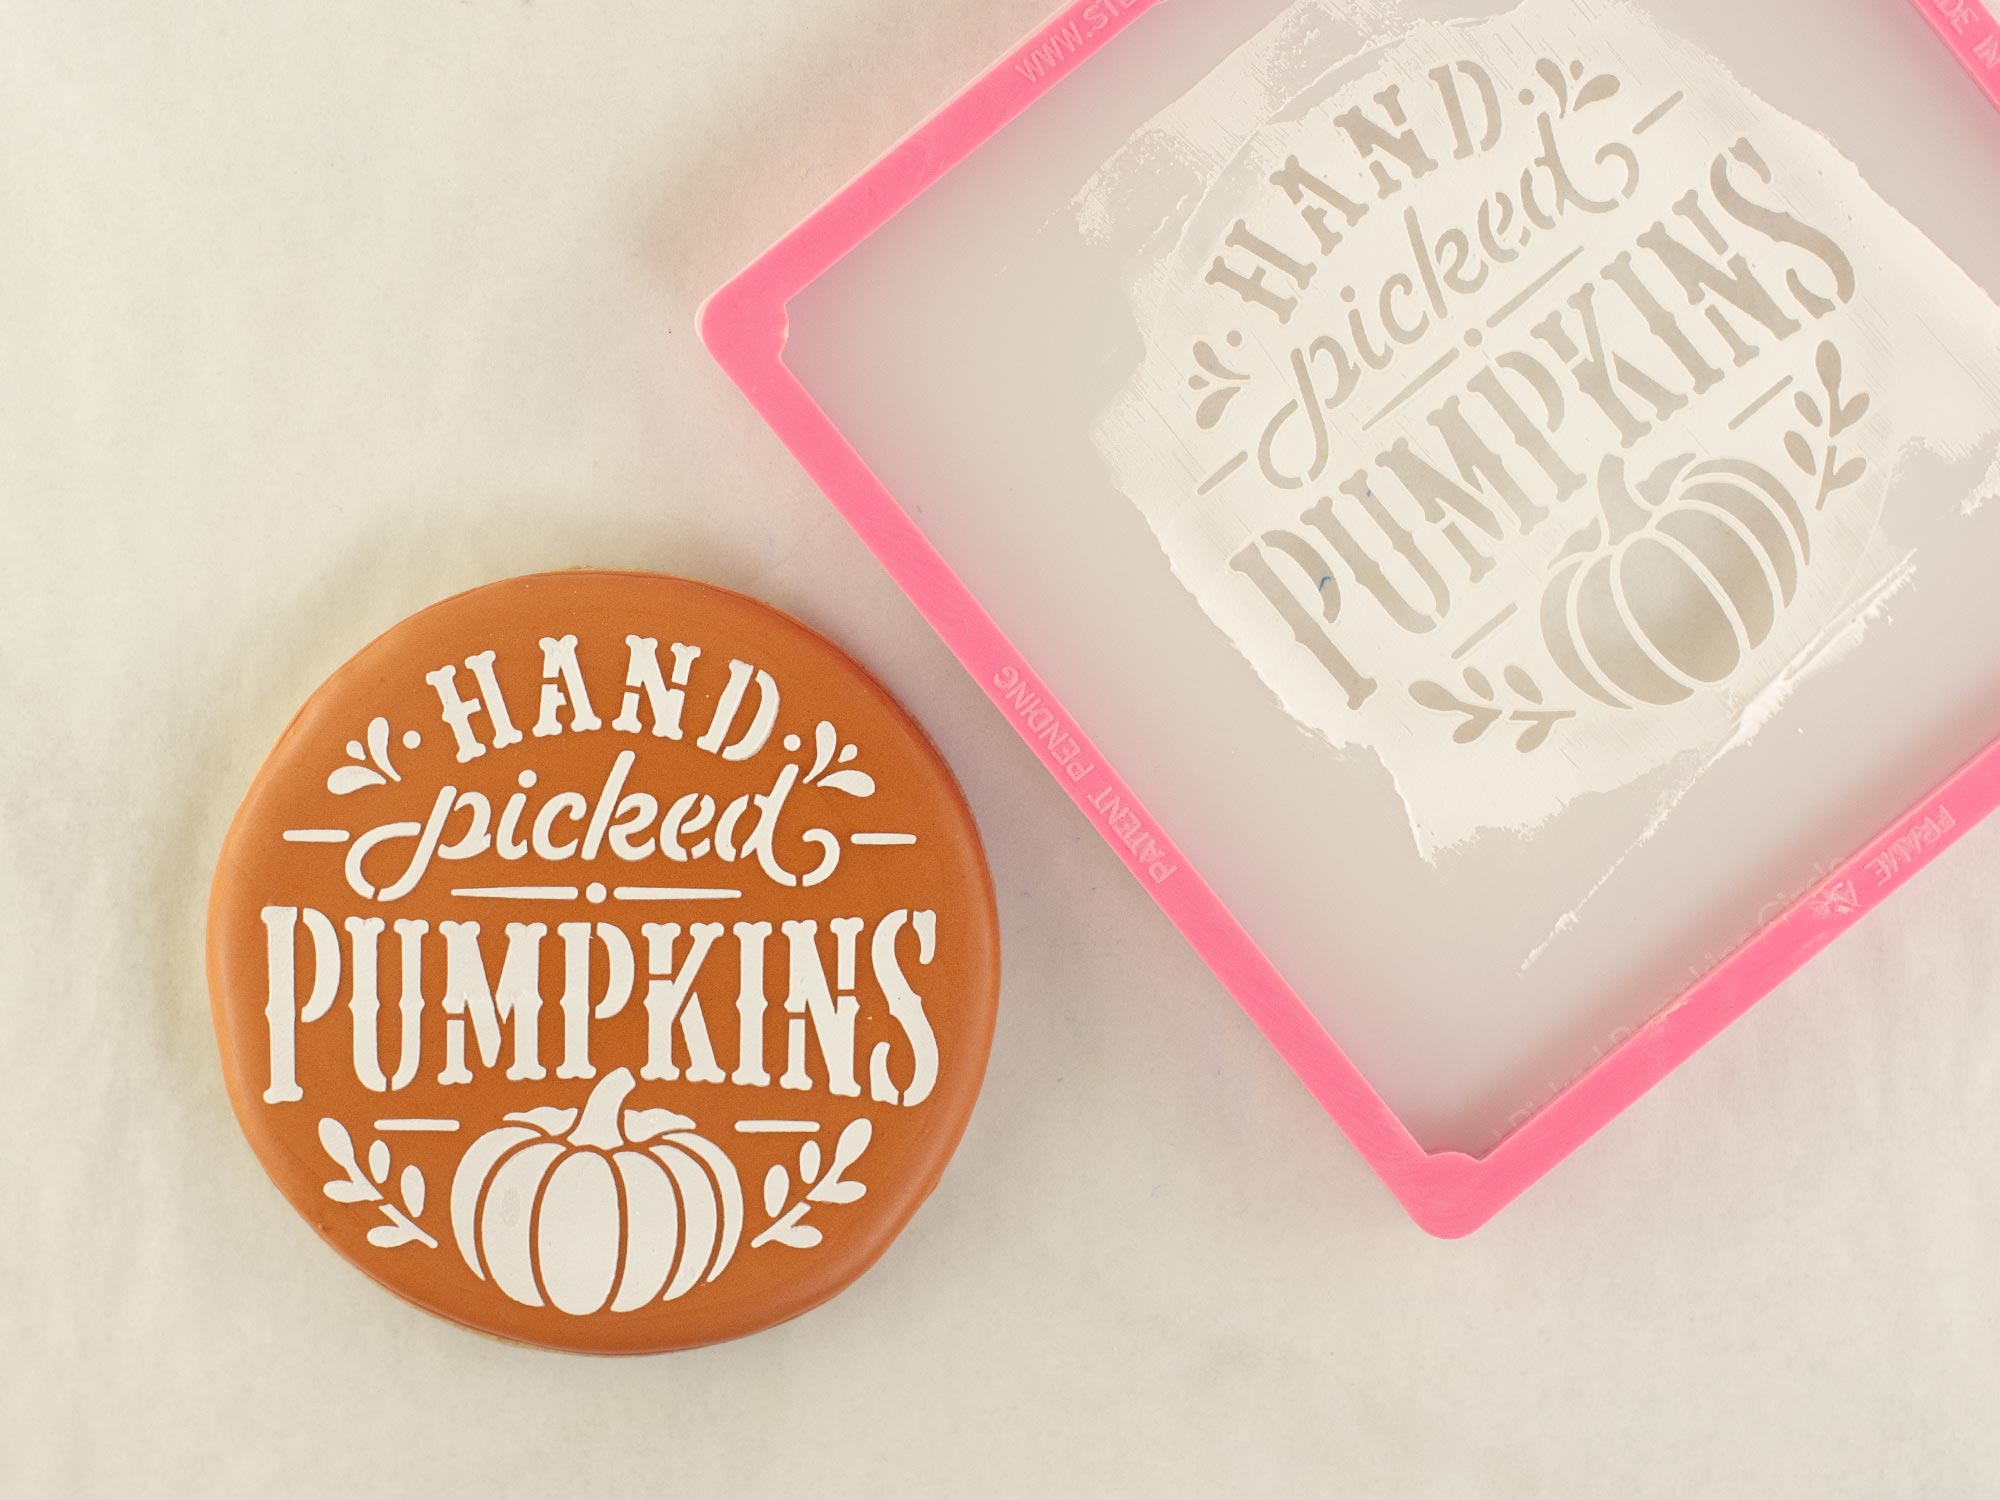
For the center cookie, outline and flood the entire round cookie with warm brown royal icing.
Let the base icing dry completely before adding the stencil. This is important, you don't want the stencil to leave marks or dents in the royal icing underneath.
Position the Hand Picked Pumpkins cookie stencil in the center of the cookie and spread a thin, even layer of stiff white royal icing over the stencil.
Carefully scrape away the excess icing and lift the stencil straight up to reveal the design.
The white lettering really pops against the warm brown background and helps turn the center cookie into the focal point of the entire platter.
Tip for Clean Cookie Stenciling
For crisp lettering, use royal icing that's relatively stiff rather than flood consistency. You want it to spread smoothly across the stencil without being runny enough to seep underneath the openings.
Also, try not to make the icing layer too thick. A thin, even pass usually produces the cleanest results.
Overlapping Pumpkin Cookie Platter Video Tutorial
The steps above are summarized in this time-lapsed video I put together below.
Assemble the Pumpkin Cookie Platter
Once all of the royal icing is completely dry, it's time for the best part—putting everything together.
Place the round “Hand Picked Pumpkins” cookie in the center of your platter first.
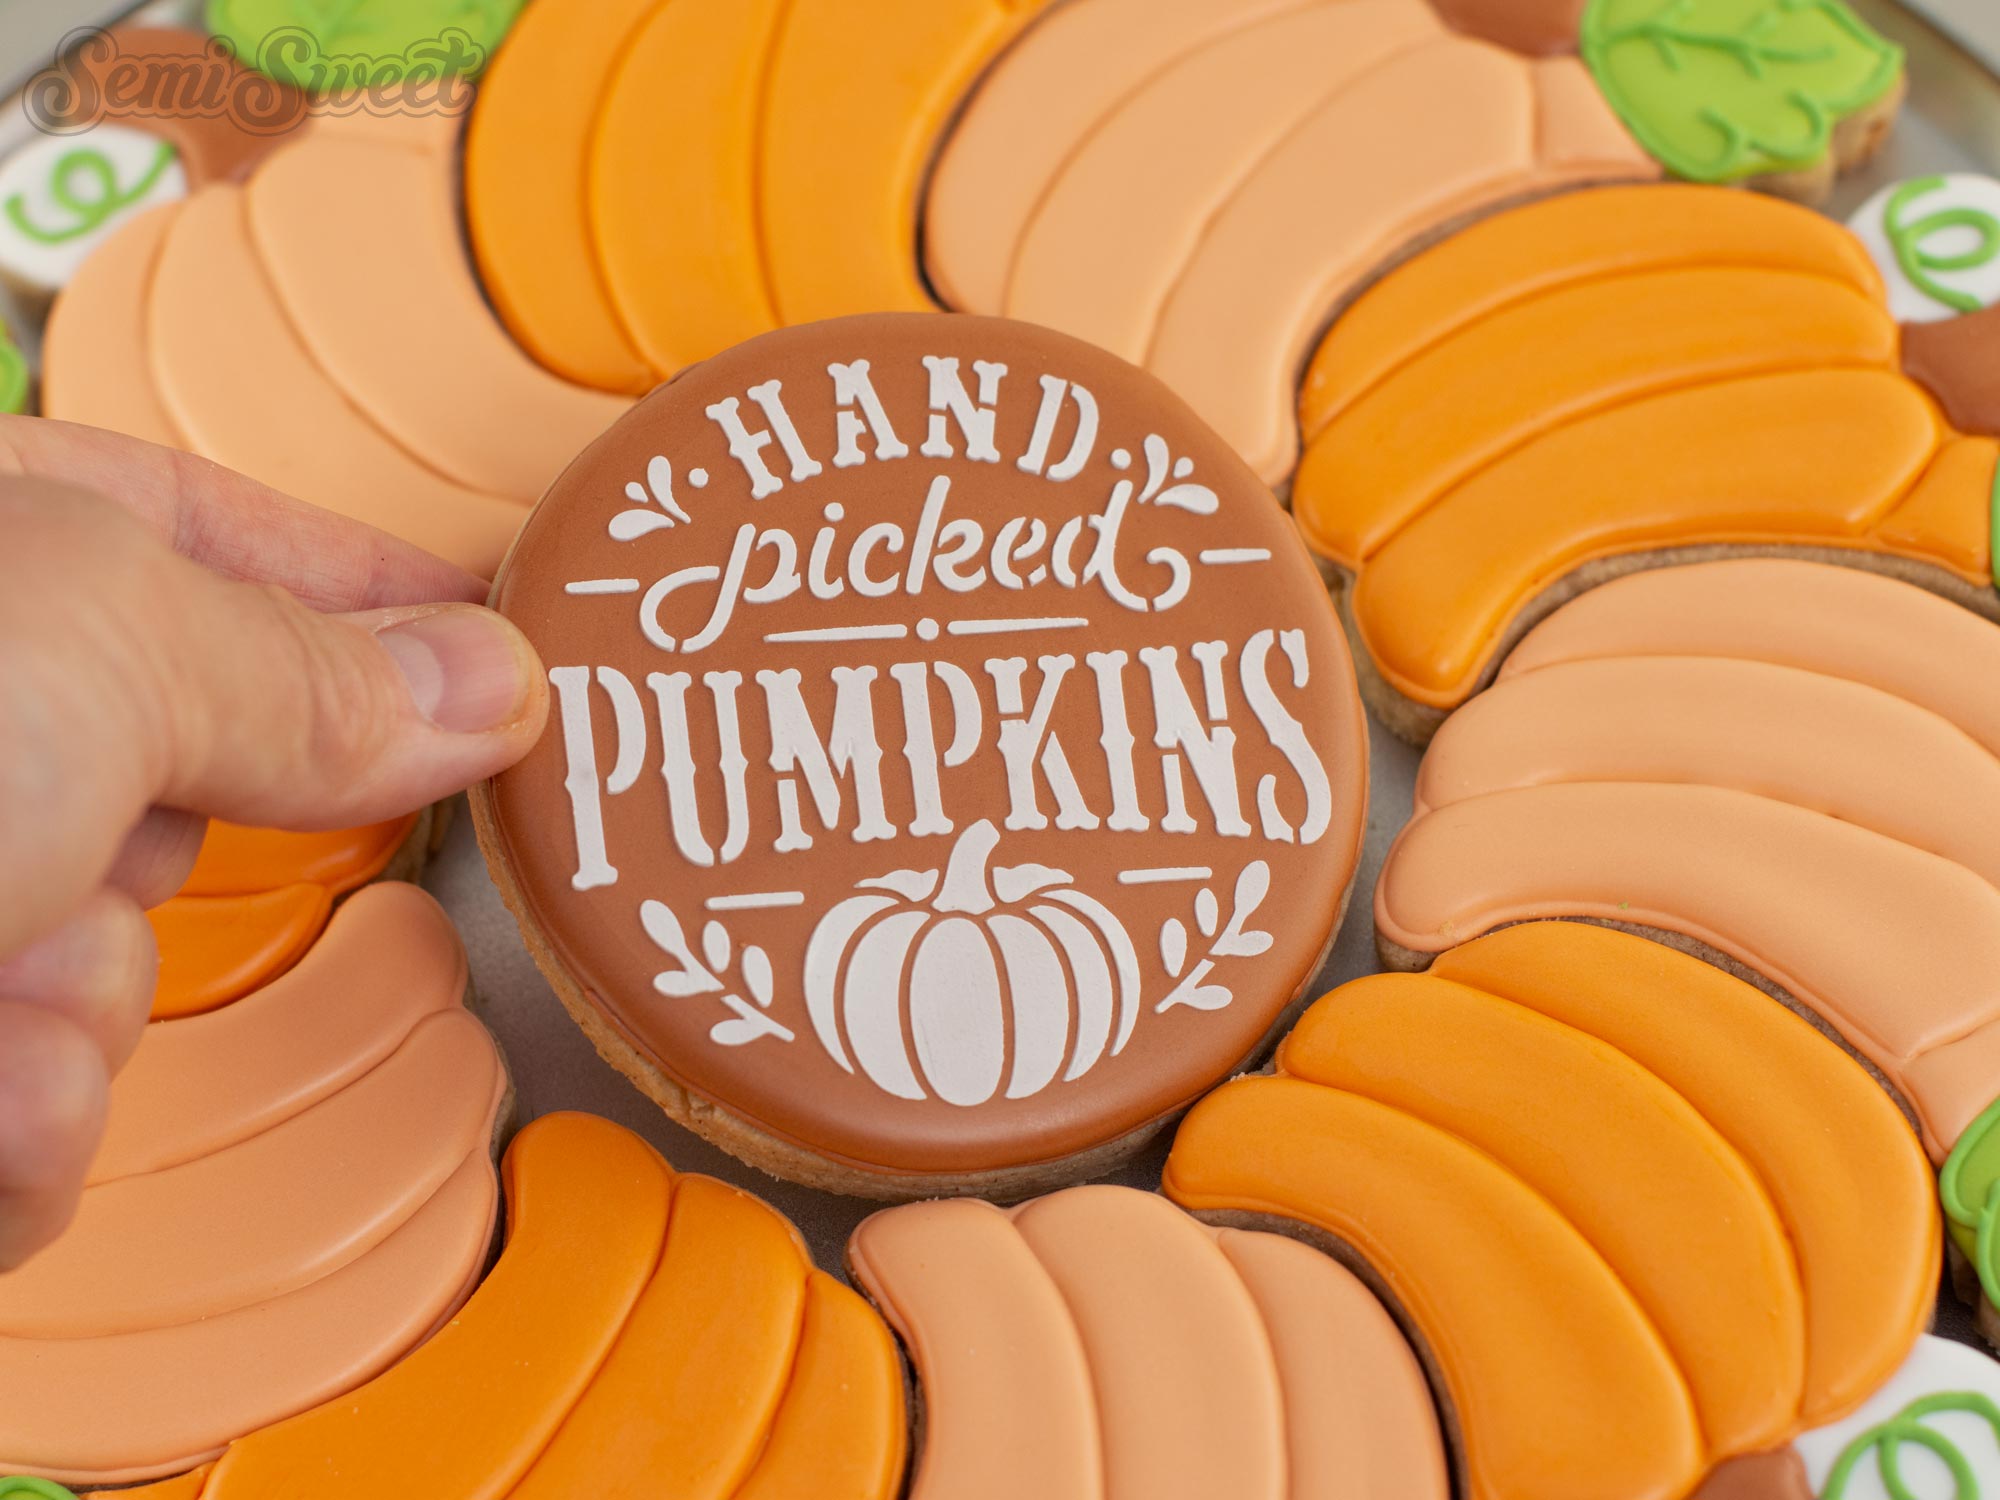
Next, arrange the pumpkin cookies around it, alternating between the orange and light orange pumpkins. Position each cookie so the curved pumpkin bodies create a continuous circle around the centerpiece.
Make small adjustments until the cookies sit closely together and the spacing looks even.
When assembled, the separate cookies should read almost like one large pumpkin wreath.
Serving and Packaging the Finished Cookie Platter
A 12-inch round pizza pan from the Dollar Tree makes a convenient base for displaying a cookie platter like this one. It's inexpensive, sturdy, and makes it easy to transport the cookies without disturbing their arrangement.
For gifting, you can place the entire assembled platter inside a large clear cellophane bag and tie it closed with coordinating ribbon or a bow. This keeps all of the individual cookies together while still allowing the finished design to be seen.
If you're transporting the platter rather than gifting it, I recommend arranging the cookies as close together as possible so there's less room for the individual pieces to shift.
More Fall Cookie Decorating Ideas
I hope this overlapping pumpkin cookie platter inspires a little fall baking of your own! For this platter, I used my Pumpkin Spice Toffee cookie recipe, which pairs pumpkin spice flavor with little bits of toffee and is made specifically for cookie cutters. It’s a great recipe to use when you want the cookies themselves to feel just as seasonal as the design.
If you’re looking for more designs to decorate this season, be sure to browse the fall cookie cutters in our shop. You’ll find plenty of pumpkins, leaves, Thanksgiving designs, and other autumn favorites that are perfect for creating coordinating cookie sets or adding to your fall baking lineup.
Add Vibrant Colors with Americolor Food Coloring

To make your decorated cookies pop, use Americolor Food Coloring for bold, consistent colors. It’s my go-to brand for achieving vibrant shades without altering the consistency of the royal icing.
Buy NowTags:
You may also like...


Mike Tamplin
Hi, I’m Mike, the cookie decorator behind Semi Sweet Designs! Since 2011, I’ve been sharing recipes, tips, and tutorials to help beginners gain confidence and give experts fresh inspiration. Along with my brother, Billy, we design and offer hundreds of cookie cutters, stencils, and apparel—all made with decorators in mind.
Whether you're just starting or a seasoned pro, we’re here to make cookie decorating easier and more fun!
Read more