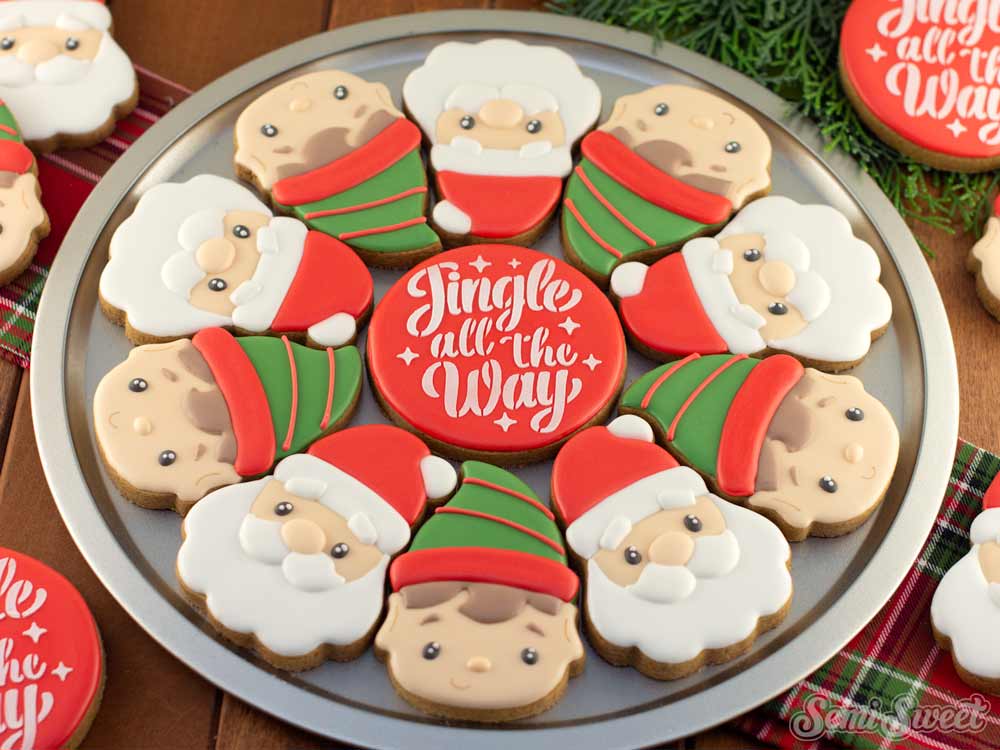
How to Make a Mrs. Claus Cookie Set

My Essential Baking Tools for Royal Icing
Essential Decorating Tools for Royal Icing
Out of all the cookie designs out there, cookie-fying a "person" cookie always tend to be most challenging for me. They're definitely a labor of love because of the number of details involved and steps to complete the design.
With this new Mrs. Claus cookie couple set, I tried to minimize those details and steps, while still producing an adorable character cookie everyone is sure to love.
The approach behind this cookie set design was to break up the character into two cookies- a head and a body. This made Mrs. Claus bigger overall, making it easier to get to all of her details. Also, I simplified her body elements by hiding most of it behind a big giant chocolate chip cookie. My hopes were to remove any intimidation of decorating her, while making it enjoyable in the process.
Stocking with Gifts Cookie Cutter
Just added to the shop for the upcoming Christmas season is this Mrs. Claus cookie couple set. There is also a coordinating Santa Claus cookie set available to complete the set.
The cookie cutters are available in Regular and Large sizes. However, for this tutorial, I'll be decorating the LARGE size.
For reference, you can see both sizes at the end of this tutorial. My personal preference would be the LARGE size though.

Template for the Mrs. Claus Cookie Set
To help with the decorating process, I made a PDF template available for this Mrs. Claus cookie set design as a guideline.
You can download Round 2 of the 2020 Christmas cookie templates HERE.
If you have a Kopykake or Pico projector, just print it out (or pull it up on your mobile device) and you are good to go. For those without a projector, follow the suggested steps below by tracing the design onto the cookie with an edible food marker.
The Decorating Process
For these Mrs. Claus Cookies, you will need the following suggested colors:
- Flesh Color royal icing (I mixed a Americolor Copper and Americolor Ivory.)
- Holiday Red piping and flood icing. (I used Americolor Tulip Red.)
- Holly Green icing (I mixed Americolor Egg Yellow with Mint Green.)
- Yellow piping icing ( used Americolor Egg Yellow.)
- White icing (I used Americolor Bright White.)
- Black icing (I used Americolor Super Black.)
- Brown Tan icing (I mixed Americolor Warm Brown and Americolor Egg Yellow.)
- Chocolate Brown (I used Americolor Chocolate Brown.)
Step 1
Begin by first filling in the face with flesh colored icing and the bun with white icing.
Let that icing crust over, then fill in the middle hair section with white icing.

Step 2
Next, add the small details like two circles for the glasses, the earrings, the white side hair curls, one holly leaf on the head and one berry. Let this icing set.
Then continue with the remaining details like the nose, the eyes, the smile, the eyebrow, the other holly leaf and berries, and lastly the hair outline.

Step 3
For the body cookie, begin by flooding the top shirt area with red icing. Let that set, then flood the bottom skirt with green icing.

Step 4
Next, add the round cookie icing, as shown. Also, add one white collar to the top.
Once that icing is set, add the other collar and both middle fingers.

Step 5
Lastly, add the dark brown chocolate chips, the other fingers, and the dress outlines.

Video Tutorial
The steps above are summarized in this time-lapsed video I put together.
Mrs. Claus can't be without her partner-in-crime, Santa Claus. He too, is also available as a two-piece set.
This single person set will fit in this classic BRP cookie box (7" x 4 3/8" x 1.25").

If you would like to package both these two Christmas characters together, I was able to do so in this BRP long cookie box (12" x 5" x 1.5").
However, as shown below, the large-sized cookies had to be angled to fit them all in.

For comparison, the regular-sized cookies fit in a straight line, as shown.

Alternatively, instead of holding chocolate chip cookies, you can easily substitute anything else round for the design. For instance, they could be decorated as holding an ornament or a wreath instead.
Happy Holidays!
Add Vibrant Colors with Americolor Food Coloring

To make your decorated cookies pop, use Americolor Food Coloring for bold, consistent colors. It’s my go-to brand for achieving vibrant shades without altering the consistency of the royal icing.
Buy Now


