How to Make Santa Beard Plaque Cookies

My Essential Baking Tools for Royal Icing
Essential Decorating Tools for Royal Icing
Now that Halloween is officially over, I think it's safe to go full-speed ahead to Christmas.
(Before you ask, "well, what about Thanksgiving, Mike?" Thanksgiving and Christmas are kind of blended together at my house. My tree is usually up and the halls are decked by the time the turkey is served.)
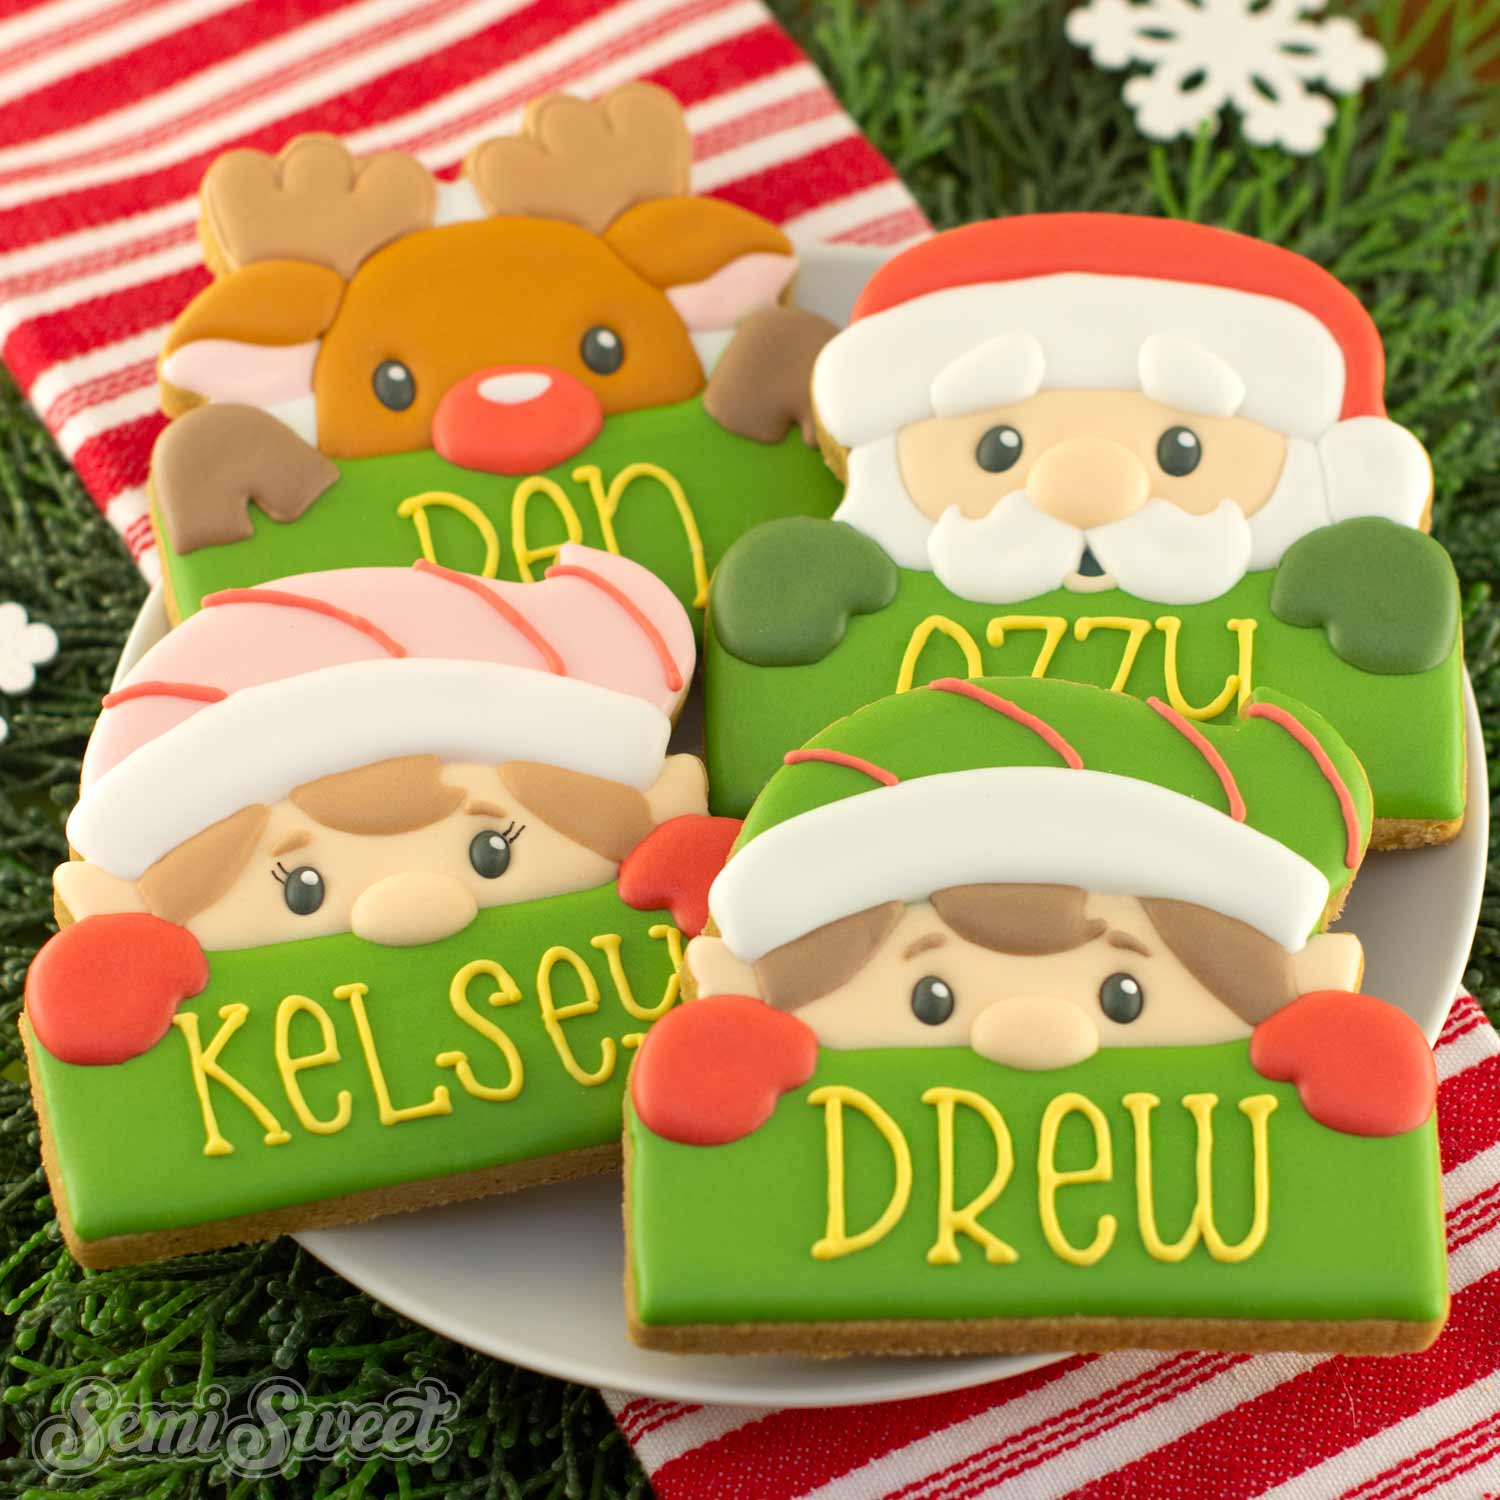
Christmas is such a busy season for baking, mostly because cookies play such an integral part of the holiday. And adding names to cookies or a unique message is always a popular option for Christmas cookies. That being said, I came up with these whimsy Santa Beard Plaque cookies as a creative way to add personalization. I tried to design Santa's beard to be wide enough for the longest of names, while still encapsulating the magic of Jolly Old St. Nick that I think kids would enjoy.
Here's a breakdown on how I decorated these Santa beard plaque cookies.
Santa Beard Plaque Cookie Cutter
Recently added to the shop is this new Santa Beard Plaque cookie cutter design.

This cookie cutter is available in two sizes, Regular and Large, but the ones shows in this post are the LARGE size.
Template for the Santa Beard Plaque Cookies
To help with the decorating process, I made a PDF template of all the designs of my 2019 Christmas cookie collection, including this Santa Beard Plaque cookie design.
Click the link below for the downloadable template PDF file.
This file is 3 pages long and is rather large in data size. Just a warning, it might take a moment before the file opens in your browser.
If you have a Kopykake or Pico projector, just print it out (or pull it up on your mobile device) and you are good to go. For those without a projector, follow the suggested steps below by tracing the design onto the cookie with an edible food marker.
The Decorating Process
For these Santa Beard Plaque Cookies, you will need the following suggested colors:
- Flesh Color royal icing (I mixed a Americolor Copper and Americolor Ivory.)
- Holiday Red piping and flood icing. (I used Americolor Tulip Red.)
- White icing (I used Americolor Bright White.)
- Black icing (I used Americolor Super Black.)
Step 1
For those without a projector, begin by making a guideline for where the face and hat sections should be. I made a template with template plastic from the PDF file above and used a food marker to draw the guideline on the cookie.

Step 2
Start by first filling in the top of the cap area with red icing and the lower beard area with white icing. Let that icing set, then fill in the face and ear sections with flesh-colored icing.

Step 3
Next, fill in the remaining white sections of the cap. Let this icing dry (about an hour).
Once the icing had time to set, add the two eyebrows and only one side of the mustache, as shown.

Step 4
When the mustache icing had time to set, go ahead and add the other matching side.
Complete the face by adding the eyes, the nose, and the lip. Draw on the ear details with a black food pen.

Step 5
Lastly, add a custom phrase. I added the word "believe" using my pico projector.
To create the believe design, I used this Samantha Font as a guide. However, I altered the letter accents and letter spacing to better fit the beard area. If you would like to use this believe design, I added it to the PDF template.

Video Tutorial
The steps above are summarized in the time-lapsed video below.
For gift box options for these Santa Beard Plaque cookies, I like the square boxes from ClearBags.com.

Shown above, is the LARGE size cookie in a 4"x4" gift box. Honestly, I think the fit is a little too tight. If I could do these cookies again, here are my gift box recommendations.
For the REGULAR sized cookie (which is 3.5" in size), the 4"x4" gift box would be perfect.
For the LARGE sized cookie (which is 4" in size), these 5"x5" boxes would most likely be idea.
Both these cookie / box size combinations allow for a little wiggle room, which is nice if you heat-seal your cookies in bags before placing them in boxes. Hopefully, these suggestions help with planning your Christmas cookie options and clear up any questions about packaging.
Add Vibrant Colors with Americolor Food Coloring

To make your decorated cookies pop, use Americolor Food Coloring for bold, consistent colors. It’s my go-to brand for achieving vibrant shades without altering the consistency of the royal icing.
Buy Now


