Beginner-Friendly Ghost Cookie Tutorial: Easy 4-Piece “BOO” Halloween Cookie Set
Learn how to decorate three cute ghost cookies and a simple BOO cookie with this beginner-friendly Halloween tutorial.
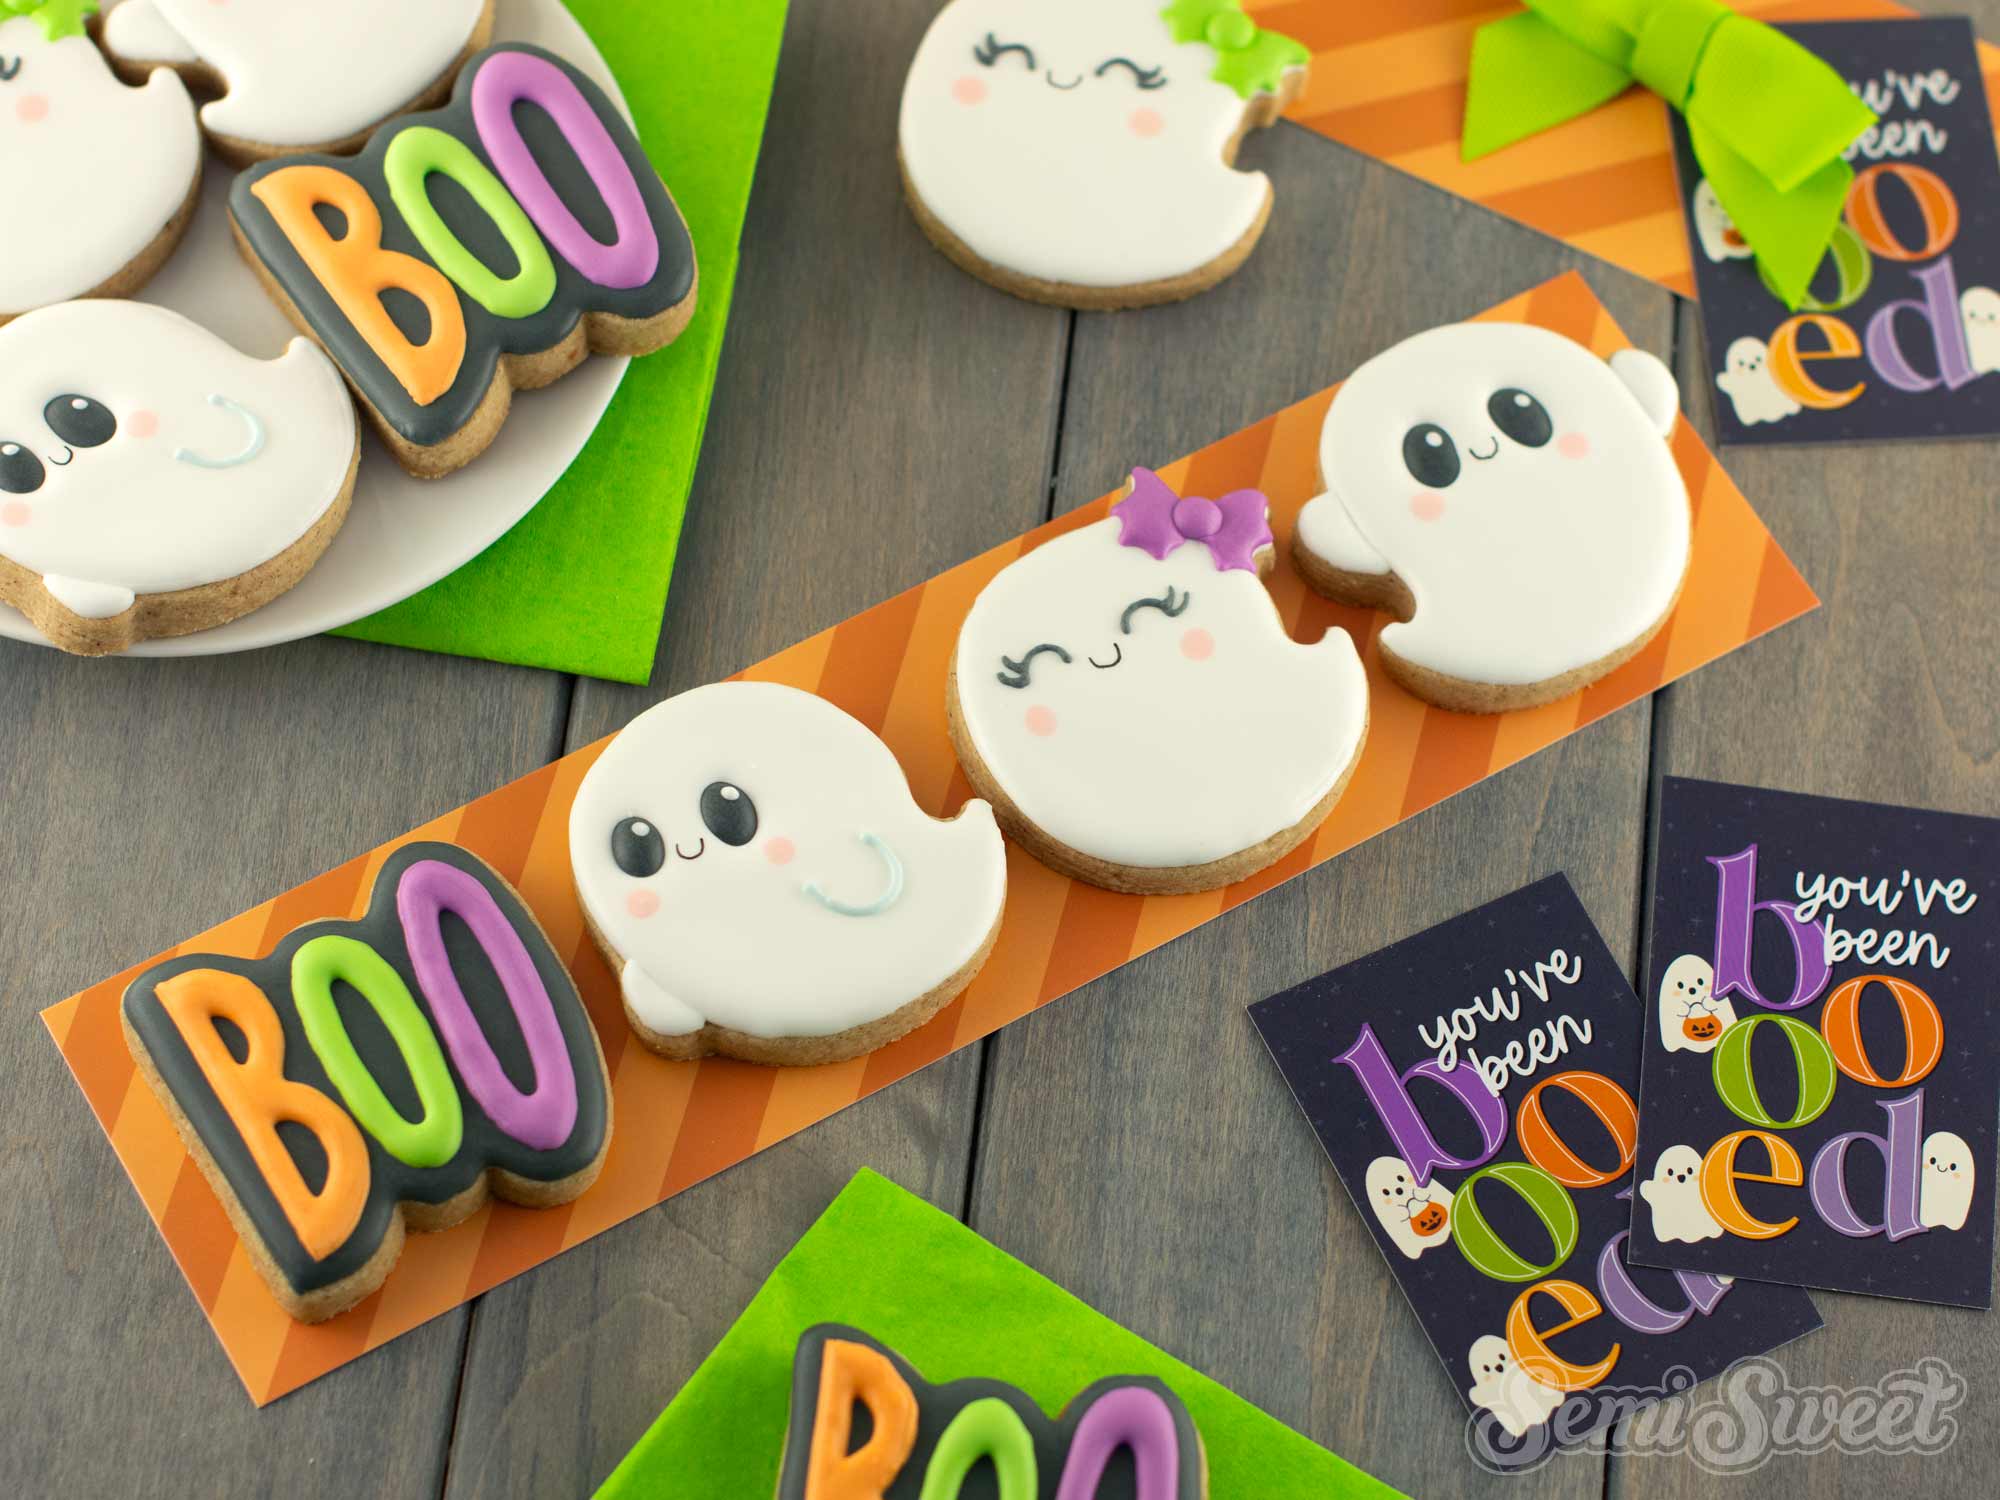
If you’ve been wanting to try cookie decorating with royal icing, this Halloween cookie set is the perfect place to start! In this tutorial, I’ll show you how to decorate a 4-piece cookie cutter set that includes three different ghost designs and one simple “BOO” word cookie. Each design is fun, beginner-friendly, and requires only a few basic steps, making it an stress-free project even if you’re brand new to cookie decorating. Whether you’re baking for a Halloween party, a seasonal gift, or just for fun, this set is a great way to practice your icing skills. The ghost cookie cutter set and the coordinating packaging ideas featured in this post are available in our shop, so you can easily recreate the look from start to finish.
My Essential Baking Tools for Royal Icing
Essential Decorating Tools for Royal Icing
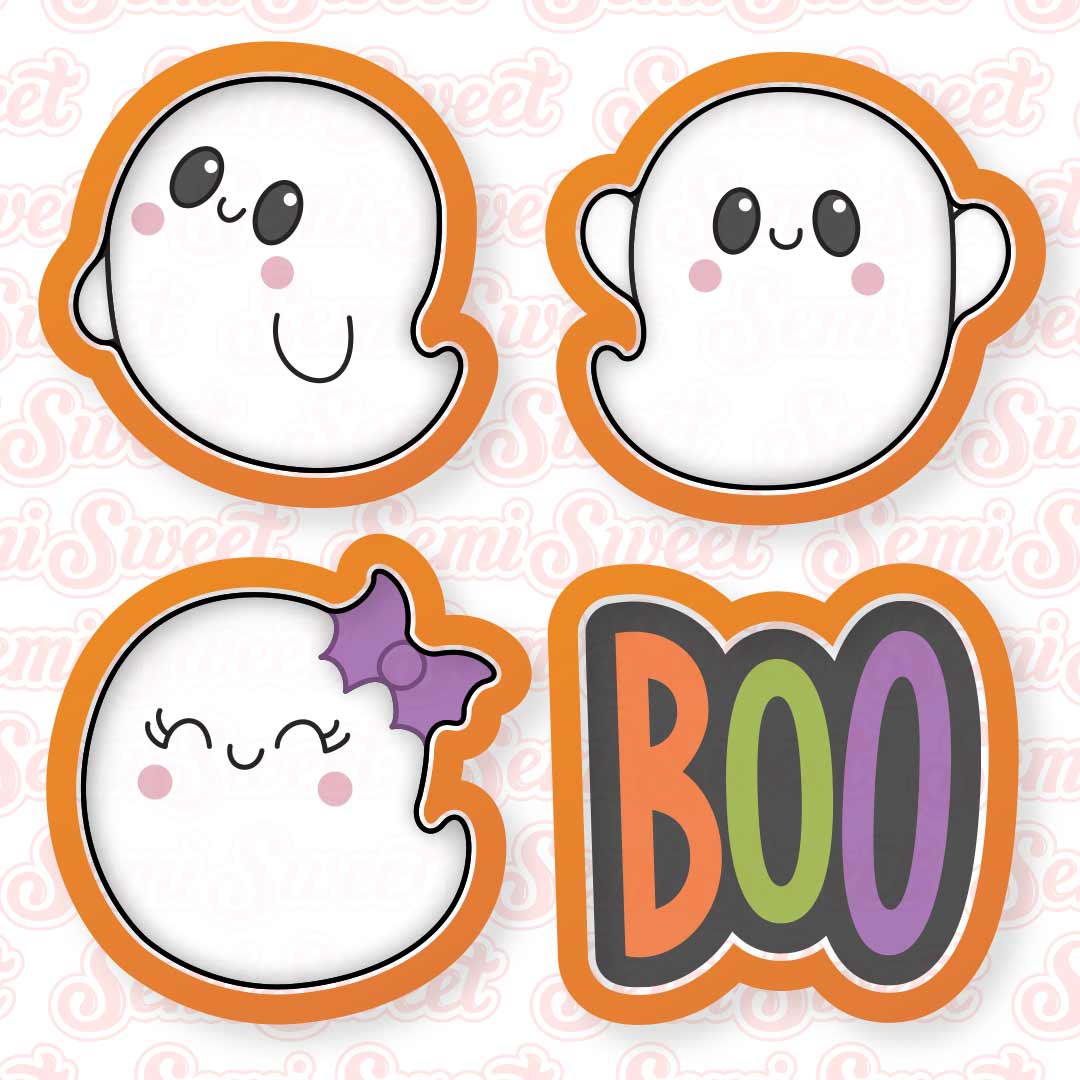
Simple Boo & Ghosts Cookie Cutter Set
Just added to the shop for the upcoming Halloween season is this Simple Boo & Ghosts Cookie Cutter Set. You can purchase it as a 4-piece set or as individual pieces.
For this tutorial, I'll be decorating the MINI sizes. The minis cookie cutters will fit in our 2.75" x 10" cookie box, as well as our 3" x 12" bag sleeves.
Template for the Halloween Ghost Dog and Cat Cookies
To help with the decorating process, I made a PDF template of all the designs of this year's Halloween collection, including this Halloween ghost pets cookie set.
Click the link below for the downloadable template PDF file.
This file is rather large in data size. Just a warning, it might take a moment before the file opens in your browser.
If you have a Kopykake or Pico projector, just print it out (or pull it up on your mobile device) and you are good to go. For those without a projector, follow the suggested steps below by tracing the design onto the cookie with an edible food marker.
Step-By-Step Cookie Decorating Guide
Decorating cookies always starts with a good royal icing recipe. This is my easy royal icing recipe for decorating sugar cookies that I always use.
For the colors used for these Ghost cookies, you will need the following suggested colors:
- White flood icing (I used Americolor Bright White.)
- Black icing (I used Americolor Super Black.)
- Orange icing (I used Americolor Orange.)
- Green icing (I mixed Americolor Egg Yellow with Mint Green.)
- Purple icing (I mixed Americolor Regal Purple with a touch of Deep Pink.)
- Light Pink icing (I used a tiny amount of Americolor Tulip Red.)
- Medium Pink icing (I mixed Tulip Red and Deep Pink.)
- Dark Pink icing (I mixed the Medium Pink icing above with a touch of Maroon.)
Step 1
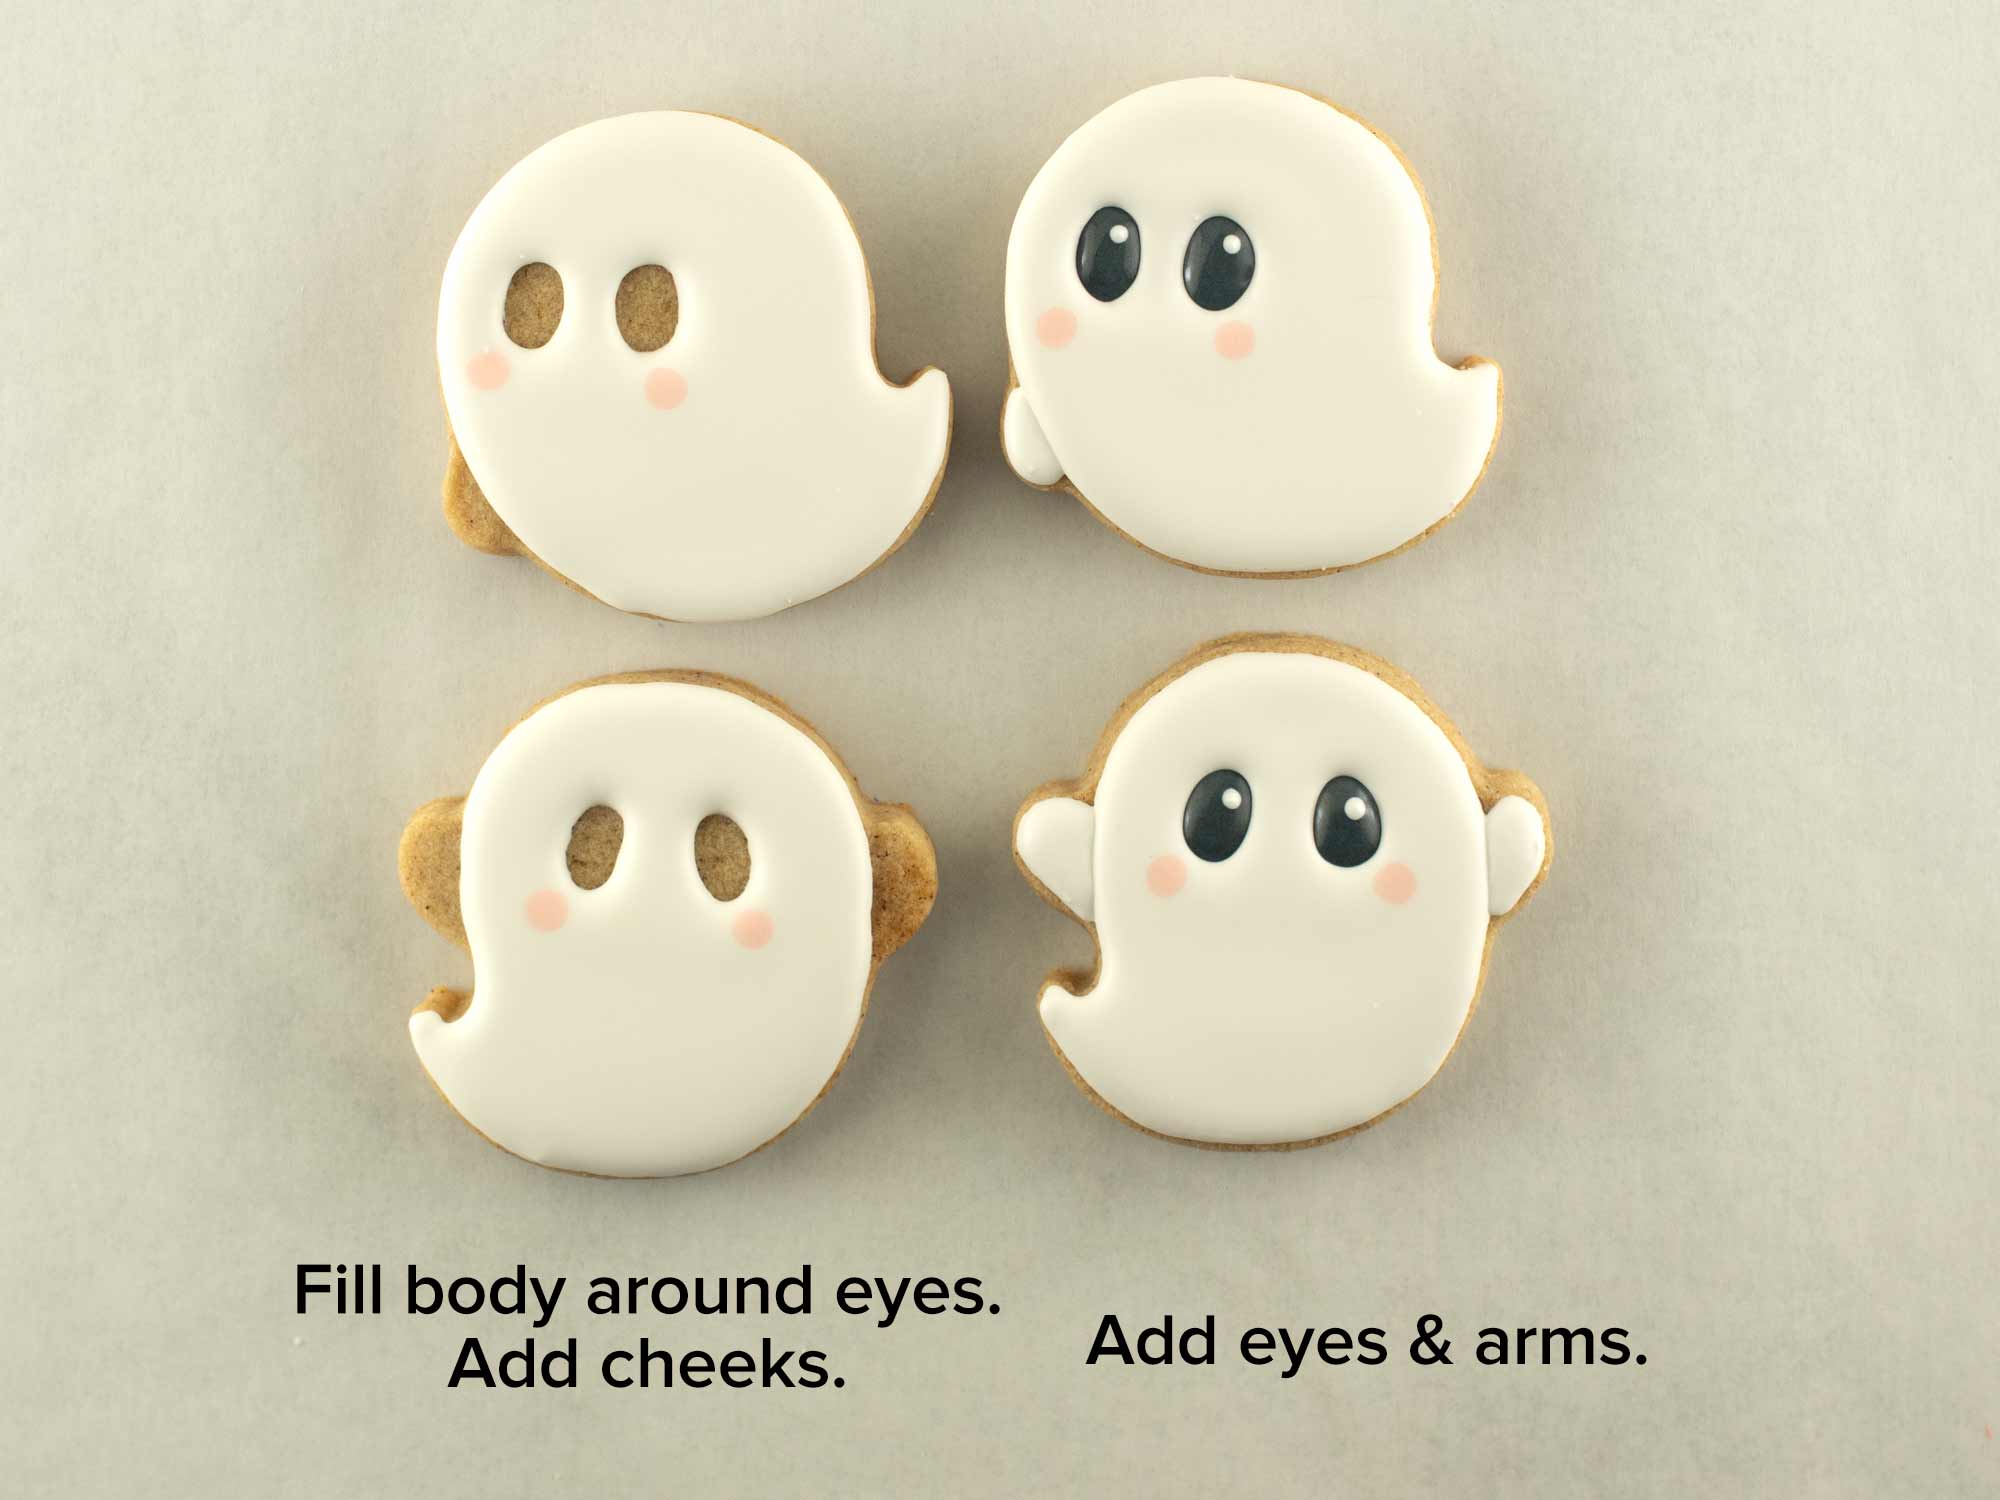
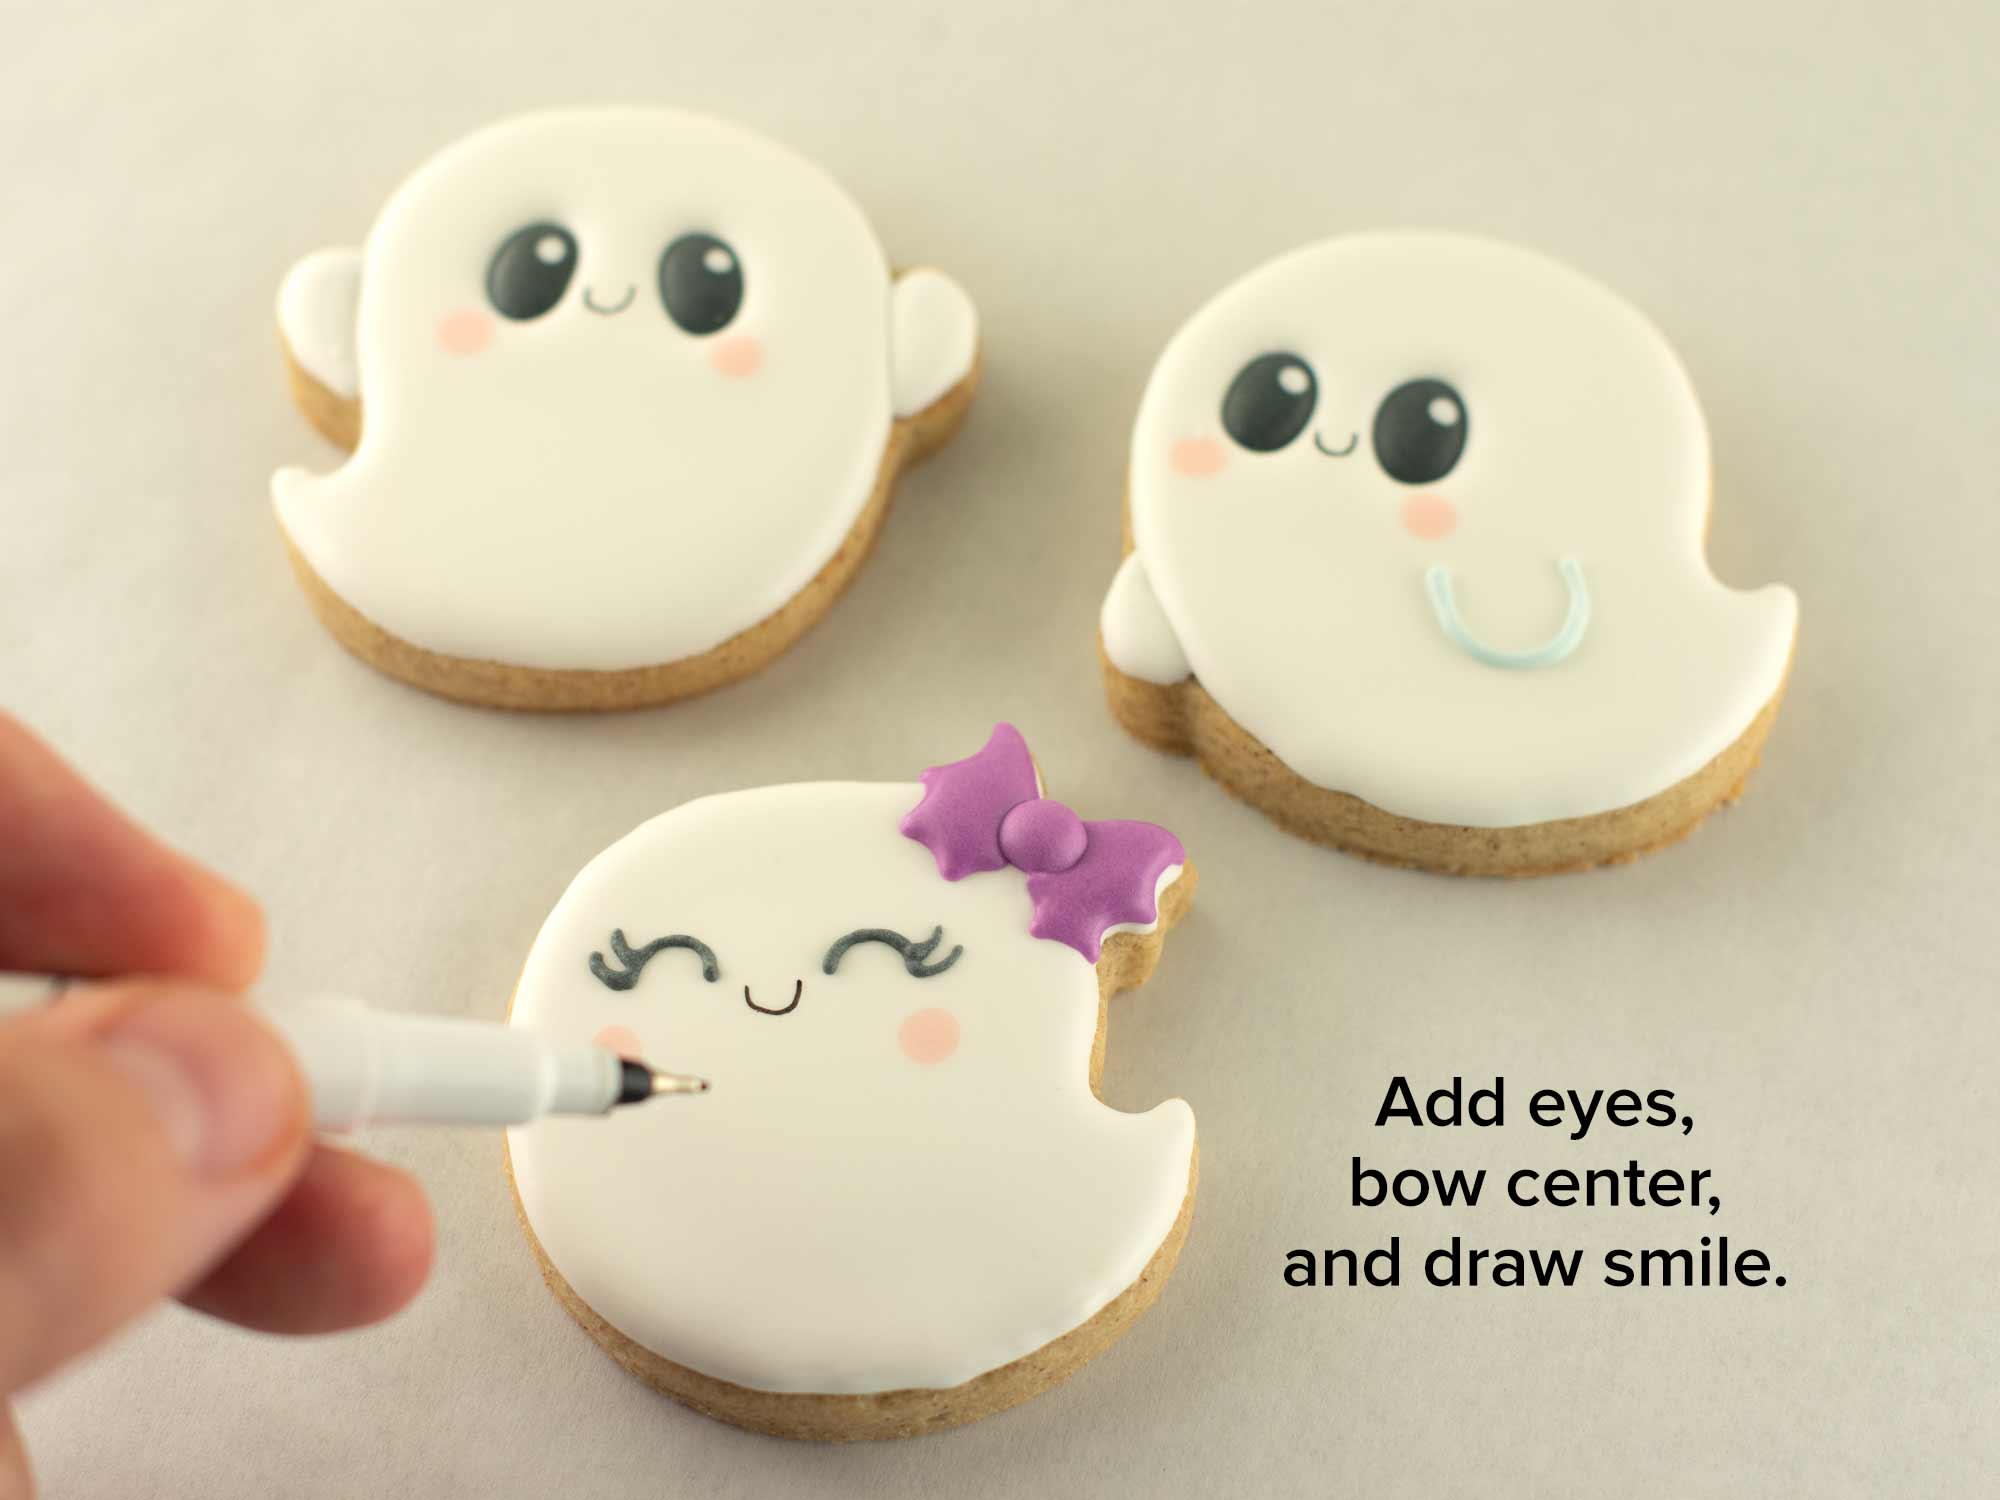
For the ghost cookies, start by filling in the body section around the eye holes with white icing. Then quickly add light pink cheek dots, as shown. Let this icing set.
Next, add the black eyes and a little white dot accent. Also, fill in the remaining arm sections with white icing.
Step 2
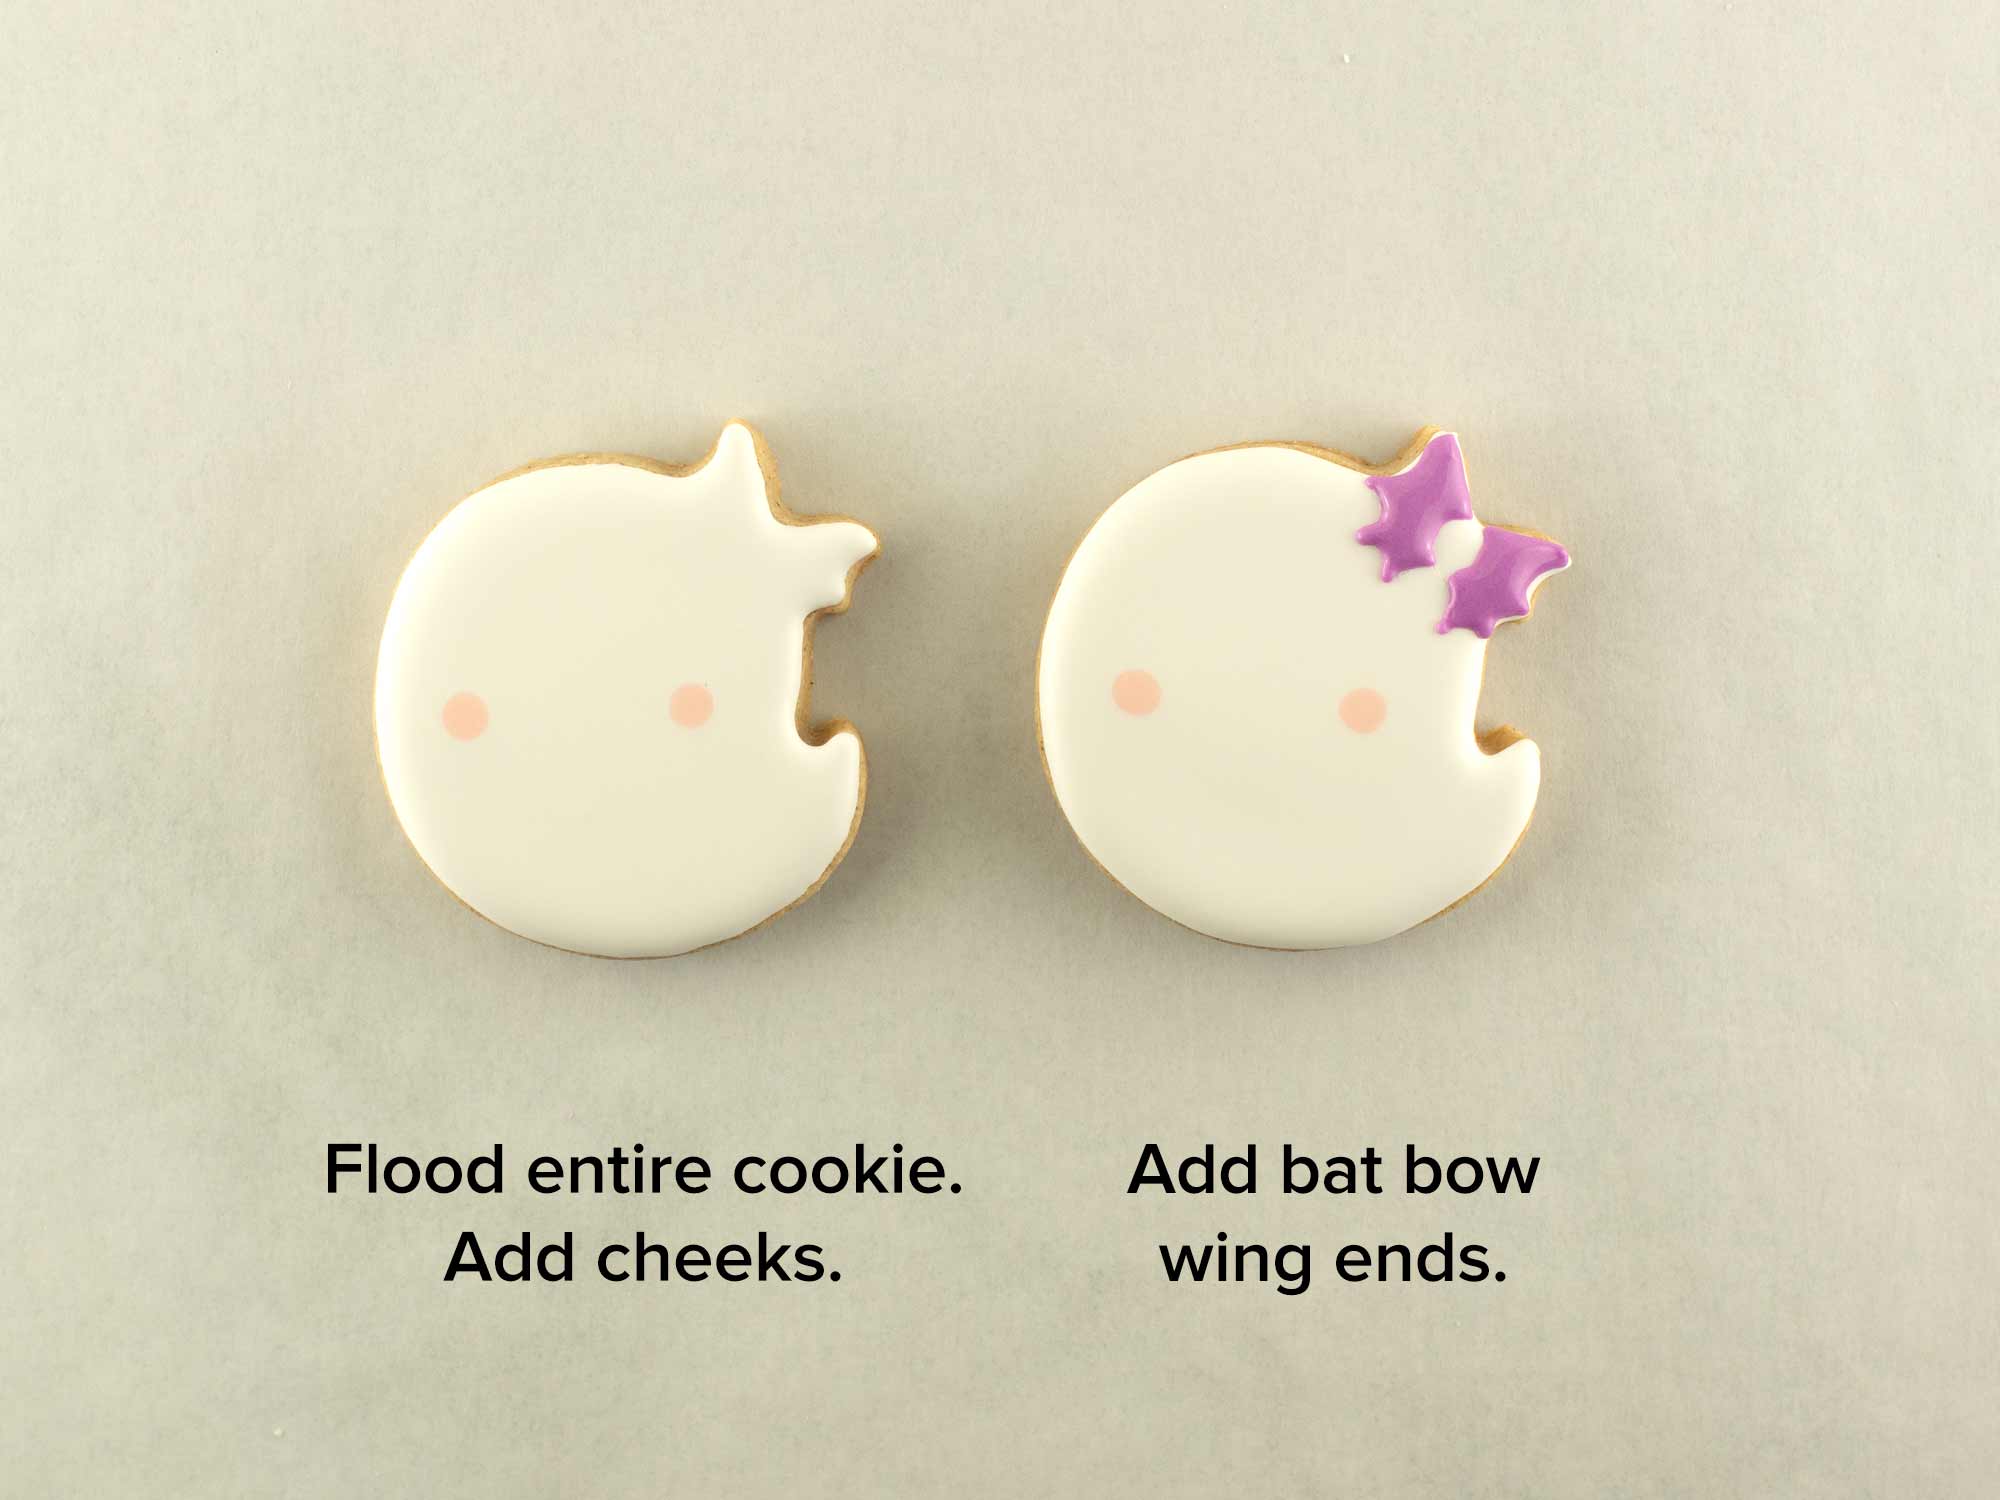
For the girl ghost, flood the entire cookie in white icing. Quickly add the light pink cheek dots. Let this icing set.
Next, add the two wing ends of the bat bow, as shown.
Step 3
Once the base layer of icing had time to dry, dry on the smiles with a black food pen. For the girl ghost, add the eyes and center dot of the bow.
Step 4
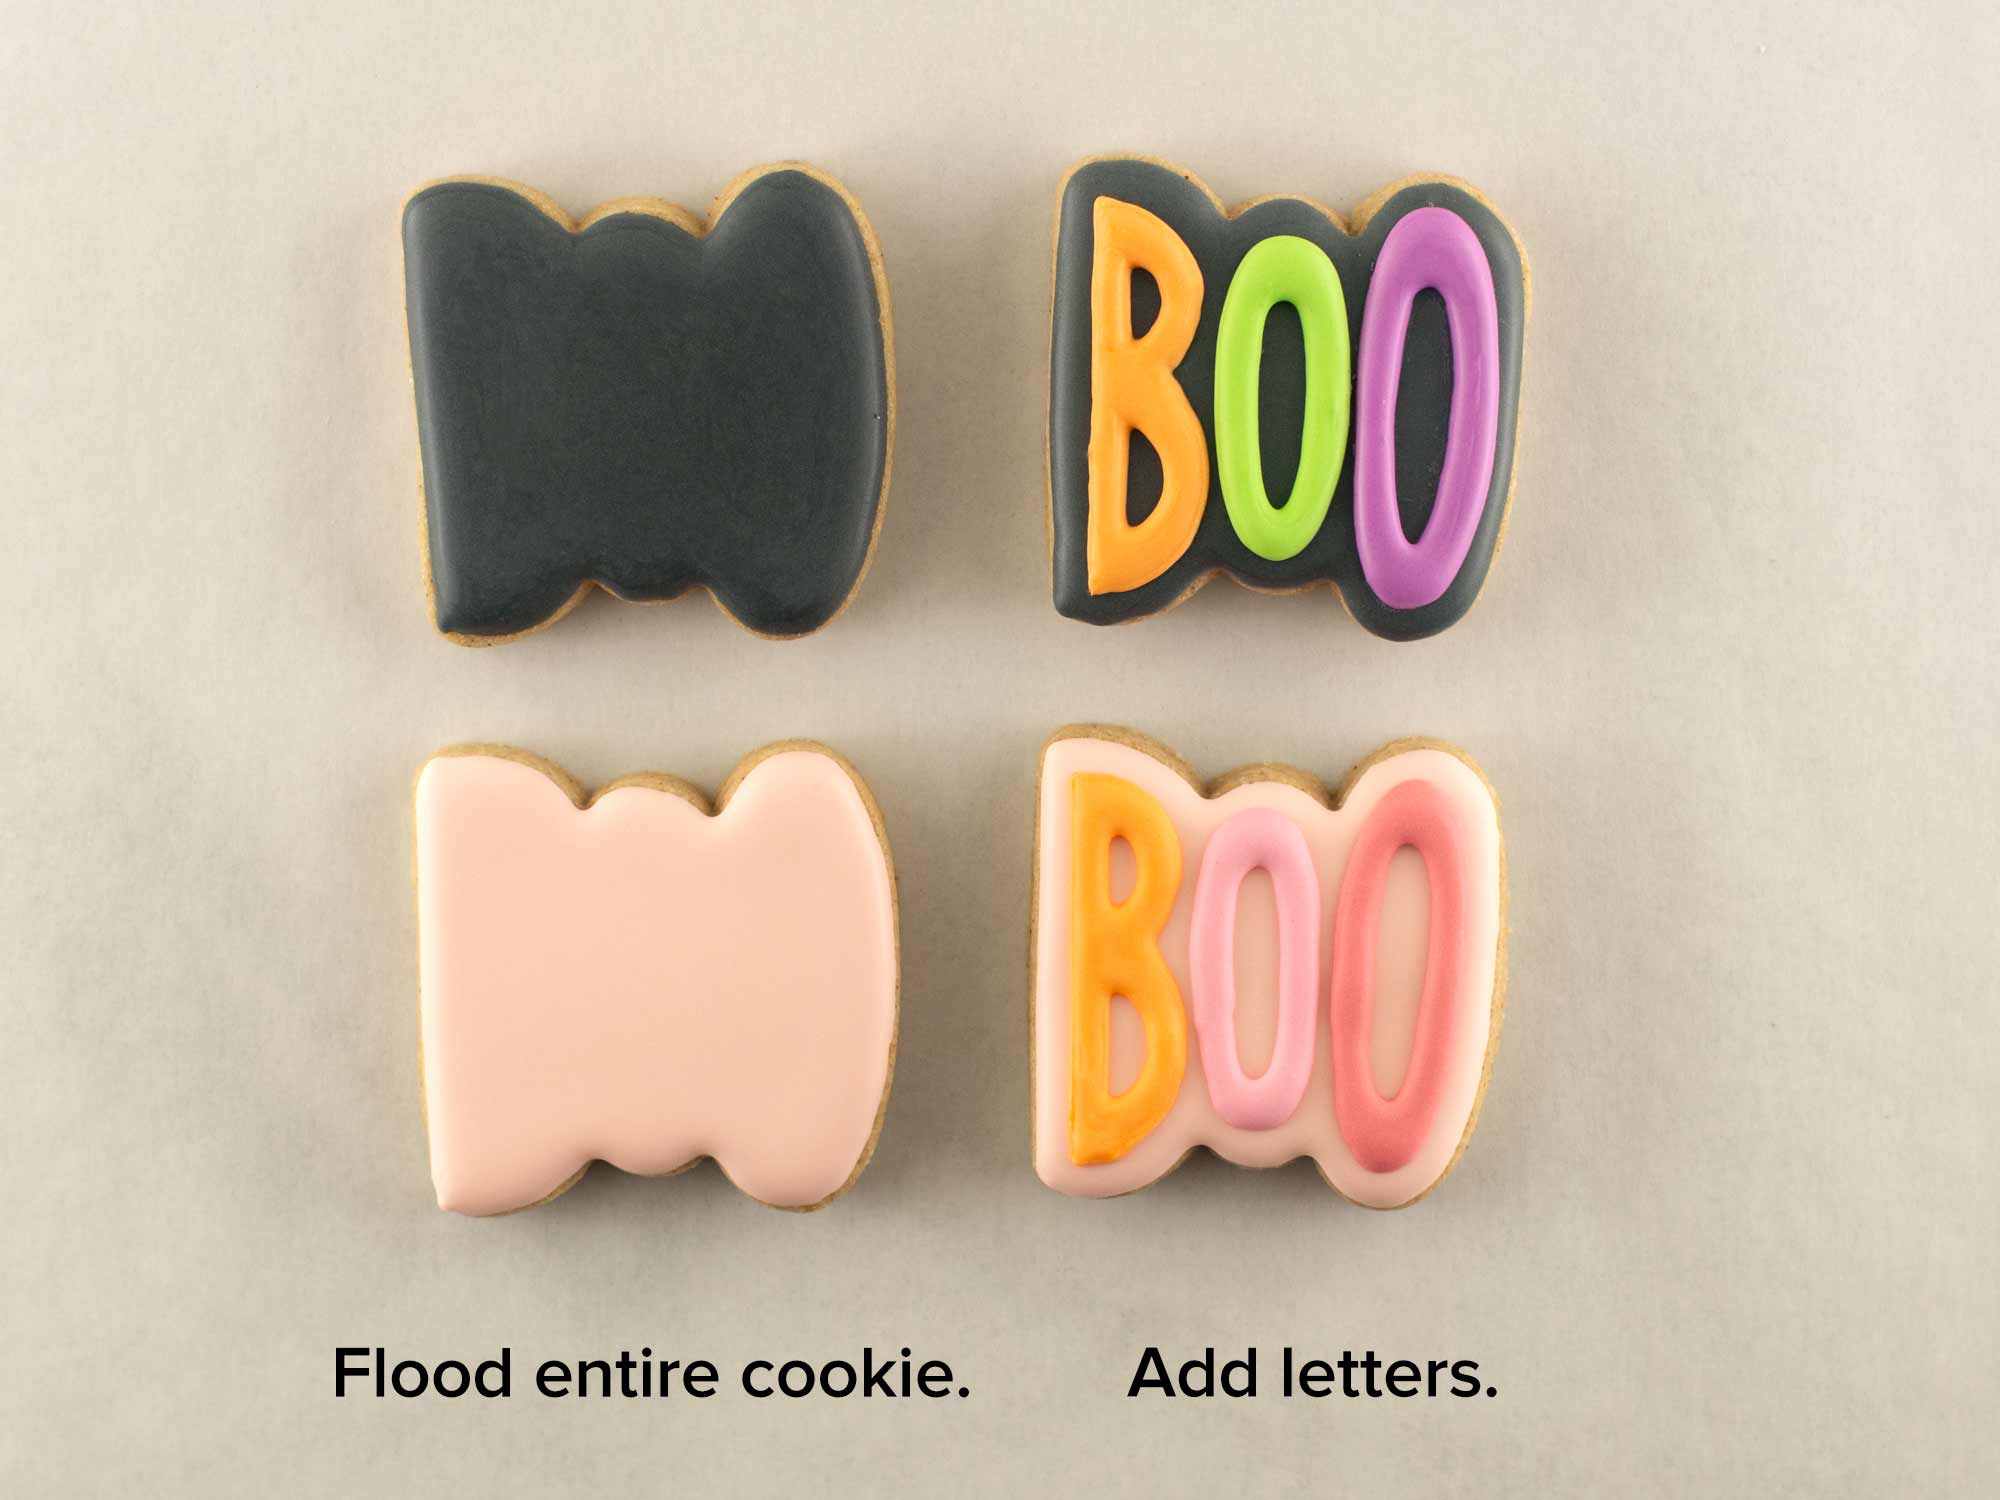
For the Boo cookie, flood the cookie with the background color. I used black and light pink.
Once that layer had time to dry, I added the letters B O O with a cookie projector to help guide me.
Ghosts Cookie Set Video Tutorial
The steps above are summarized in the time-lapsed video below.
Cookie Packaging Ideas
To give this set a little variety, I decorated it in two different color schemes. The first is a traditional Halloween palette with classic black, orange, and green for that spooky seasonal feel.
I used this striped orange greaseproof cookie backer and this "You've Been Booed" cookie tag.

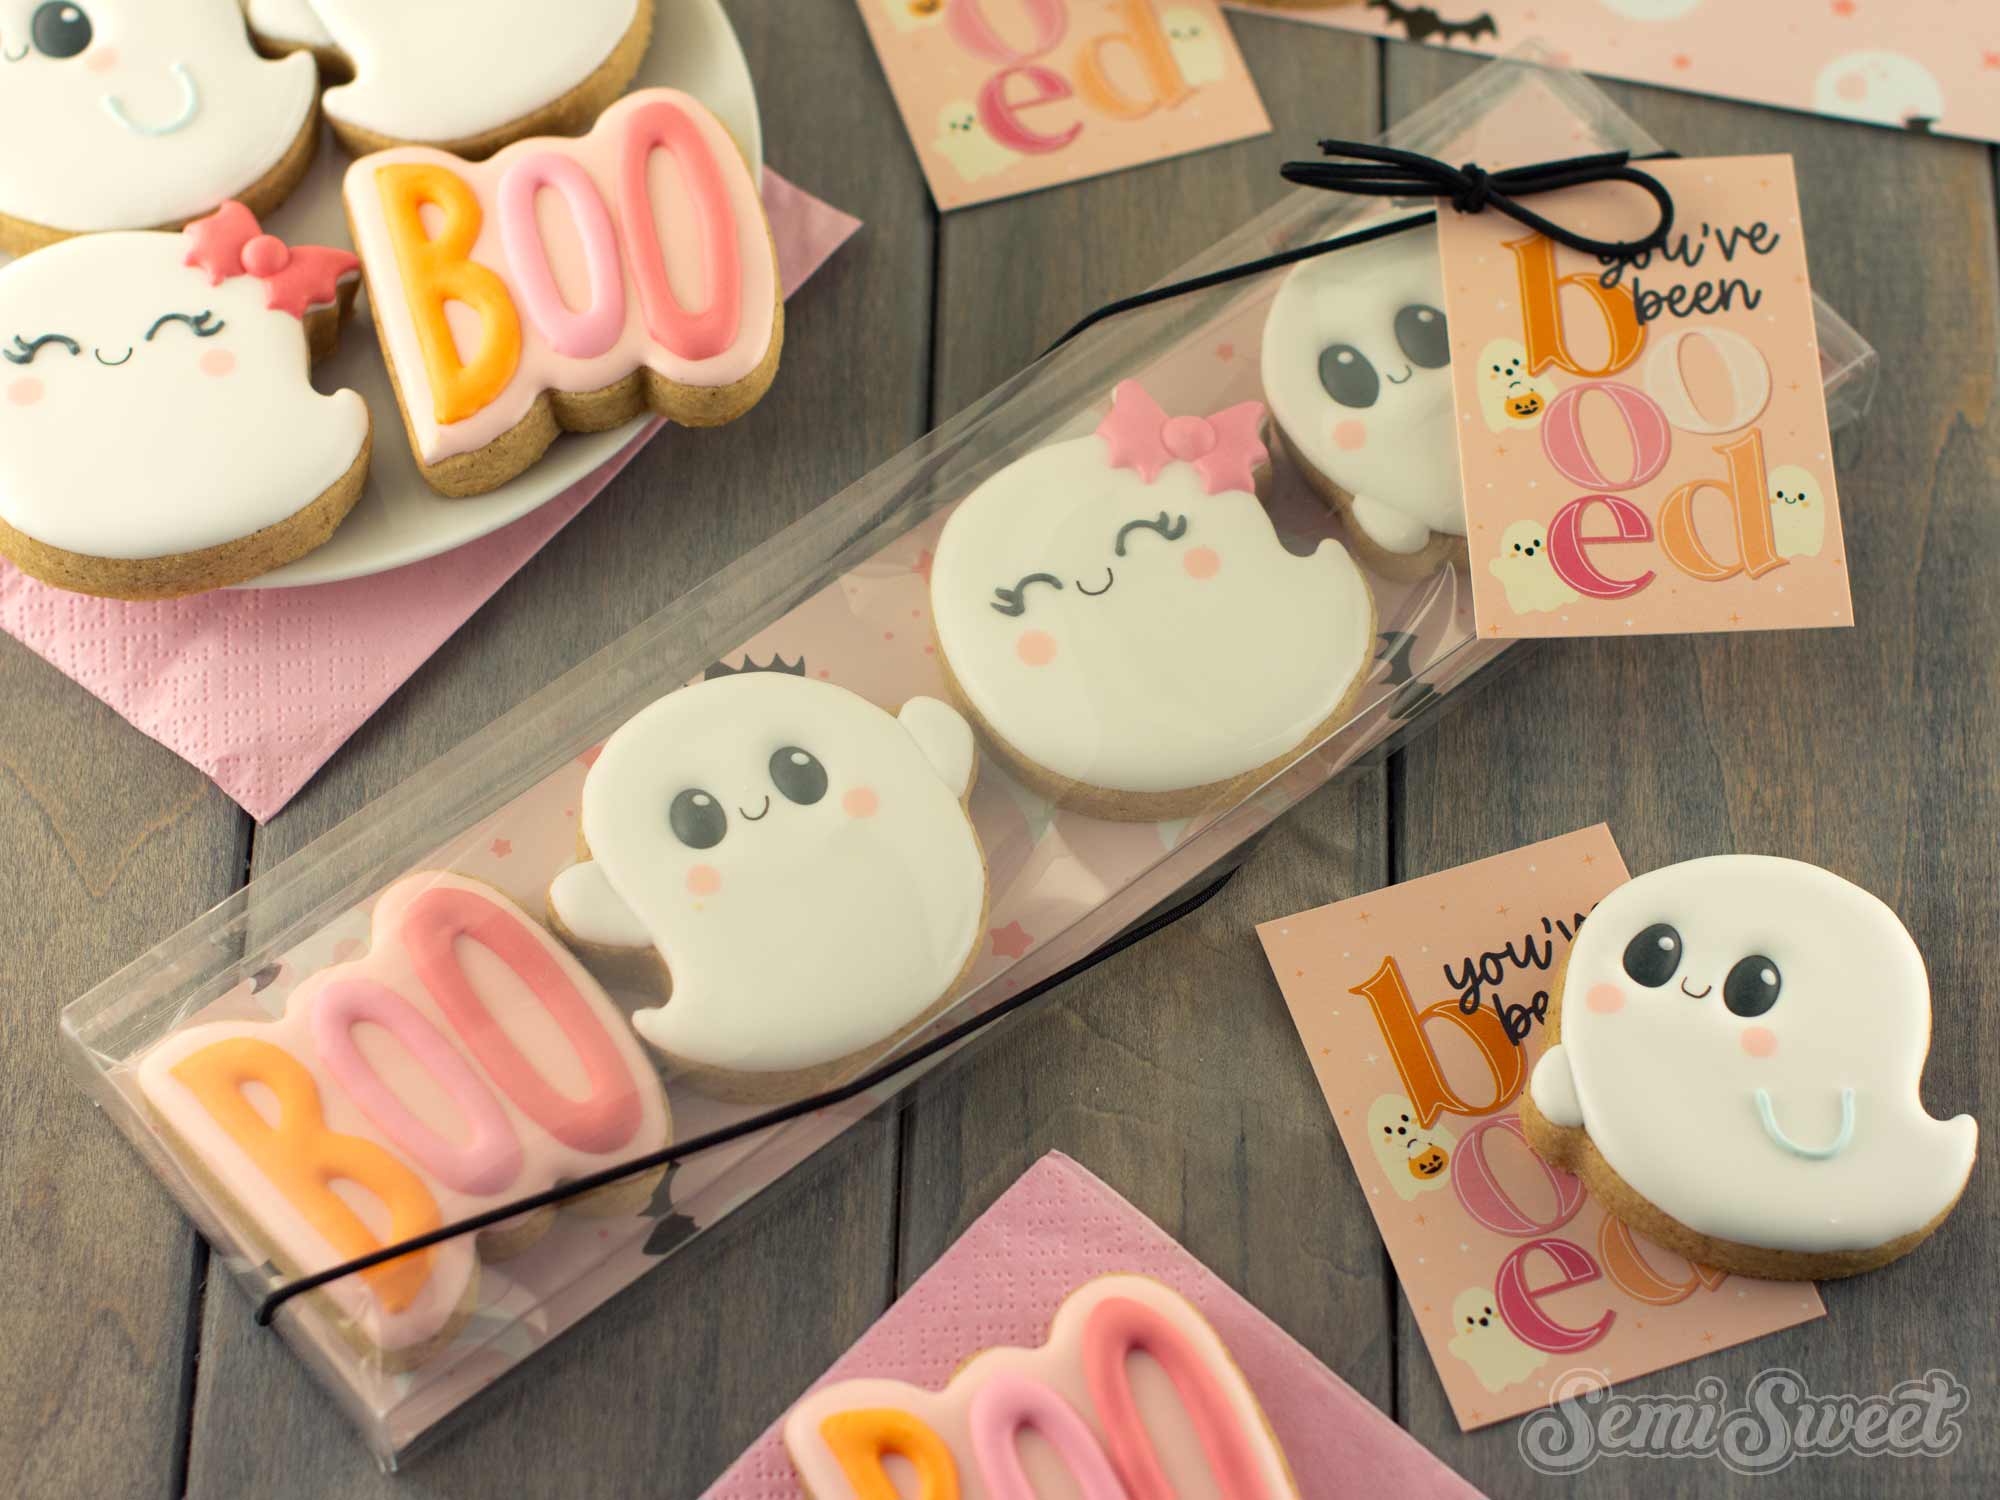
The second is a softer, playful, girly version in pink and orange. It's a fun twist if you’re looking for something a little less traditional but still festive.
I used this pink bat and moon greaseproof cookie backer, along with this pink version of our "You've been booed" cookie tag.
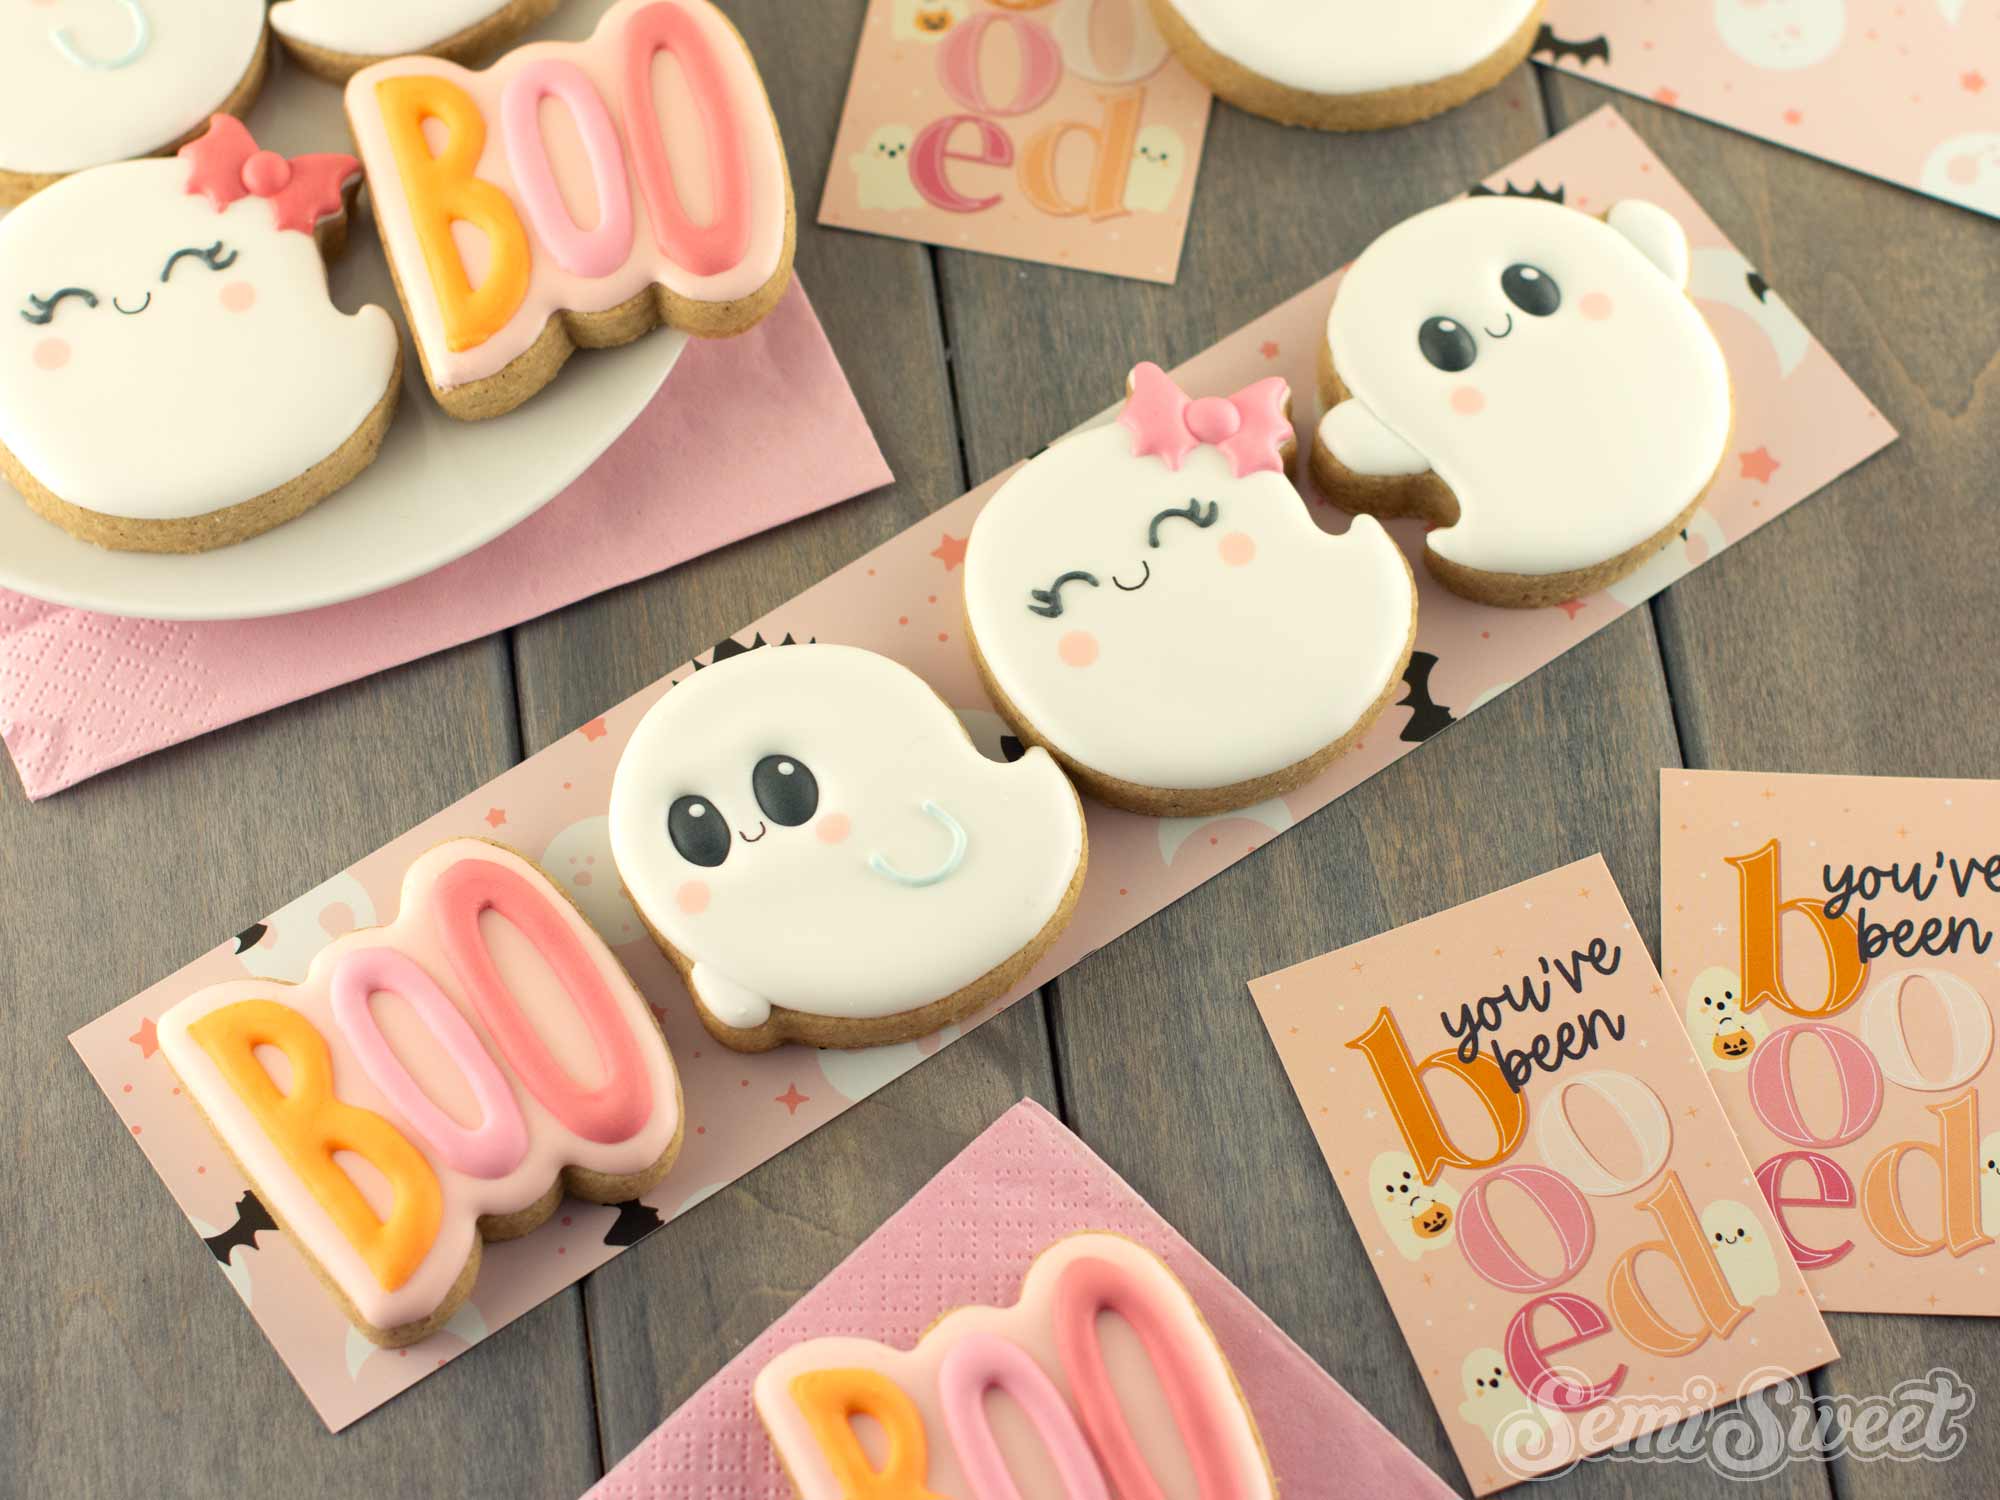
To package this set, I first sealed each cookie in one of our clear heat-sealable cello bags to keep them fresh and protected. (I use the 3" x12" size.)
For the final presentation, I placed the cookies inside a clear cookie box.
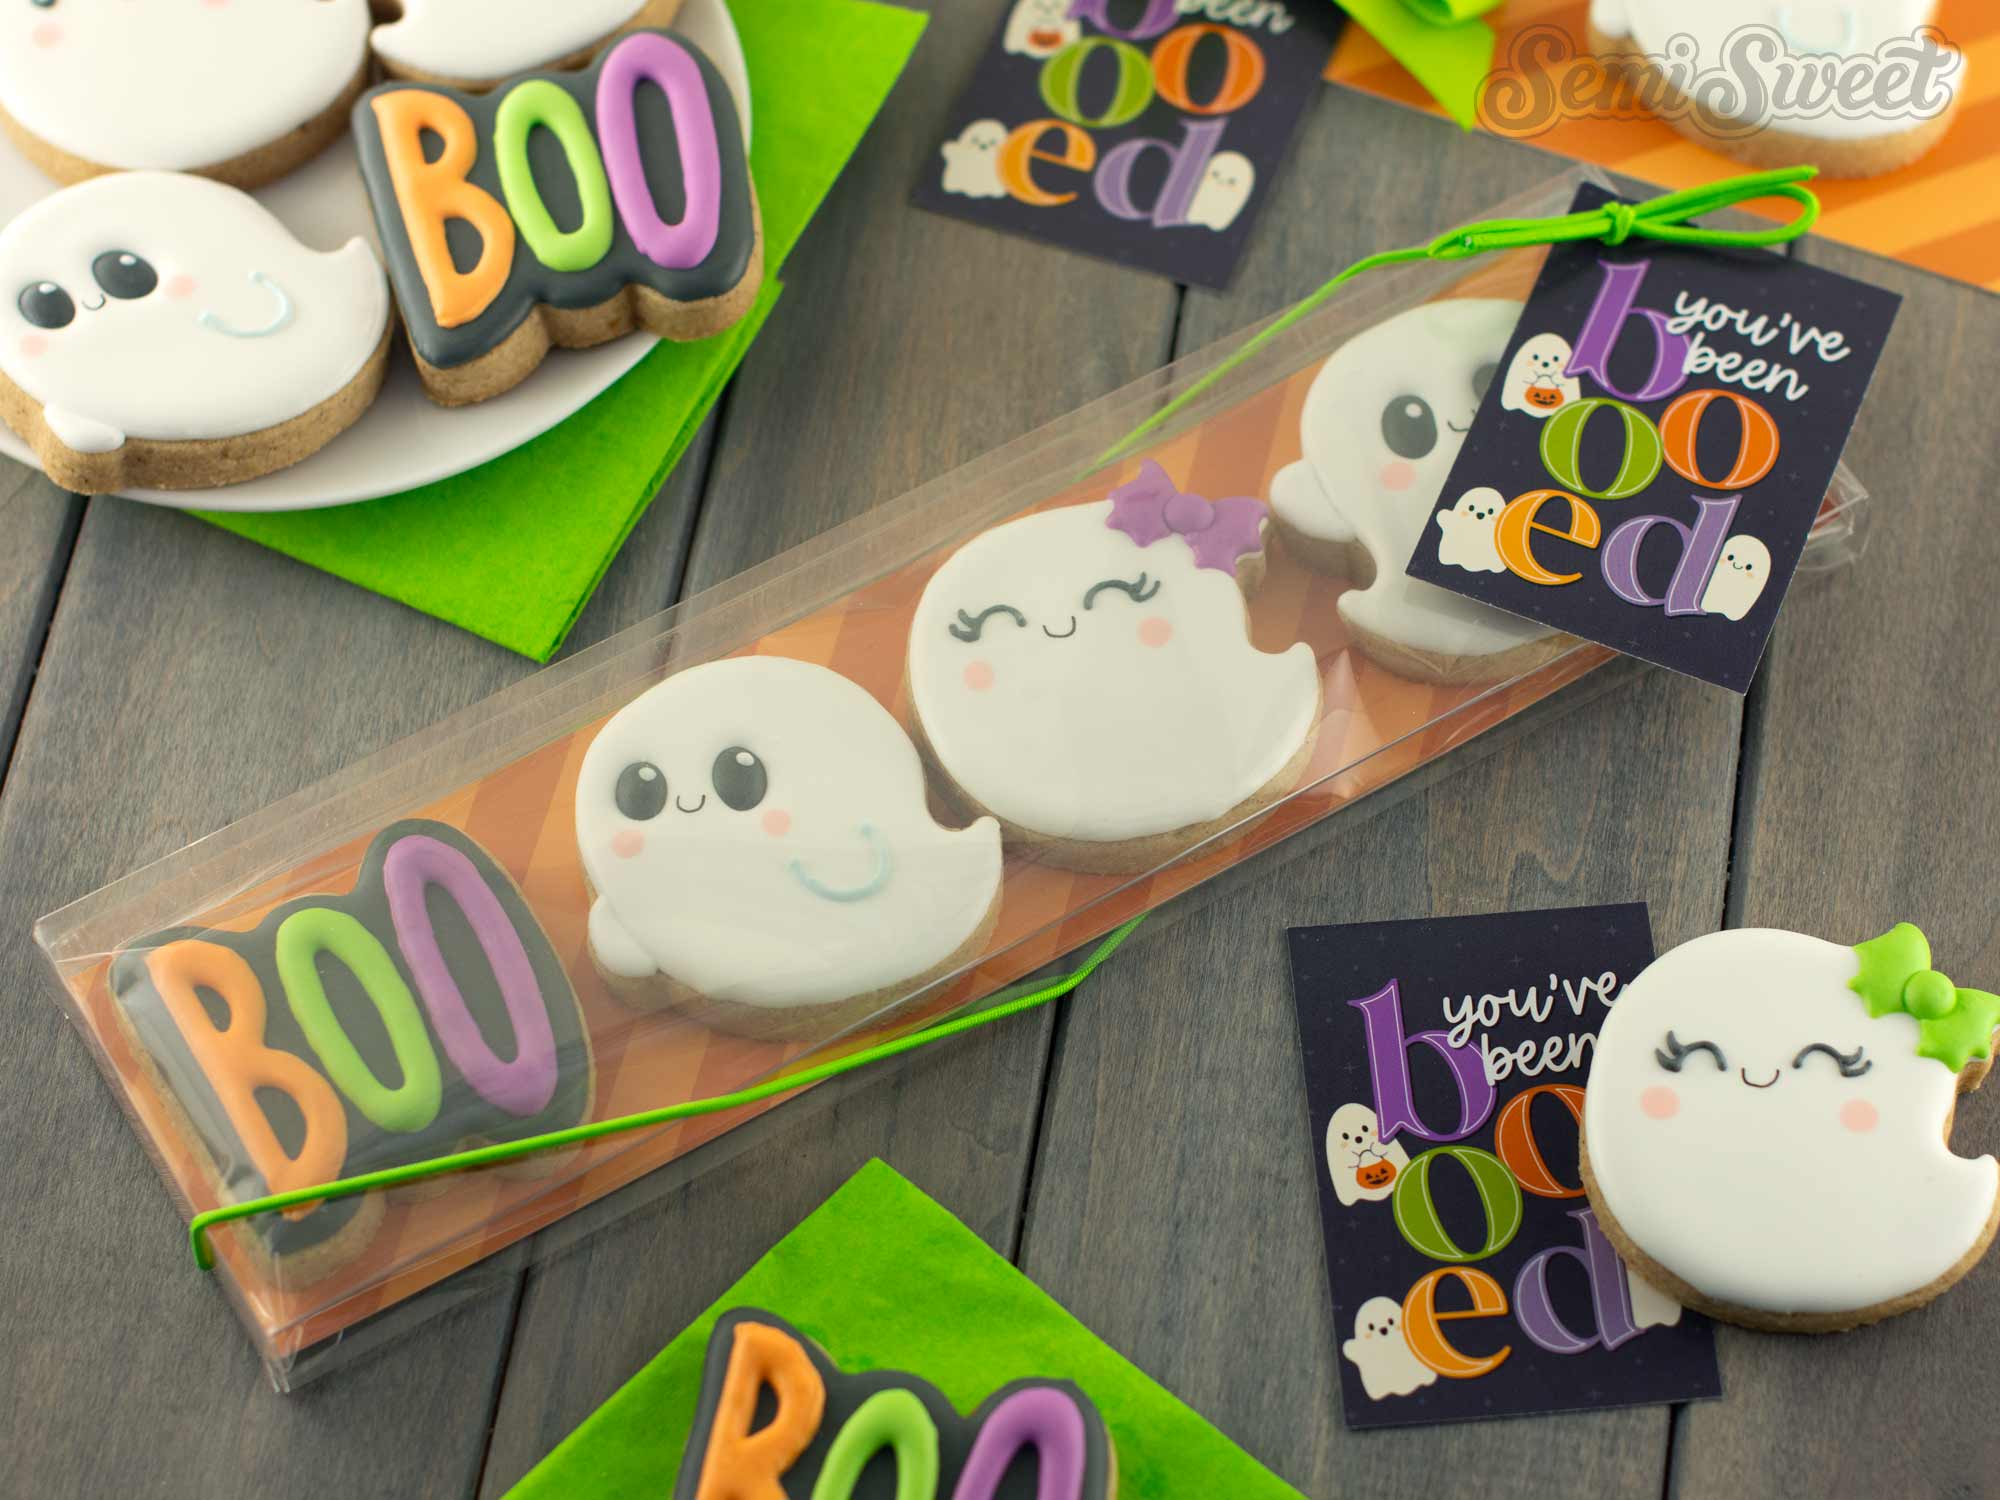
This 4-piece ghost and BOO cookie set is such a simple and fun way to celebrate Halloween, whether you stick with the traditional colors or try a playful pink and orange twist. With just a few icing steps, you’ll have a festive set that’s perfect for parties, gifts, or just practicing your decorating skills. If you’re looking for even more Halloween inspiration, be sure to check out our shop. We have a wide variety of Halloween cookie cutters and packaging ideas to help you create treats that are both spooky and sweet.
Add Vibrant Colors with Americolor Food Coloring

To make your decorated cookies pop, use Americolor Food Coloring for bold, consistent colors. It’s my go-to brand for achieving vibrant shades without altering the consistency of the royal icing.
Buy Now


