How to Make a Stackable Cat Witch Cookie Set


My Essential Cookie Tools for Cookie Decorating


My Essential Cookie Tools for Baking Cookies


My Essential Baking Tools for Royal Icing


Essential Decorating Tools for Royal Icing

I've been a fan of stackable cookie sets ever since the Christmas tree version last year. Designing a stackable option for the holidays that followed (here are links to the the Easter bunny and school backpack designs) has been a lot of fun. This Halloween was no exception.
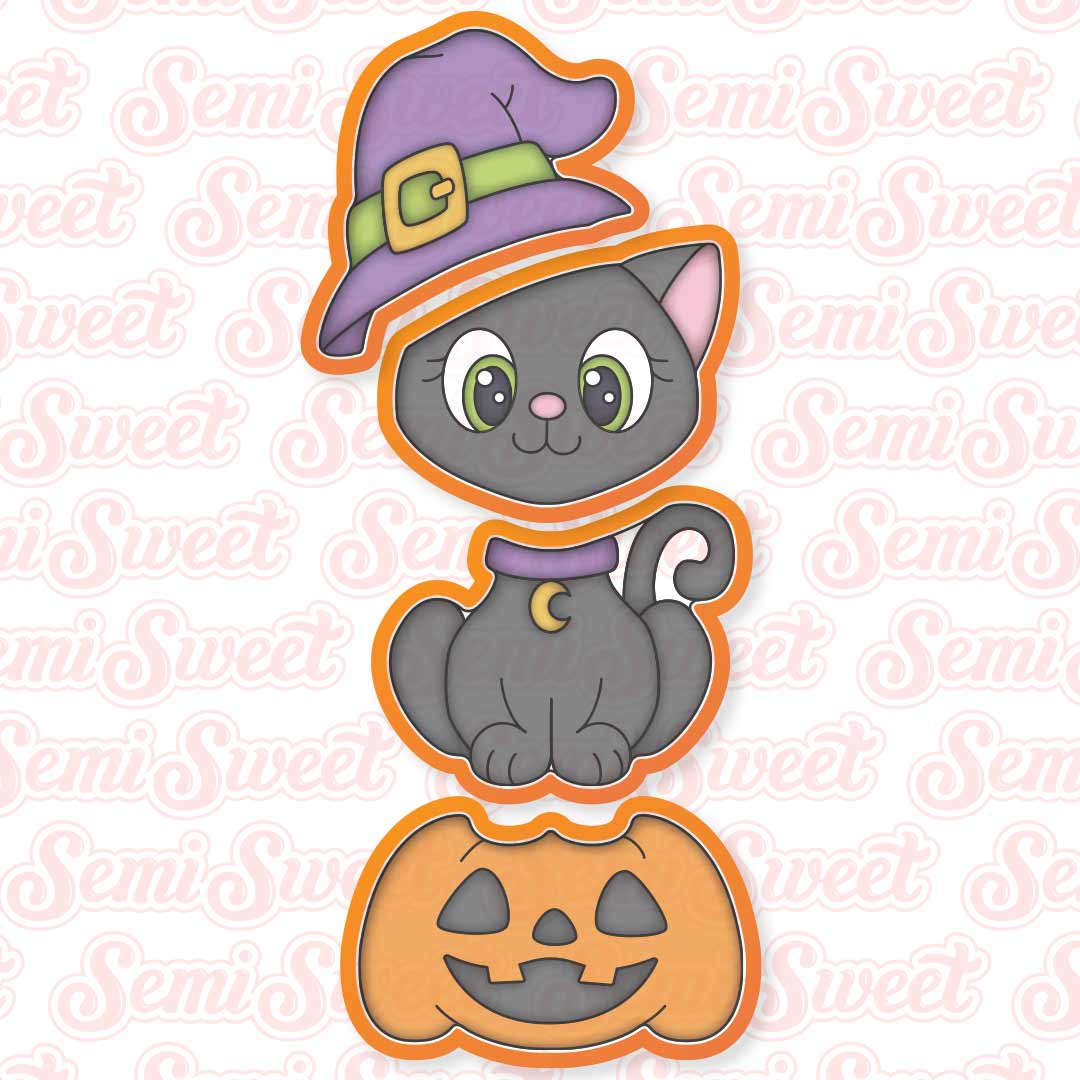
Just added to the shop is this cat witch cookie set. It's an adorable black cat, wearing a witch's hat, while atop a jack-o-lantern pumpkin. It may look intimidating as an overall design, but I promise you it's not. If you take a look at each cookie piece individually, each one is very approachable and not too complicated. I'll guide you through the process if you don't know where to start first.
As for the tutorial, this post is a long one, so I'll get right to it. Here's the detailed guide for each of the four pieces for this stackable cat witch cookie set.
Stackable Cat Witch Cookie Cutter Set
In the shop for the upcoming Halloween season is this stackable cat witch cookie cutter set. This set comes in 4 pieces, each a different part of the Halloween cat design.
When assembled together, the set will fit inside in this BRP long cookie box (12″ x 5″ x 1.5″).
Templates for the Cat Witch Cookies
To help with the decorating process, I made a PDF template available for this year's Halloween cookie designs as a guideline.
You can download these cookie templates HERE.
If you have a Kopykake or Pico projector, just print it out (or pull it up on your mobile device) and you are good to go. For those without a projector, follow the suggested steps below by tracing the design onto the cookie with an edible food marker.
The Decorating Process
For this cat witch cookie set, you will need the following suggested colors:
- Black royal icing. (I used Americolor Super Black.)
- Purple icing. (I used Rainbow Dust Purple.)
- Orange icing. (I used Americolor Orange.)
- Green icing. (I mixed Americolor Egg Yellow with Mint Green.)
- Yellow icing. (I used Americolor Egg Yellow.)
- White icing. (I used Americolor Bright White.)
- Pink icing. (I used Wilton Rose.)
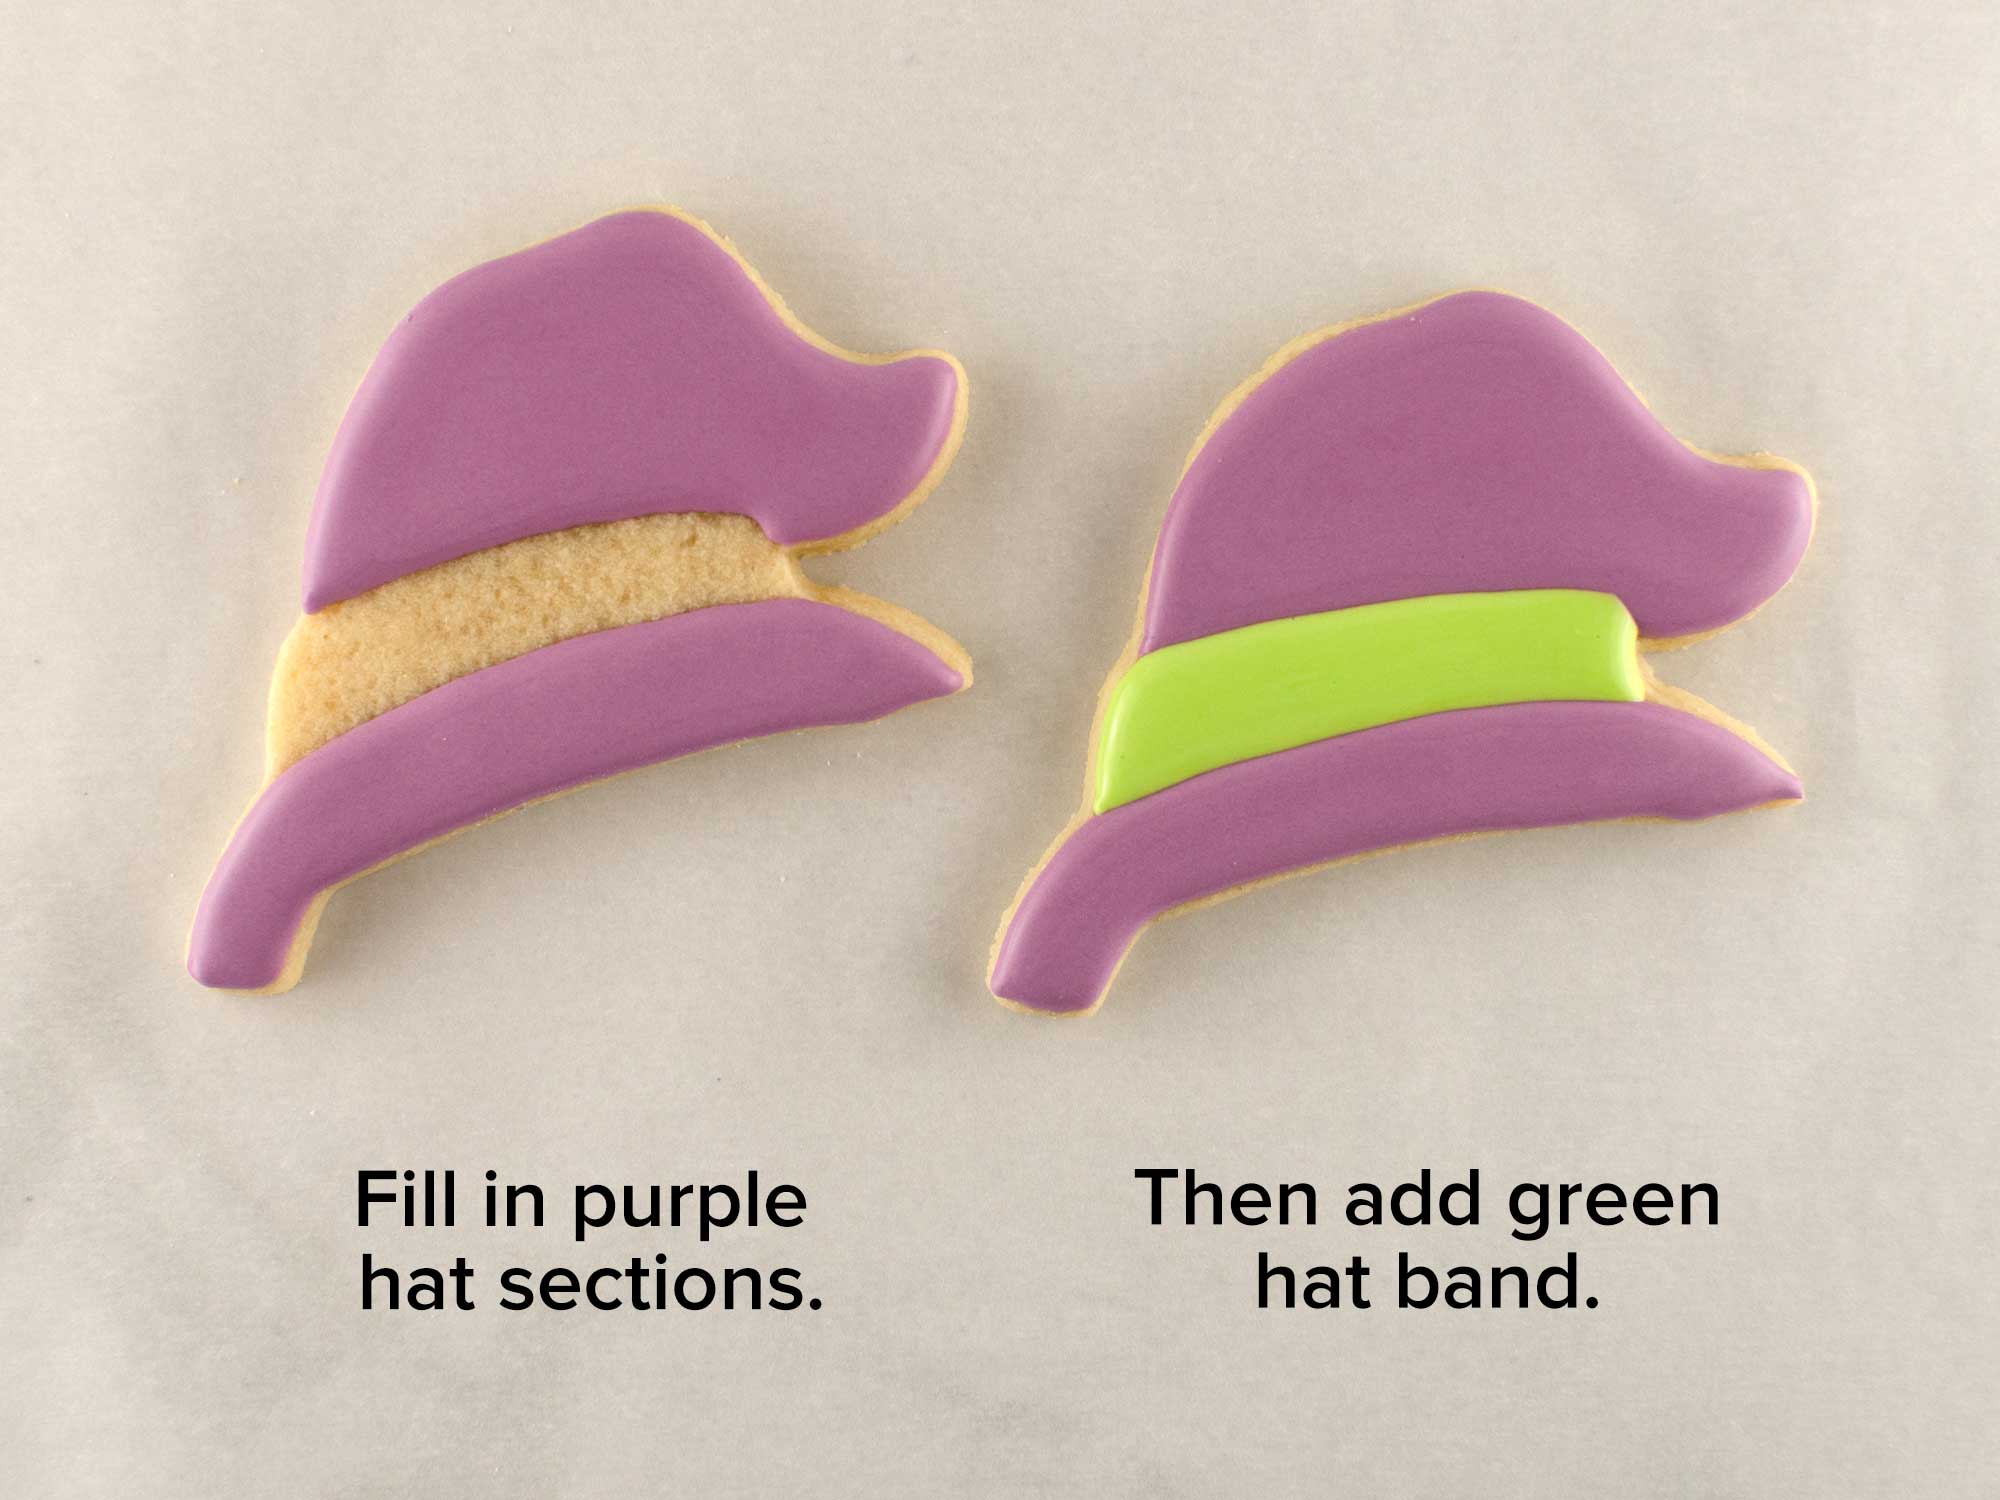
Step 1
For the hat cookie, begin by filling in the purple sections of the hat first. Let that icing set.
Then fill in the green hat band in the middle. Let this icing dry for abour an hour.
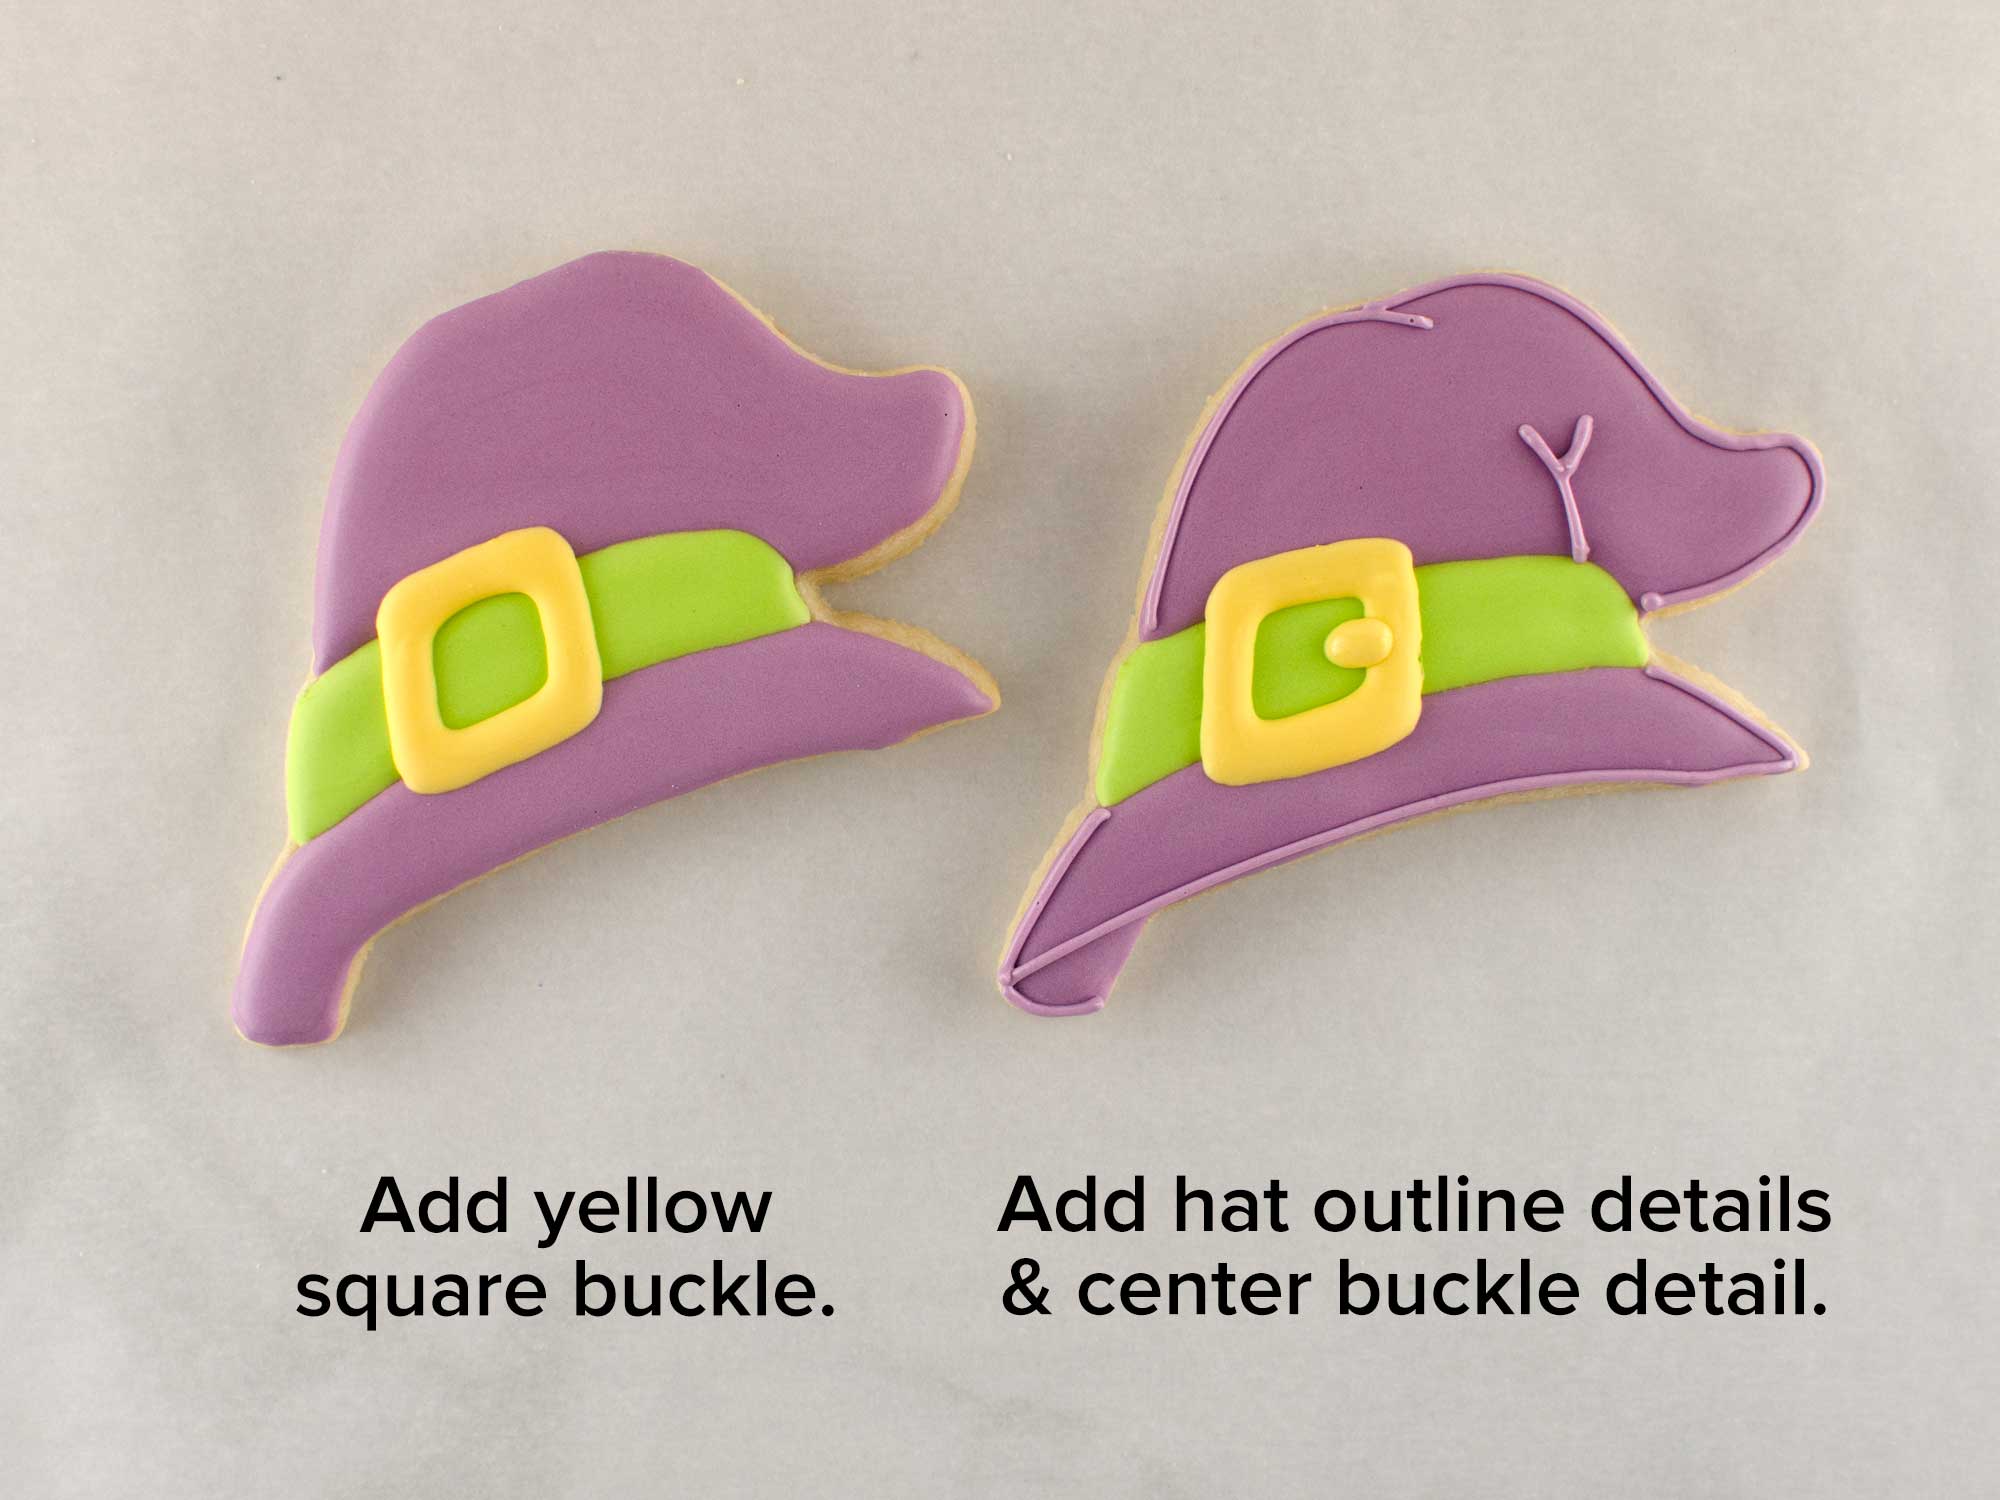
Step 2
Next, add the square buckle detail over the green band, as shown.
Then add the outline details of the hat. Lastly, add that small, center buckle detail.
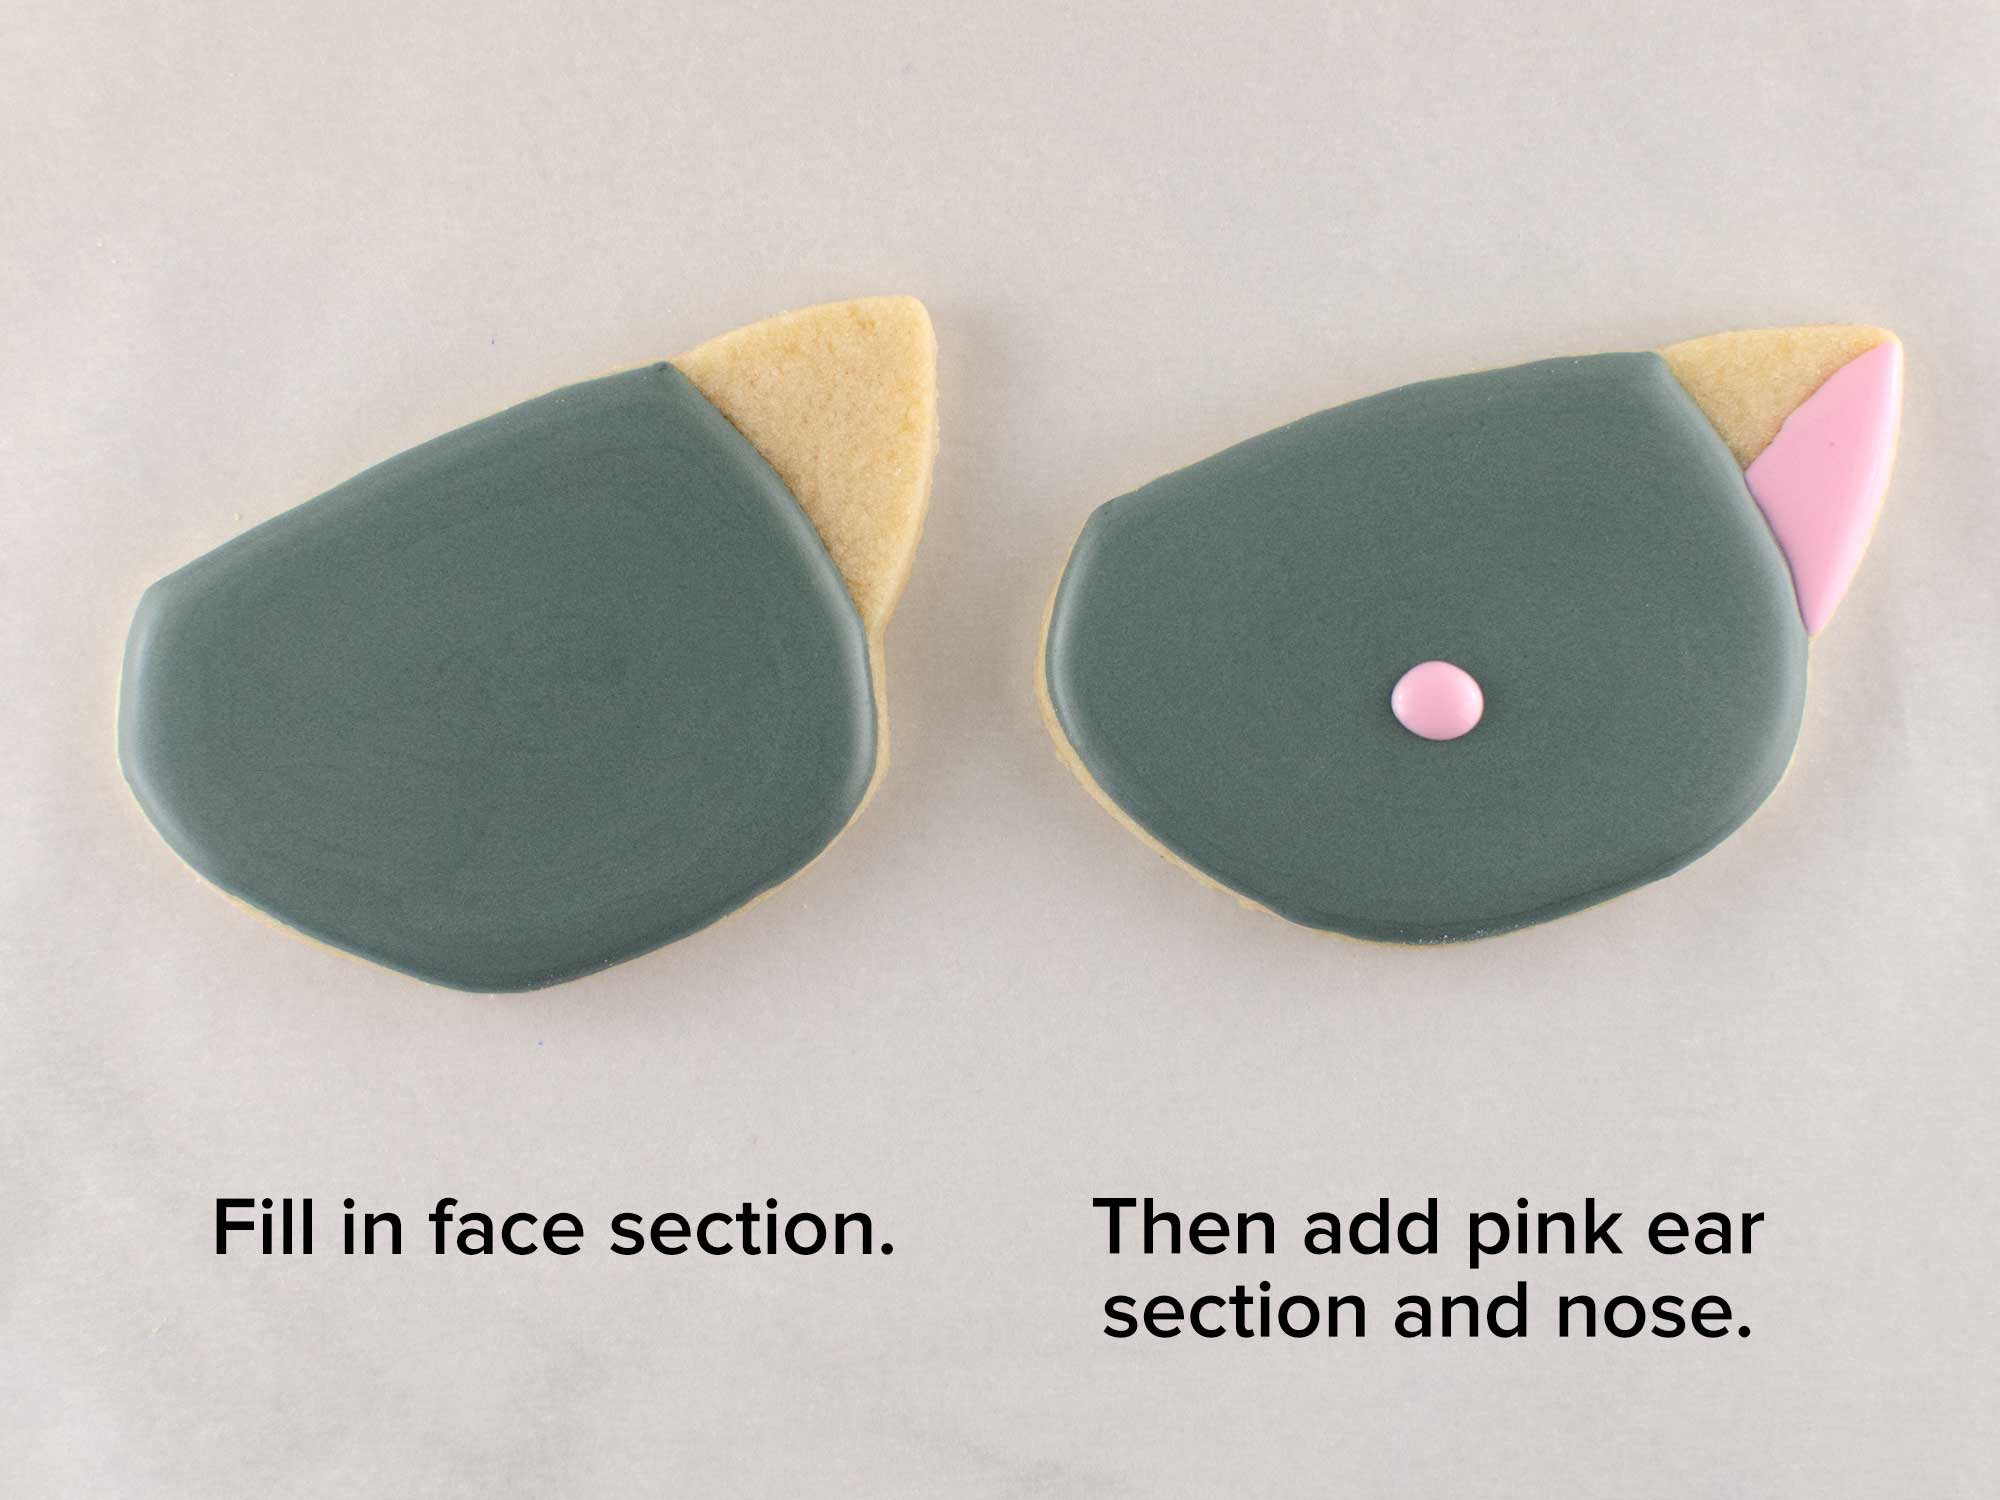
Step 3
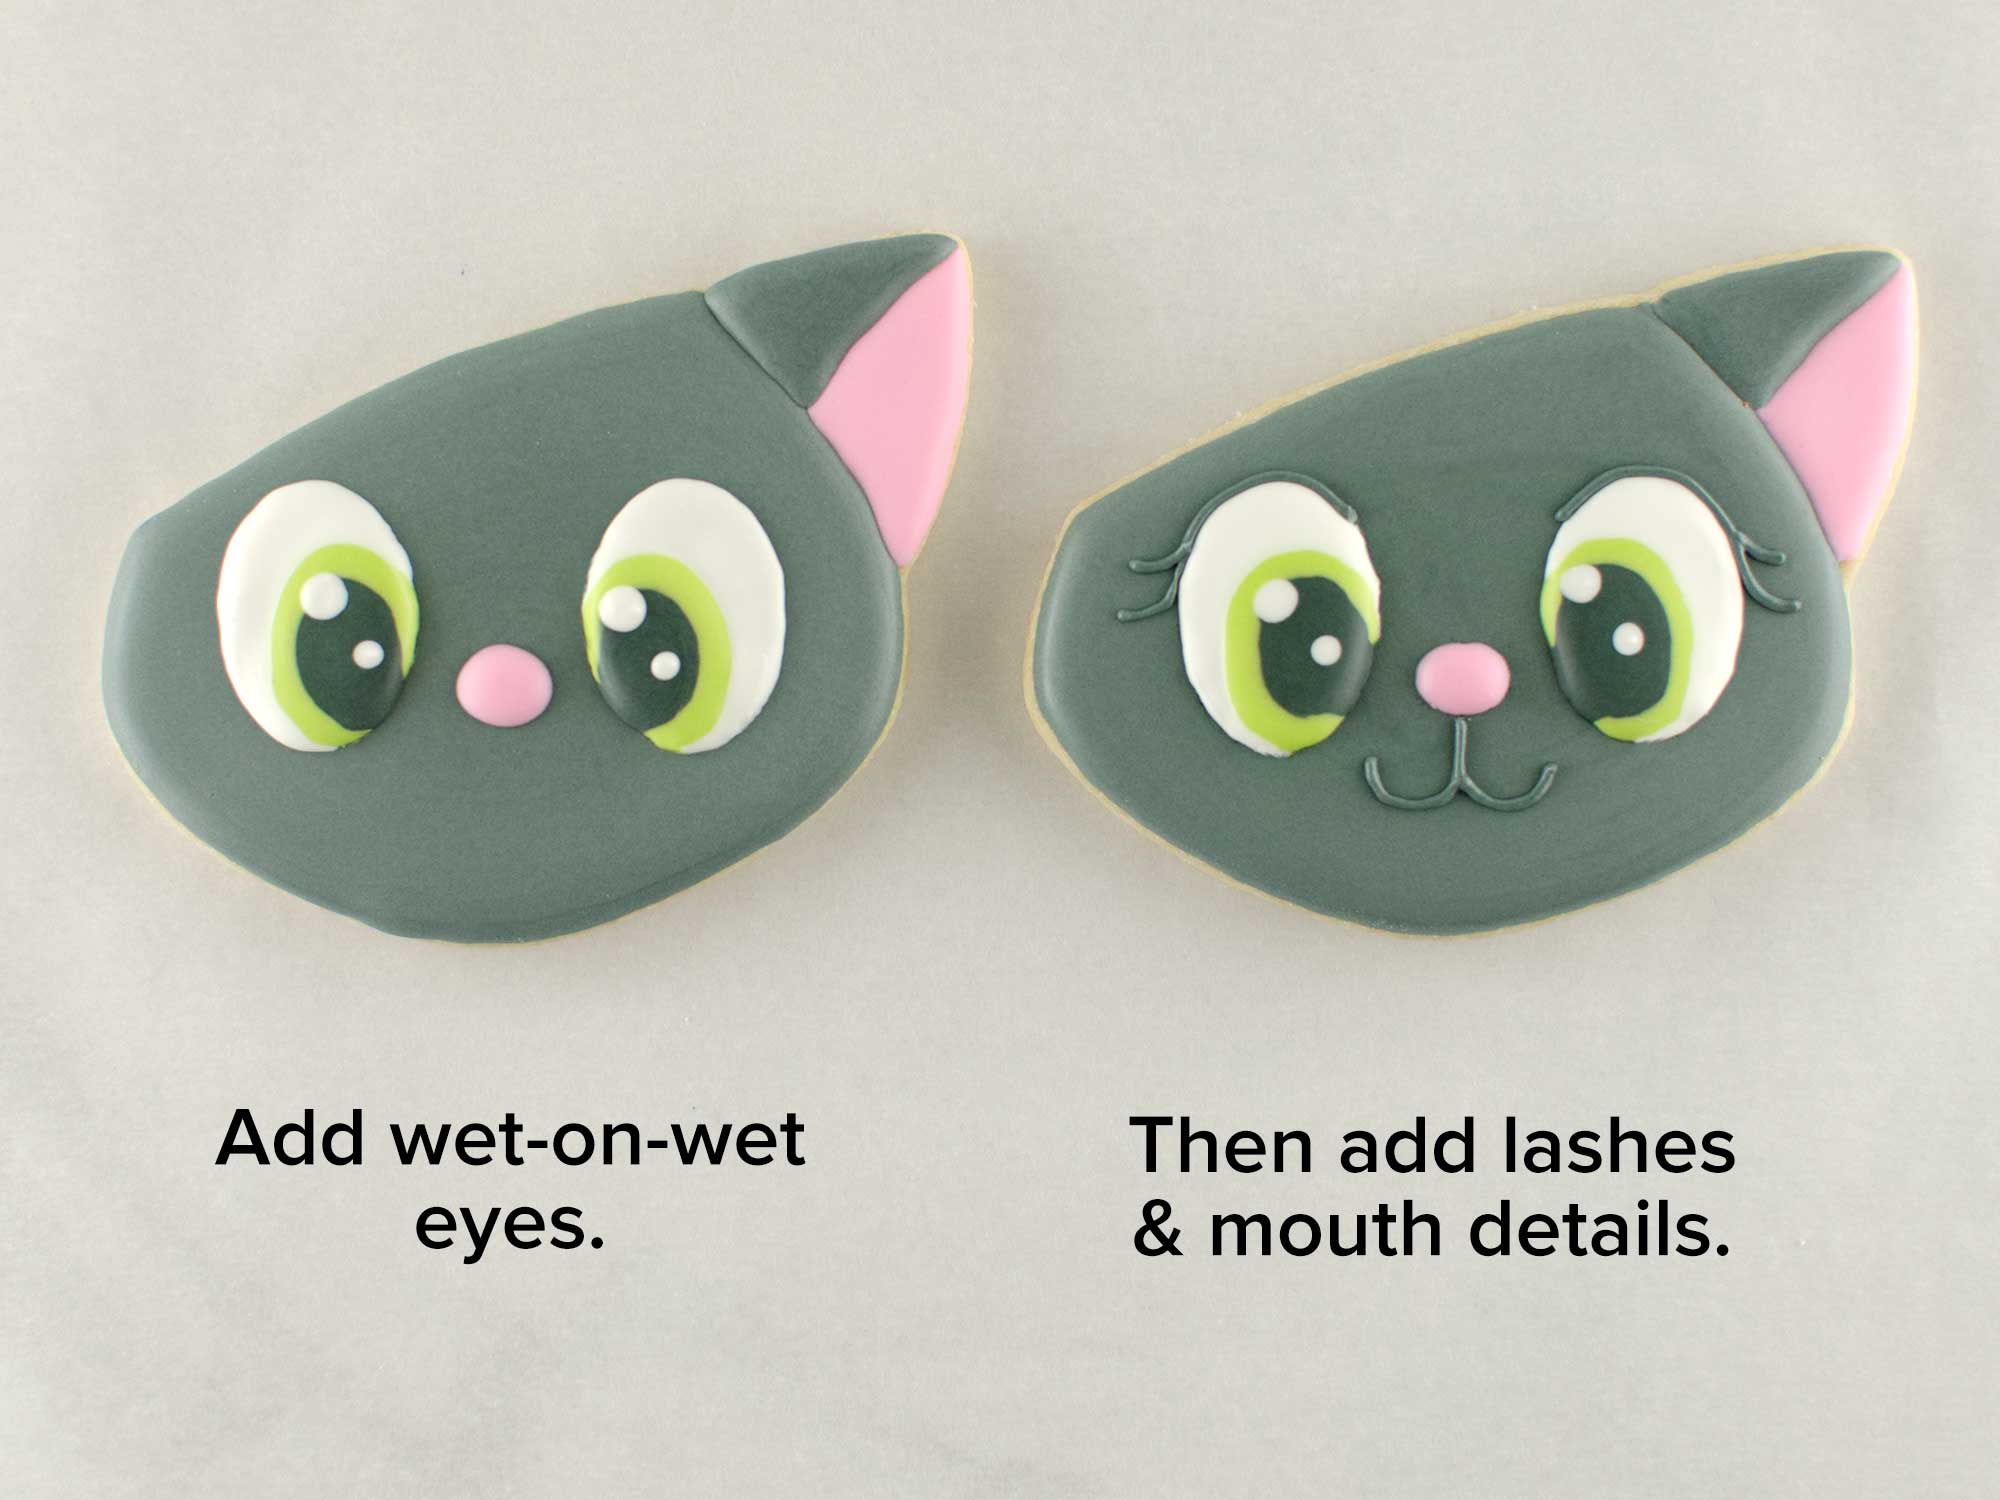
For the head cookie, begin by filling in the face area first. Let that icing set.
Then add the pink details like the lower ear and the nose.
Step 4
Next, add the eyes, one eye at a time. I used the wet-on-wet technique and etched where I wanted the eyes first.
Then I started with the outer white part, then the green, then the black pupil, and lastly the two white reflection dots. This had to be done quickly. Shake the cookie to smooth out the icing.
Also, add the top of the ear section.
Finish the face by adding the mouth lines and the eyelashes.
Step 5
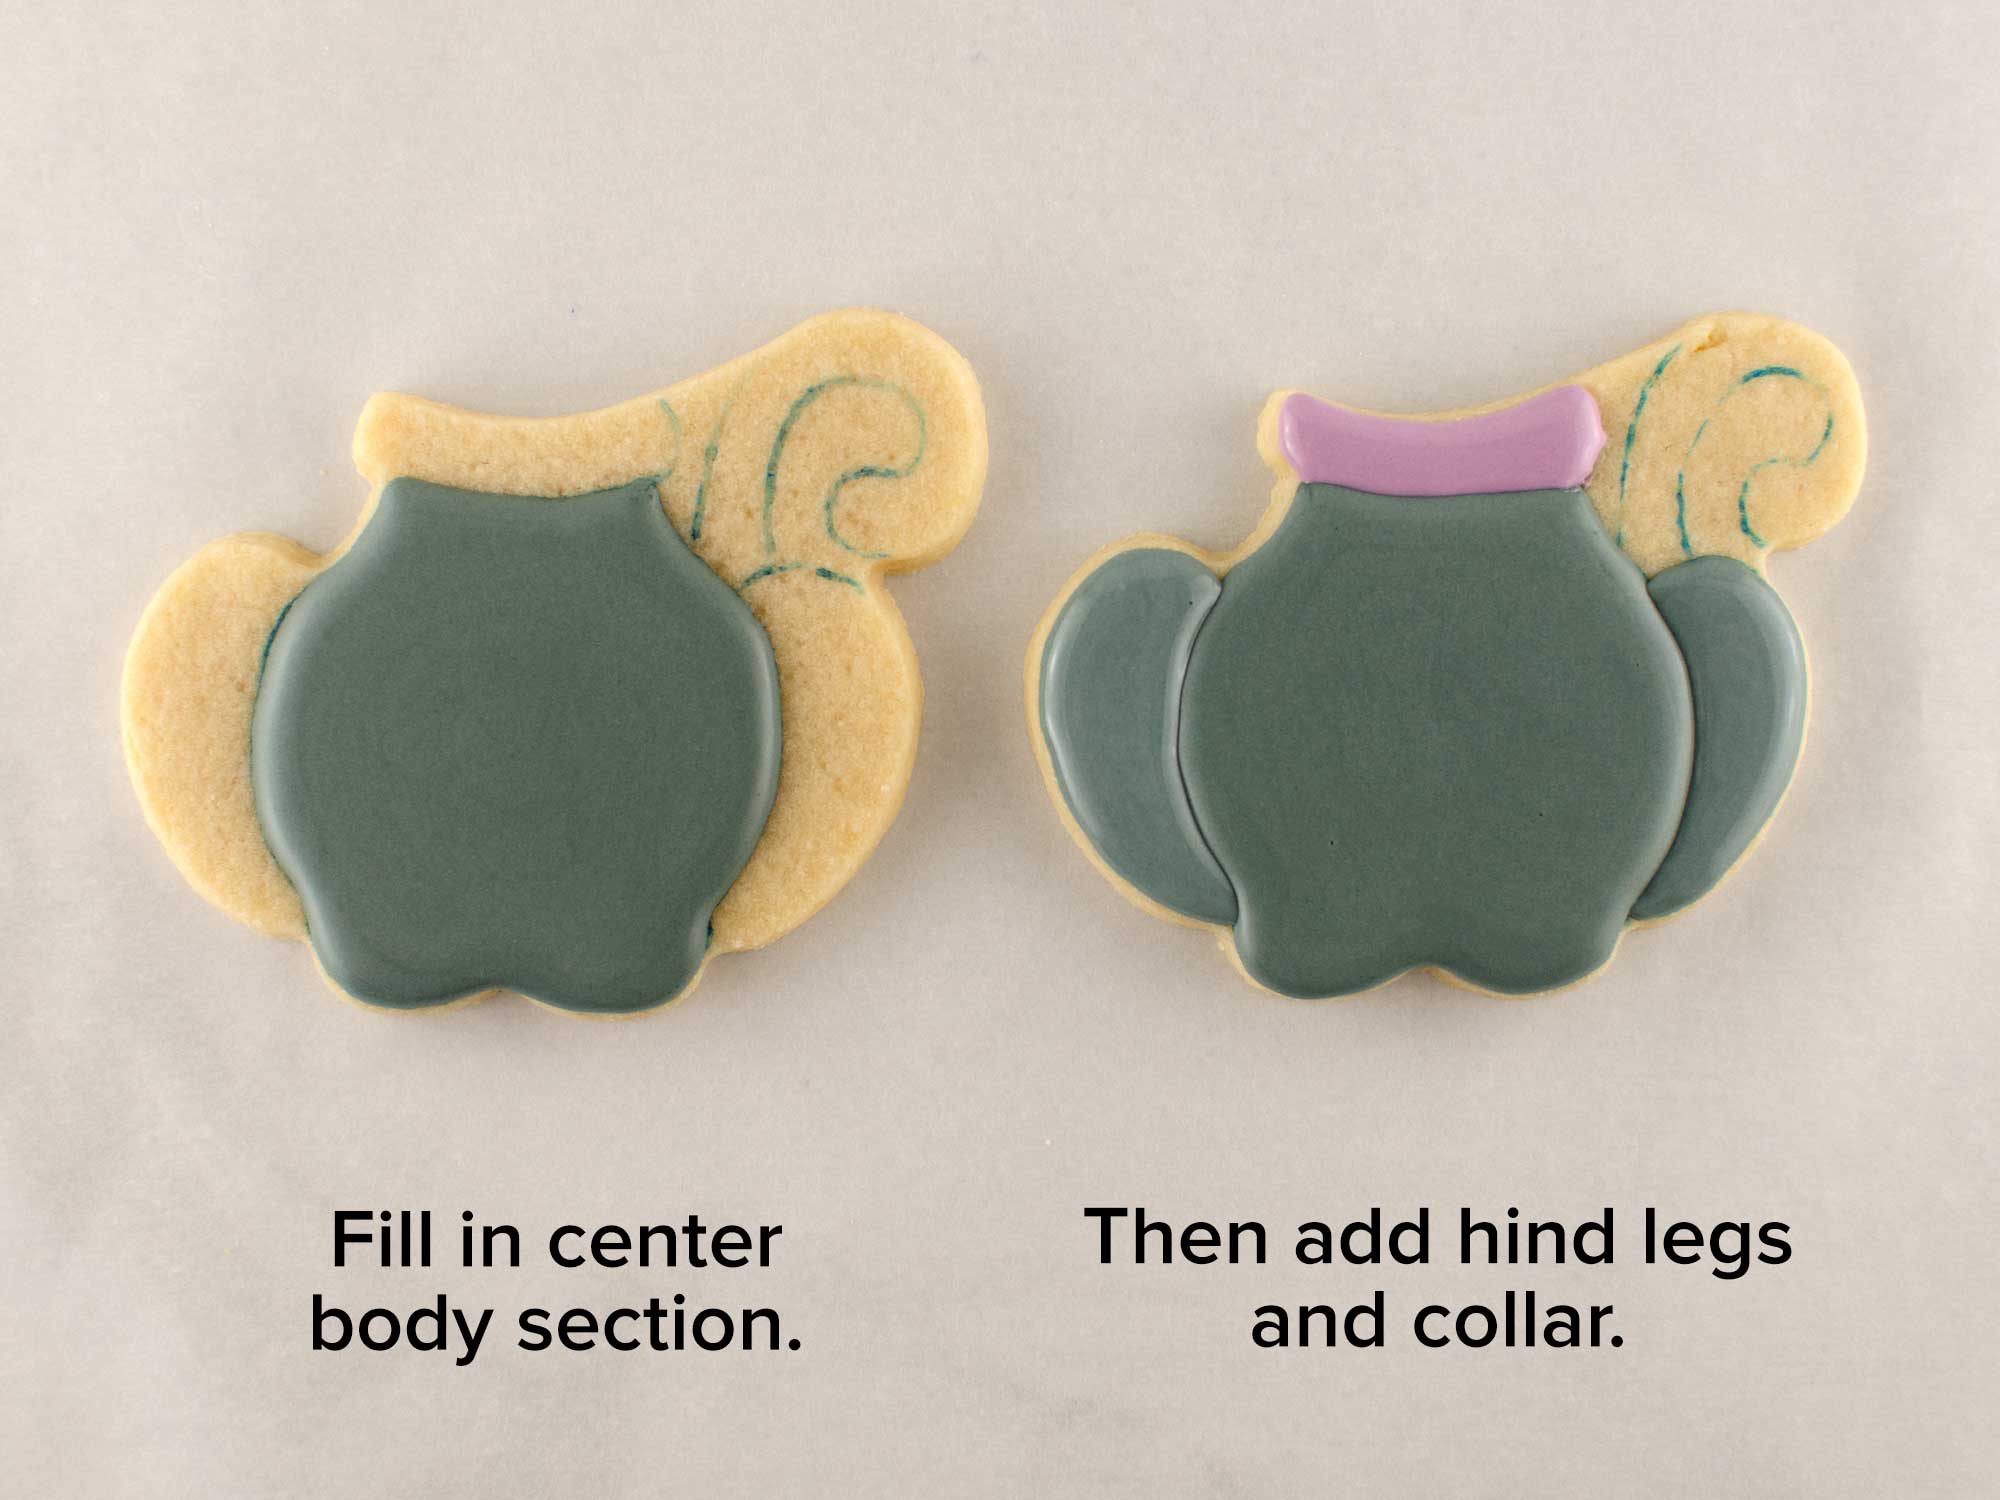
For the body cookie, start by filling in the center body section with black icing. Let that icing set.
Then fill in the two hind leg areas and the purple collar.
Step 6
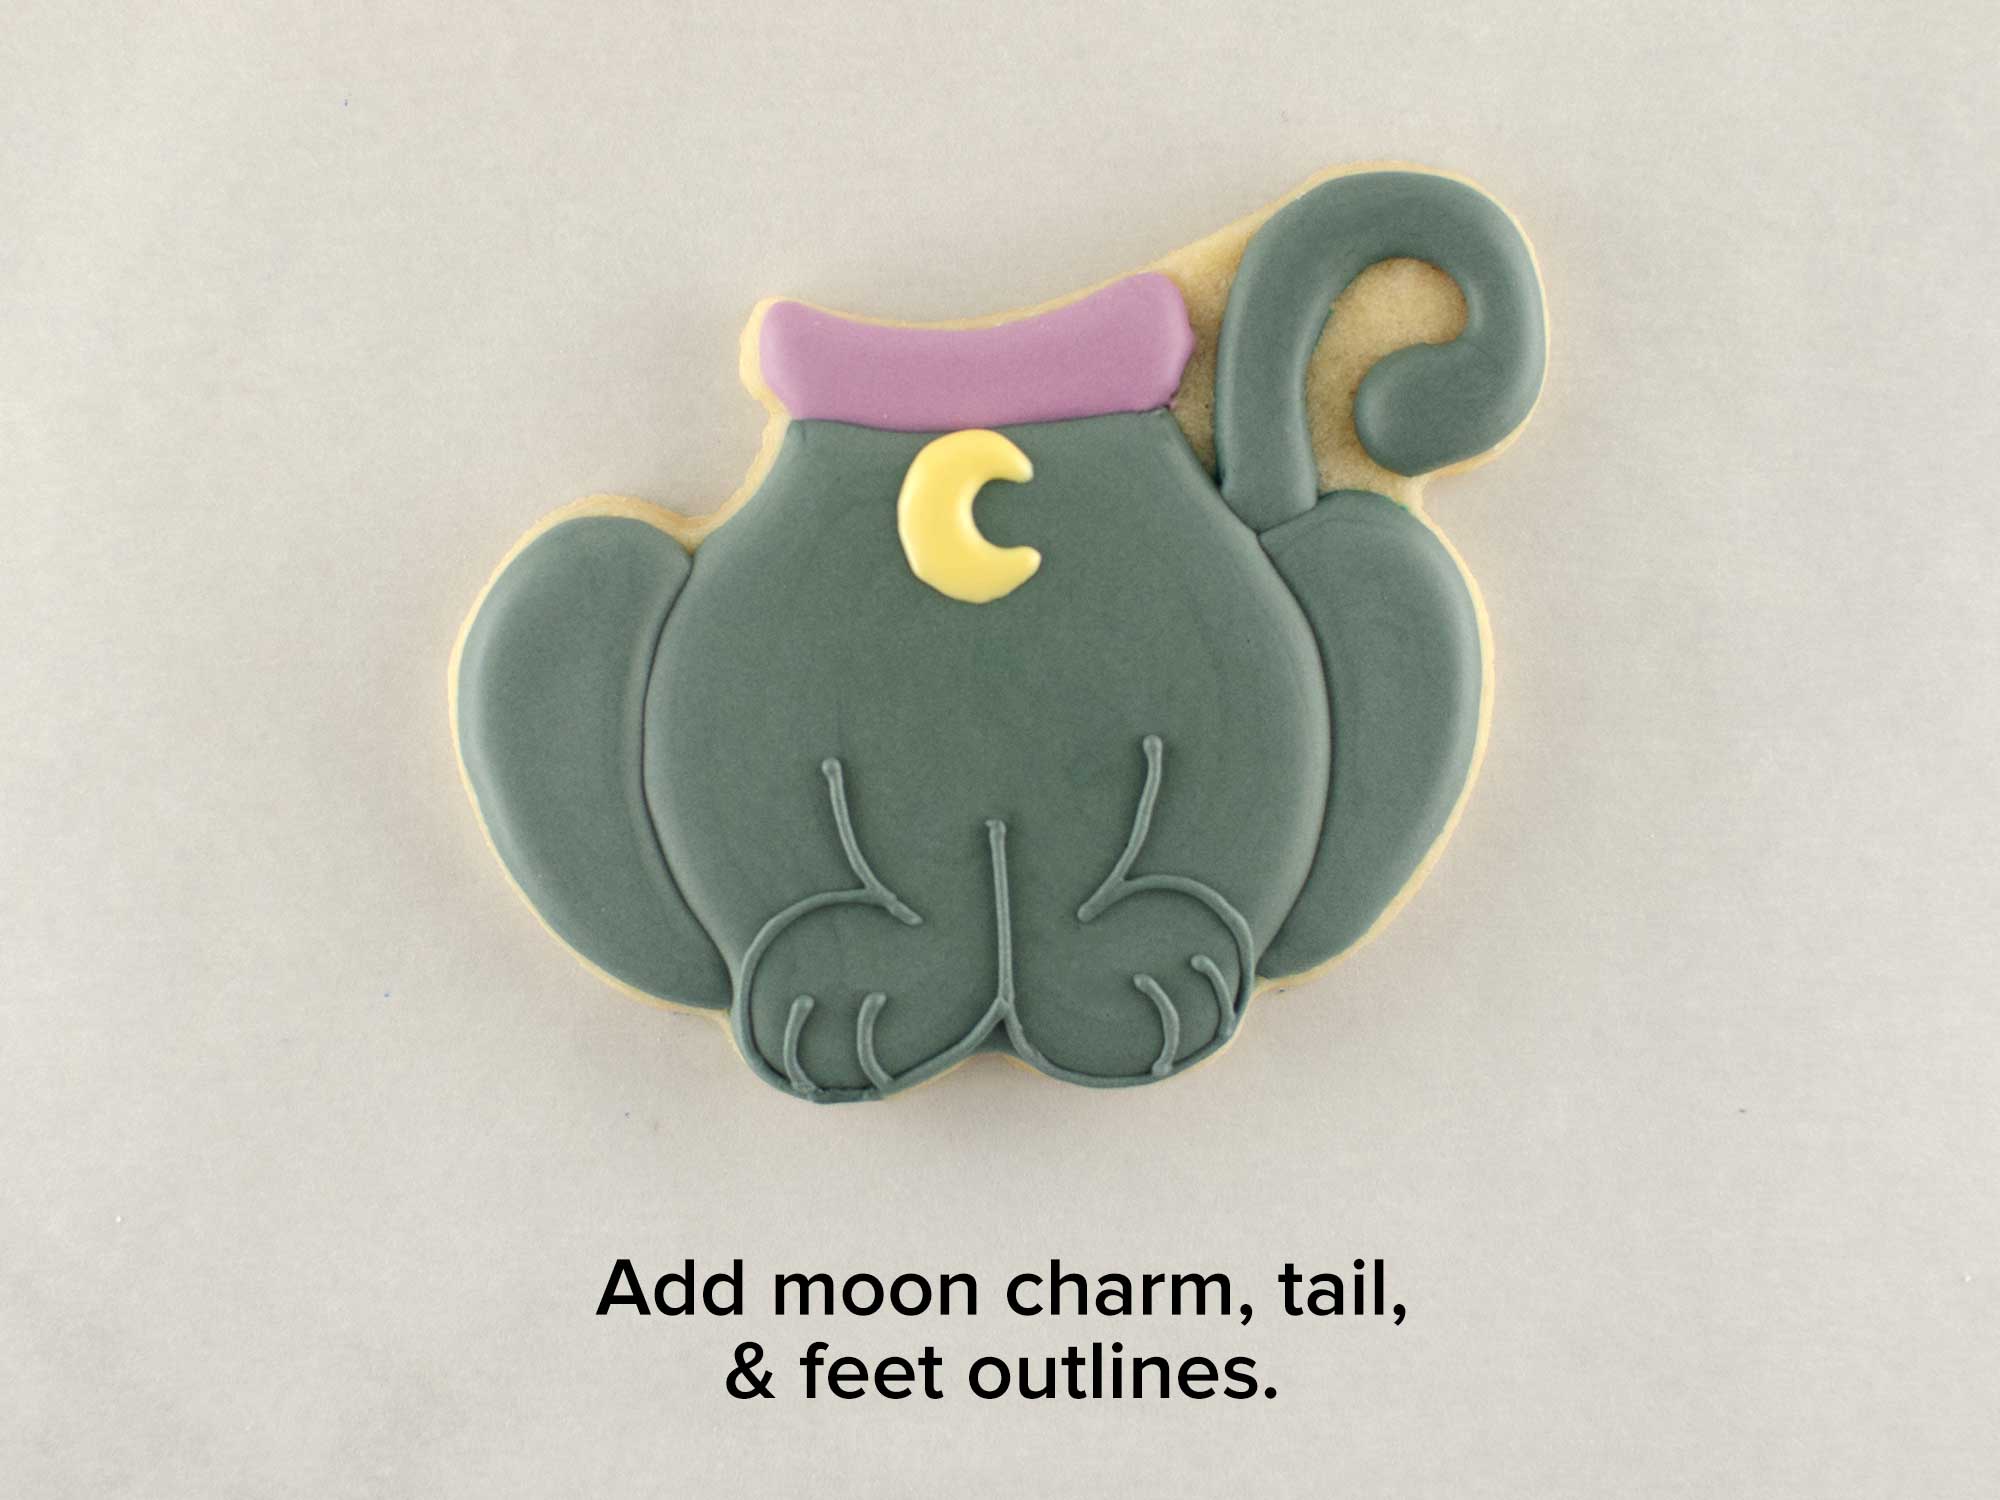
Complete the body by adding the tail, the moon charm, and piping on the feet outline details.
Step 7
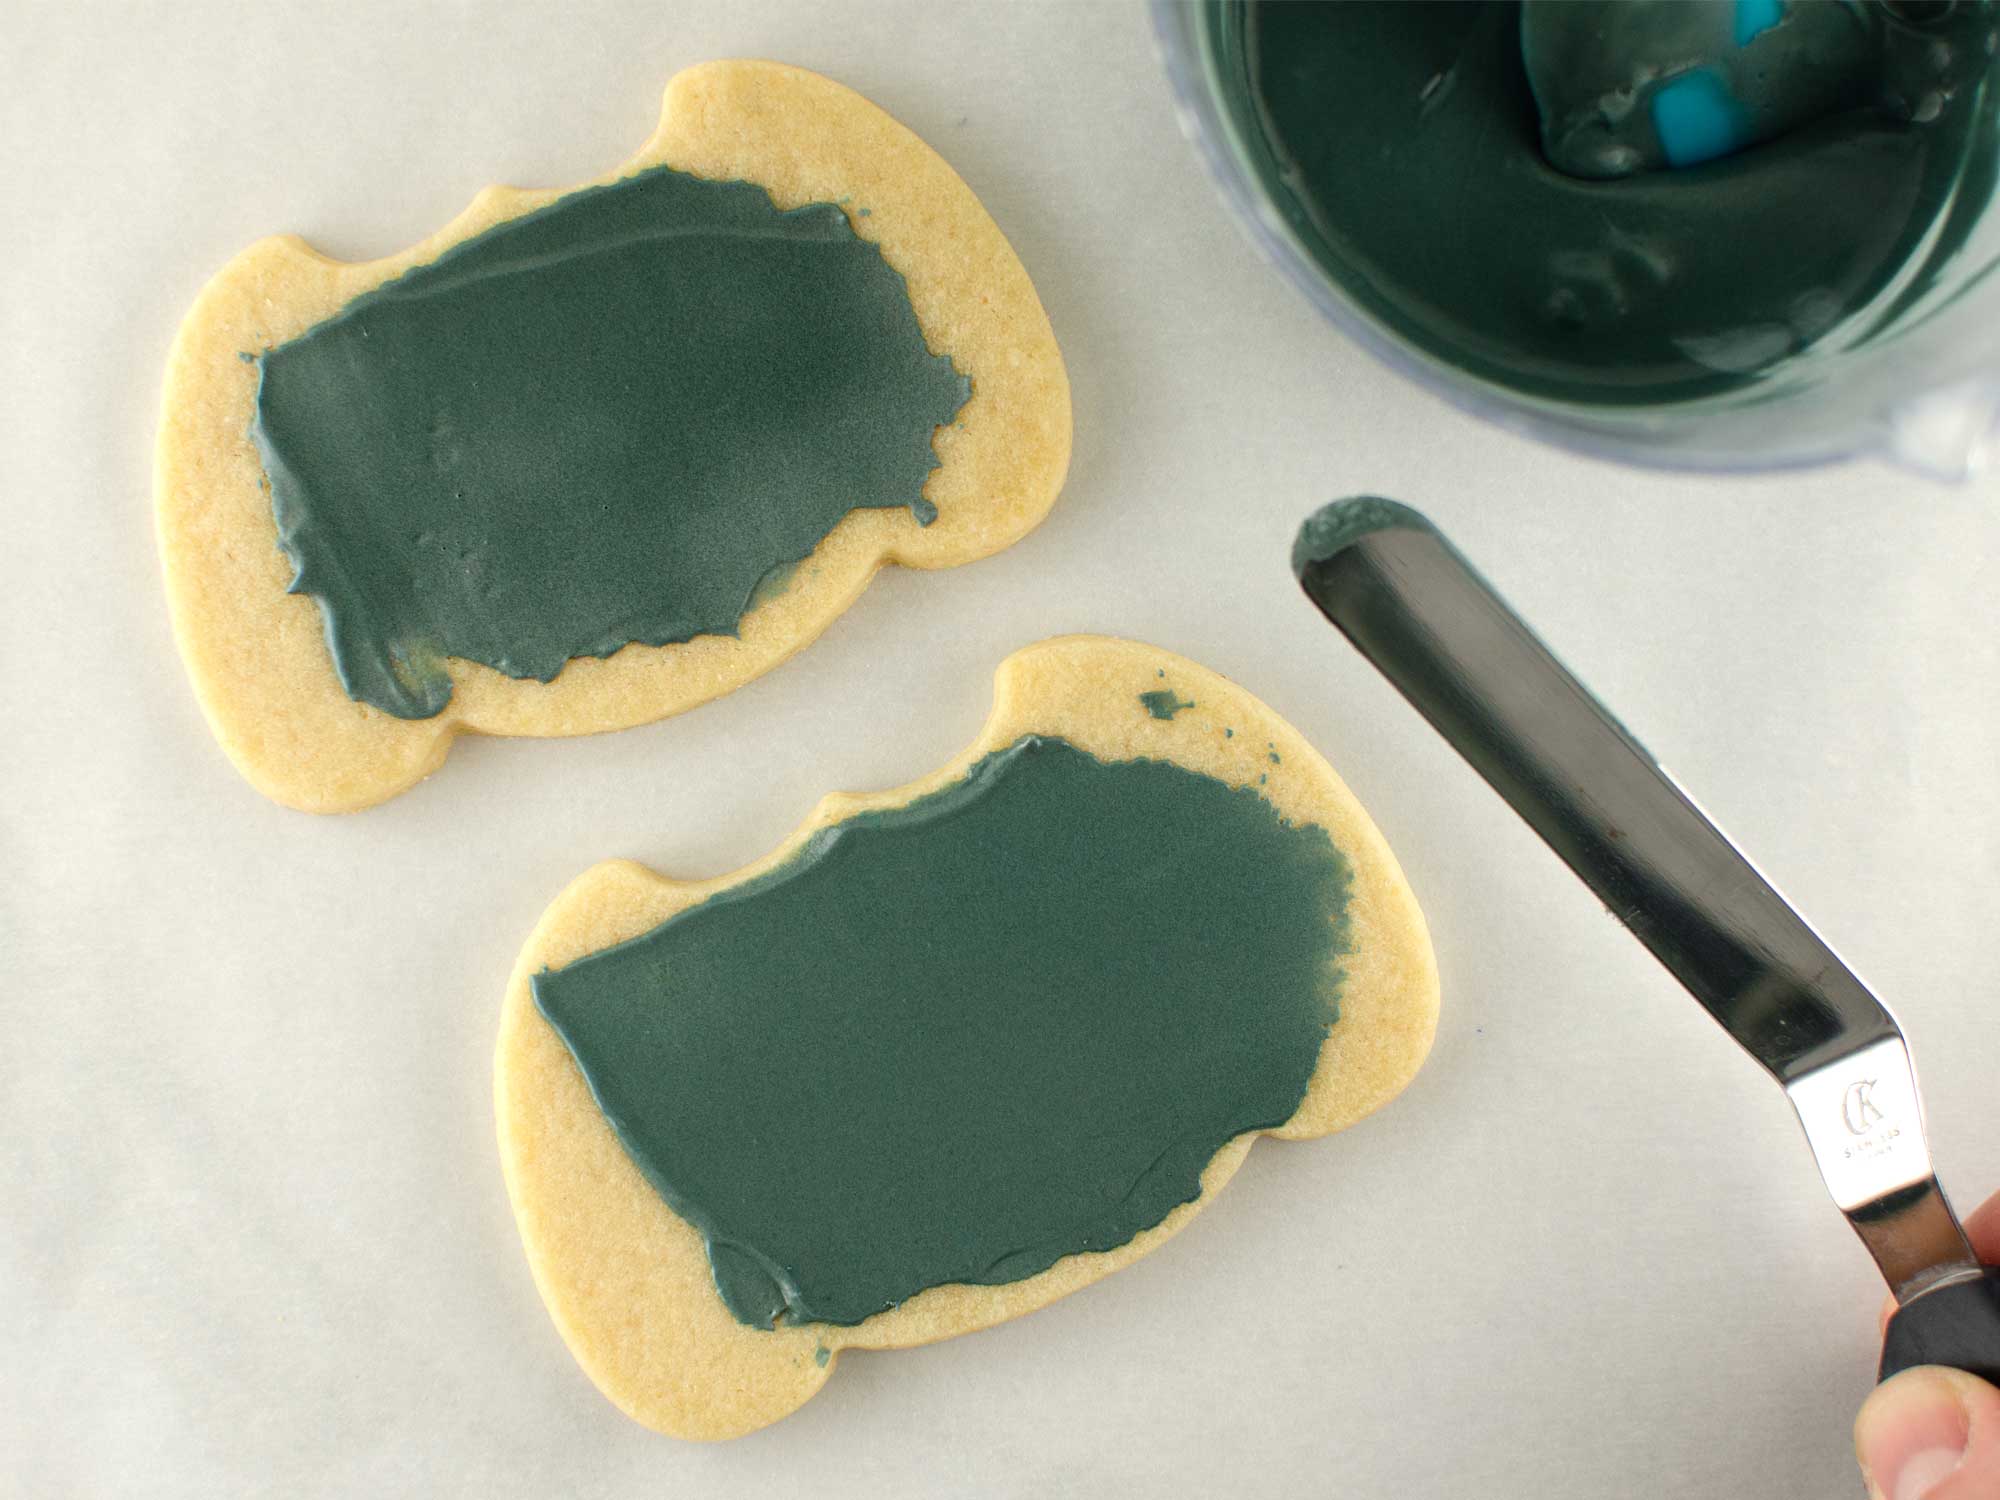
For the bottom jack-o-lantern cookie, begin by applying a thin layer of black icing to the center of the cookie, as shown. I used an offset spatula to quickly spread an even layer across the middle where the face would be.
Step 8
For those without a projector, score or etch guidelines where the face details should be, as shown. I made a template with template plastic from the PDF file above and used a scribe tool to etch the guideline on the cookie.
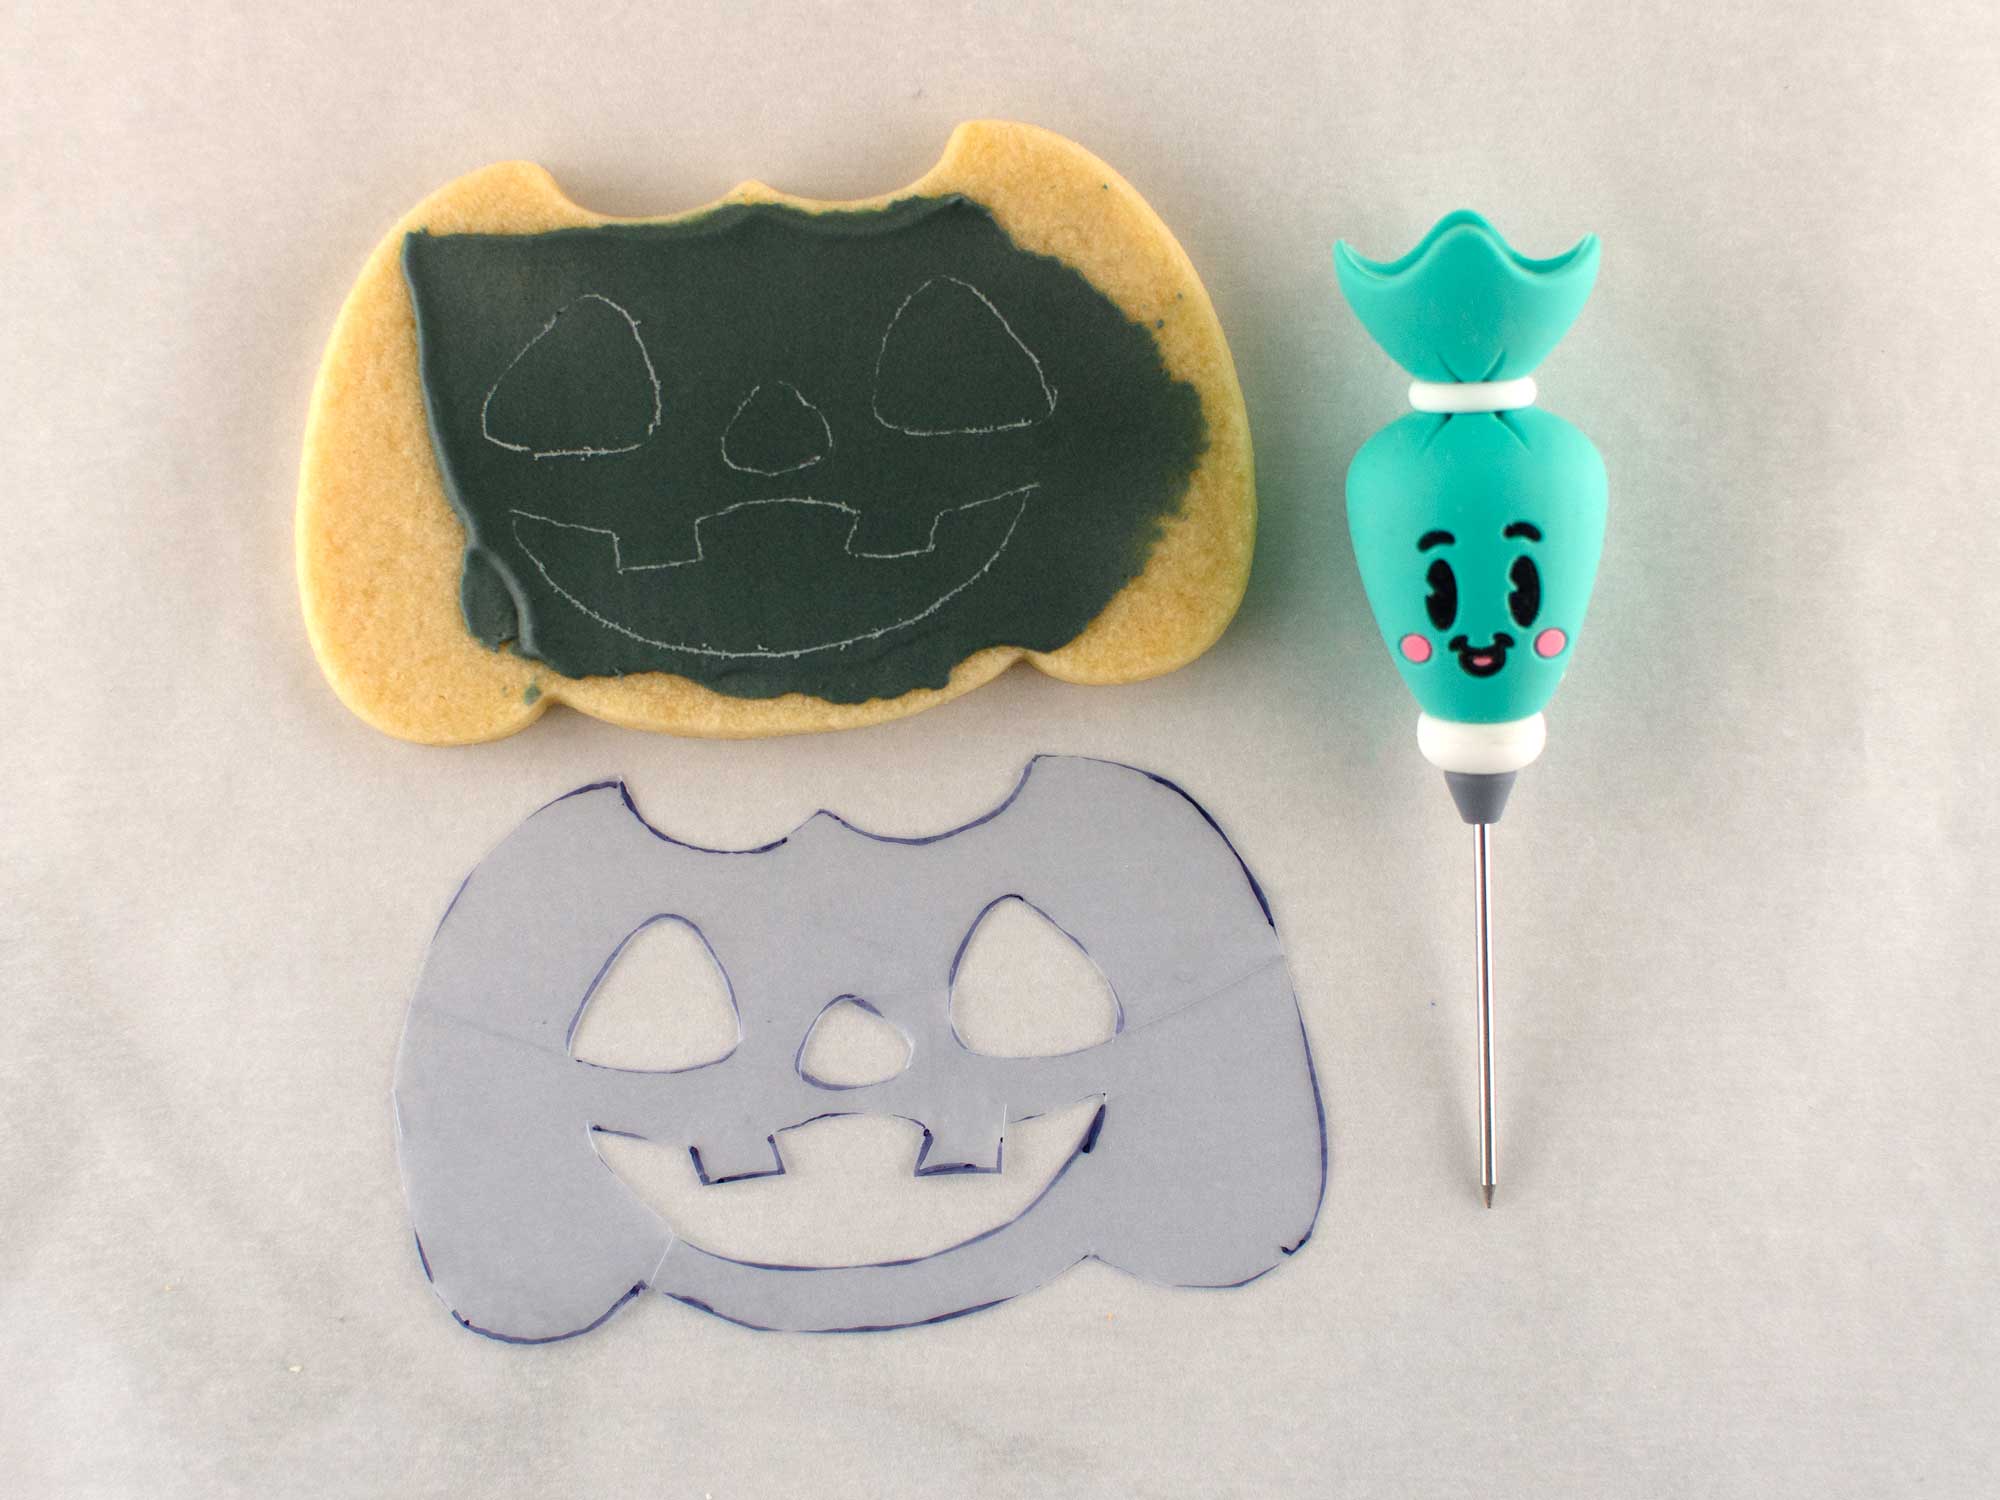
Step 9
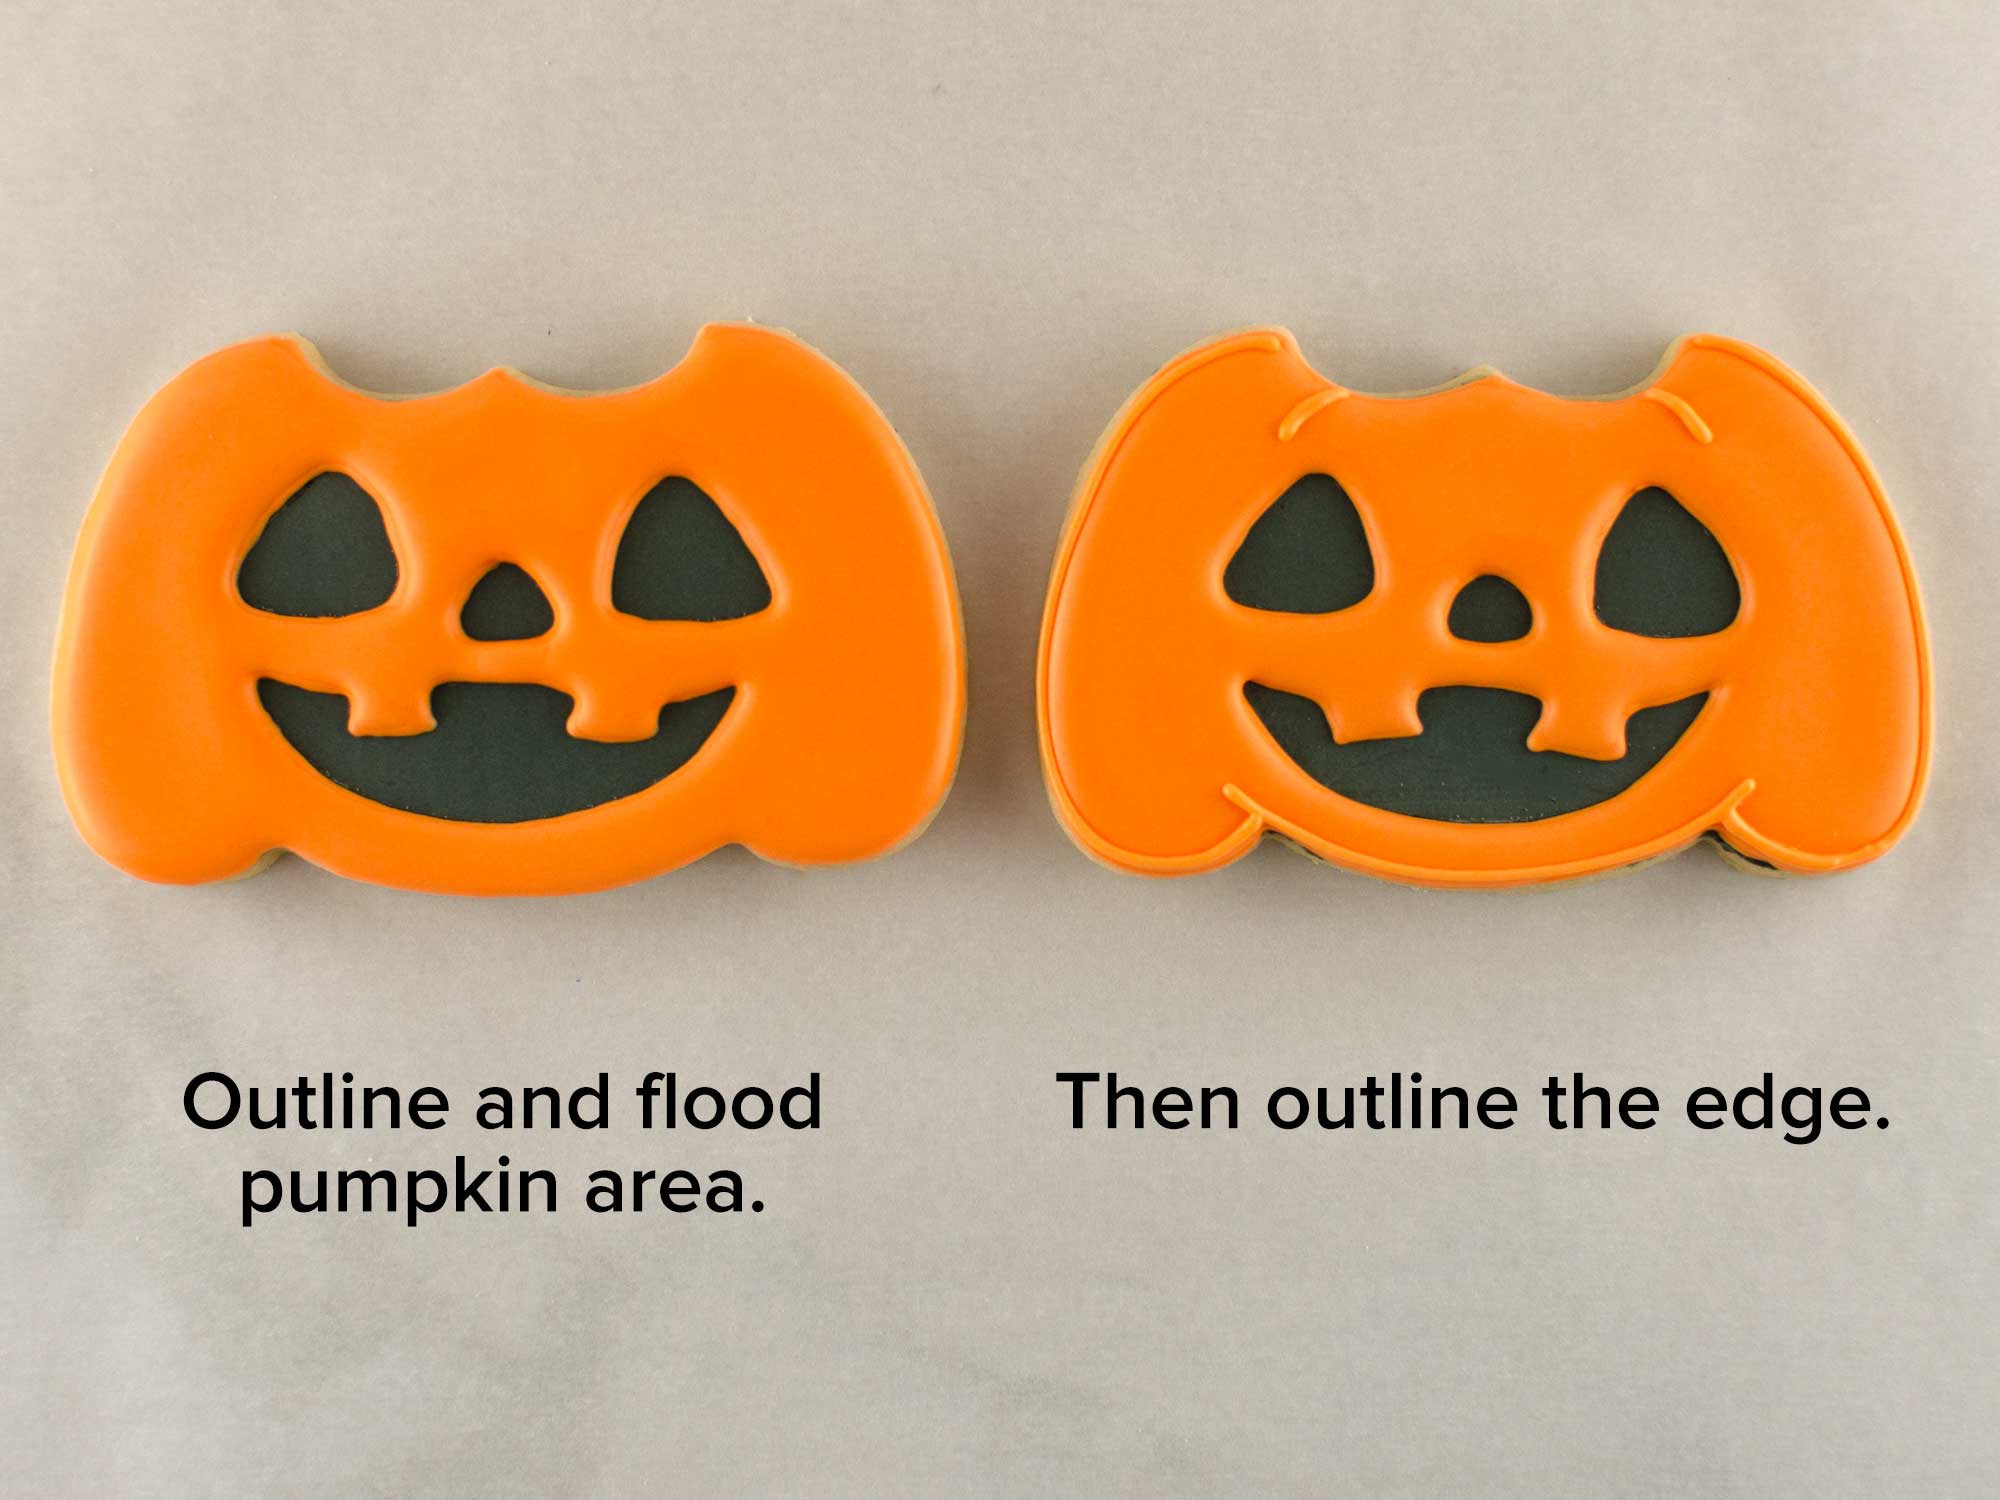
Next, with orange piping icing, outline around the eyes, mouth and around the entire cookie. Then flood with orange flood icing. Let this icing set for twenty minutes.
Lastly, outline around the edge of the cookie for added definition.
Video Tutorial
The steps above are summarized in this time-lapsed video I put together.
When all the 4 pieces are assembled together, the completed cat witch design should look like the one below.
The overall cat dimensions are 9.5" tall and 4.25" wide. I used this BRP long cookie box (12″ x 5″ x 1.5″) for packaging and it fit perfectly.

If you liked this Halloween idea want to view more, you can click here for all my past Halloween designs.
Add Vibrant Colors with Americolor Food Coloring

To make your decorated cookies pop, use Americolor Food Coloring for bold, consistent colors. It’s my go-to brand for achieving vibrant shades without altering the consistency of the royal icing.
Buy NowTags:
You may also like...


Mike Tamplin
Hi, I’m Mike, the cookie decorator behind Semi Sweet Designs! Since 2011, I’ve been sharing recipes, tips, and tutorials to help beginners gain confidence and give experts fresh inspiration. Along with my brother, Billy, we design and offer hundreds of cookie cutters, stencils, and apparel—all made with decorators in mind.
Whether you're just starting or a seasoned pro, we’re here to make cookie decorating easier and more fun!
Read more


