Easter Lamb Cookies

Possibly the most underrepresented animal around Easter time is the lamb. Sure you have your basic bunnies and baby chicks that steal the show, but in my opinion the lamb is where it's at. Lambs just add such shear warmth (literally) to the spring season. It could also be time to write the people at Peeps® for a lamb version of their marshmallow sugary treats. Just sayin'.
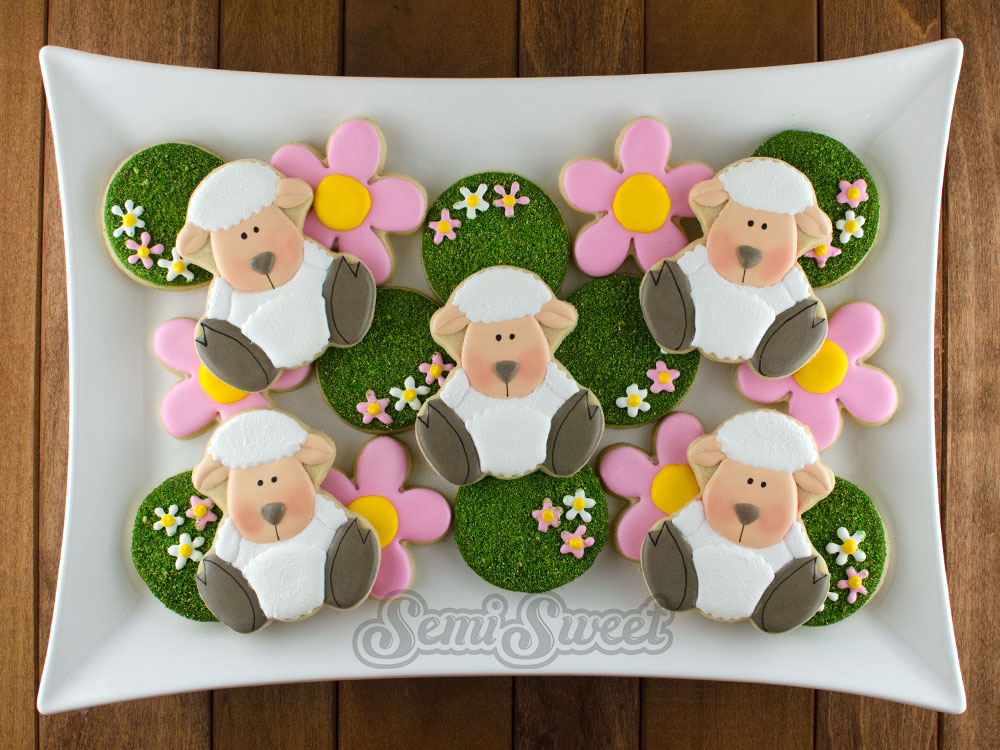
To help remedy this situation, I tried to do my part by making these cute Easter lamb cookies. Let me show you how.
Easter Lamb Cookie Cutter and Template
To make these Easter lamb cookies, I used this baby cookie cutter from KarensCookies.Net.

I sketched out a lamb while trying to keep the overall design on the simple side. However, I also wanted to provide a template to help guide you during the decorating process.
If you have a Kopykake or Pico projector, just print it out (or pull it up on your mobile device) and you're set.
For those without a projector, you can still print it out, cut out the body sections, and trace the design onto the cookie with an edible food marker.
You can download the Easter lamb cookie template HERE.
Decorating Process
Step 1
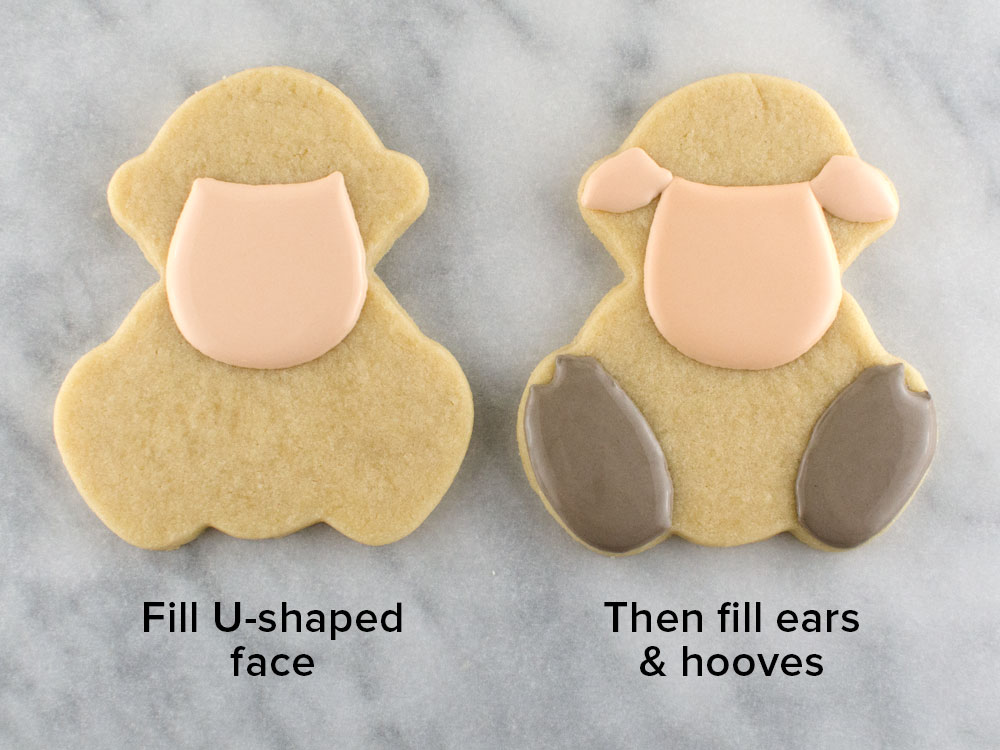
Begin by outlining and filling a U-shaped face in the upper middle of the cookie with ivory-colored royal icing. Then, after the face had time to set, add almond-shaped ears to the sides of the face.
For the hooves, outline, then fill, an oval with a slight notch removed from the tips with gray royal icing. For the exact shape of the hooves, you can use the template I provided as a guide. Just cut out the hooves from the printout sketch and trace around shape onto the cookie with a food marker.
Step 2
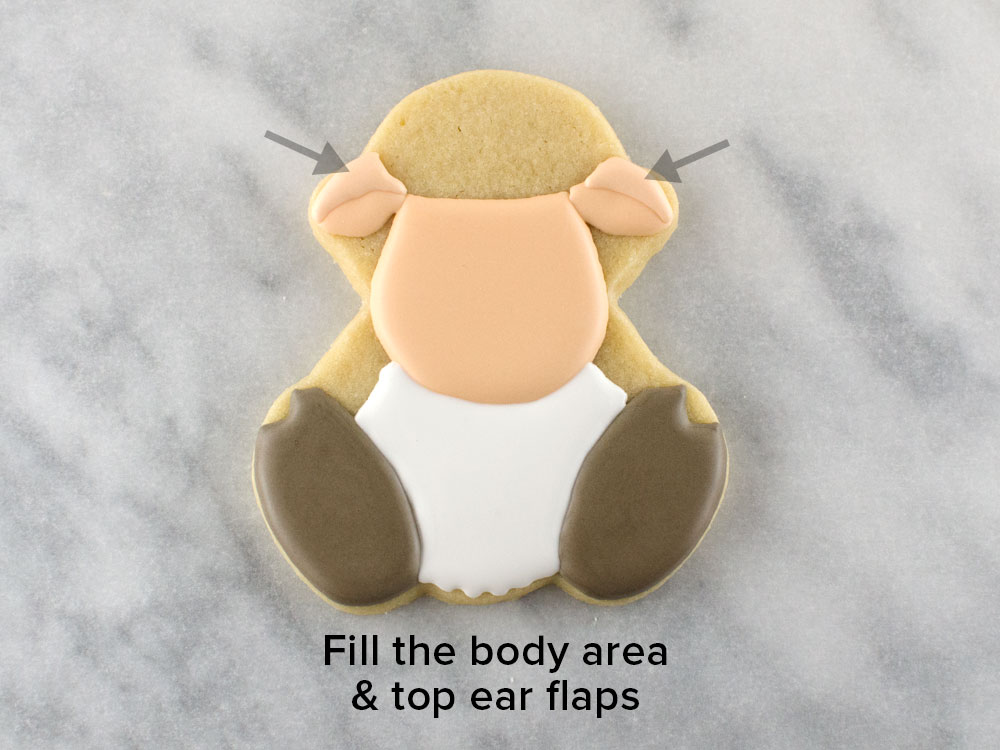
After the hooves and face had time to set (about 15 minutes), fill the center body area with white icing. Make sure to leave extra room on the sides for the arms.
For added dimension, I like to add an extra layer of ivory icing on top part of the ears to create a folded "ear flap" appearance.
Step 3
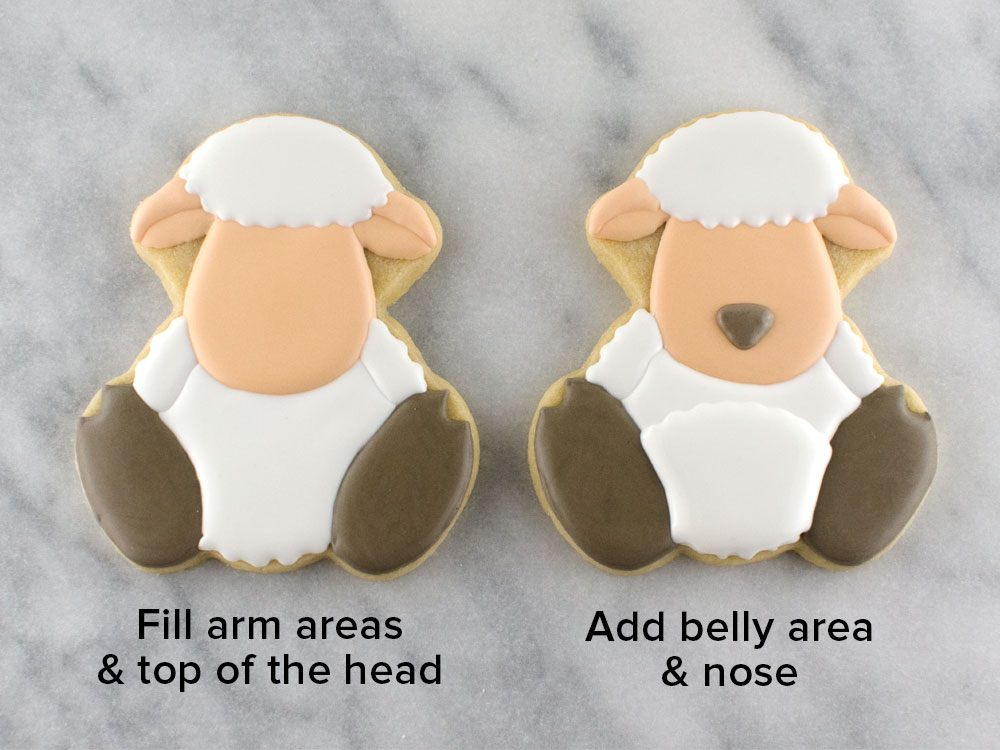
Once the ears and the body areas had time to set, fill in the arm areas and the top of head with white icing. I made sure to pipe slightly over the edges of the face and ears for a layered effect.
Again for added dimension, add a center belly layer on top of the body area. This should give this lamb a bent over, slouched look to him.
Also, add a triangle nose with the same gray royal icing used for the hooves. Leave the cookie to dry completely (about 4 hours).
Step 4
To add a woolly texture to the lamb's coat, I utilized this easy (yet amazing) technique by SweetAmbs. SweetAmbs demos how to add "fur" to a teddy bear in a helpful tutorial and video. Please click this link to see exactly how.

Step 5
After the lamb cookie is completely dry, add the finishing details. I used a black, fine-tipped food pen to add the eyes and mouth detail, as well as to add the line details on each hoof.
Also, to amp up the cuteness factor on these Easter lamb cookies, I added some rosy cheeks with watermelon-colored petal dust applied with a food-only paintbrush.

NOTE:
This might be my last post for a few months as I prepare for a big move. My day job is moving me to southern California early May, but I hope to be back to baking as soon as I get settled in my new digs. In the meantime, if you have any recommendations for me to check out in the Long Beach area I would love to hear them!
Happy Spring, Everyone!


